| 4TH QTR 2009 |
 •
•
 •
•
 •
•

|
||||||
| DATE | HRS | TTD | ACTION | IMAGES | |||
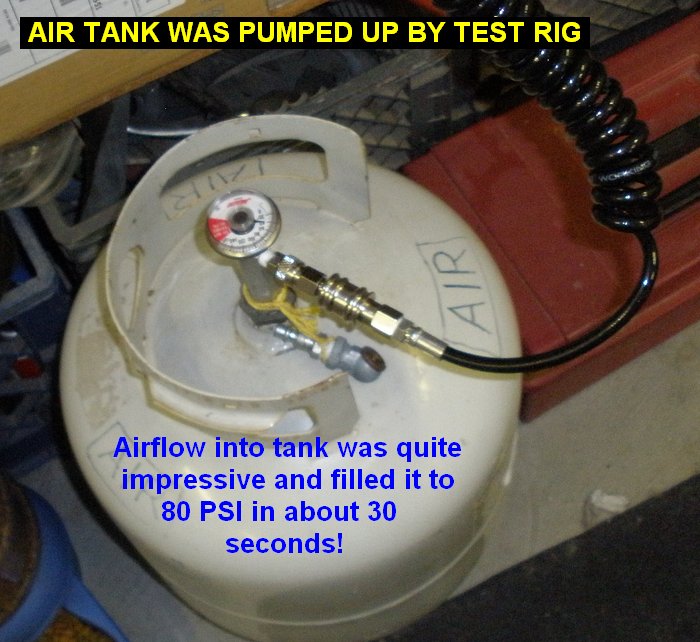
| 10/01/09 | 2.5 | 1106.9 | Took a paintball bottle down to my local sporting goods store and had it filled to 4500 PSI for $5. My bottles are only a couple years old, but for reference, the bottles must be hydrostatically tested every five years. Came home and set up a test rig to turn the bottle off/on. I used the coiled remote cable to put the air into a empty propane bottle I use to inflate tires at the MX track. While the Air Lever / Bottle Valve Assembly worked I discovered a few things that needed to be changed to make it a trouble-free system for starting the motor. First, when the system pressurizes the load on the cable increases quite a bit, which made the lever bind in its housing. Secondly the model airplane collar didn't grip the bicycle shifter very well and slipped. Lastly the higher loads on the cable made the small diameter threaded cable pivot pin bind in the lever. Fixes: The binding lever was fixed by putting it in the rotary table and machining it down a little bit to give it more clearance in the housing. The bicycle shifter cable was replaced with a larger diameter bicycle brake cable and 3 model airplane collars in a row. Lastly the 6-32 threaded pivot pin was replaced with a polished .1875 stainless steel pin with a hole in it for the cable to go through. The lever housing was also machined to provide more clearance for the larger lead cable end. Testing of this new rig found the system works well but the 3 collars still slip a little bit. | 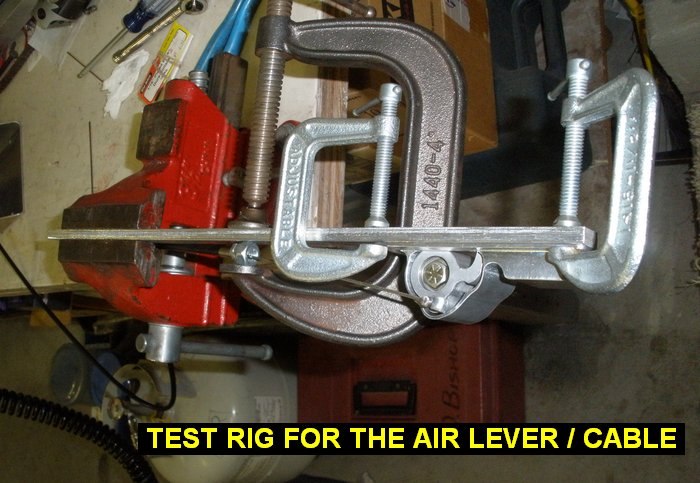 |
 |
||
 |
 |
||||||
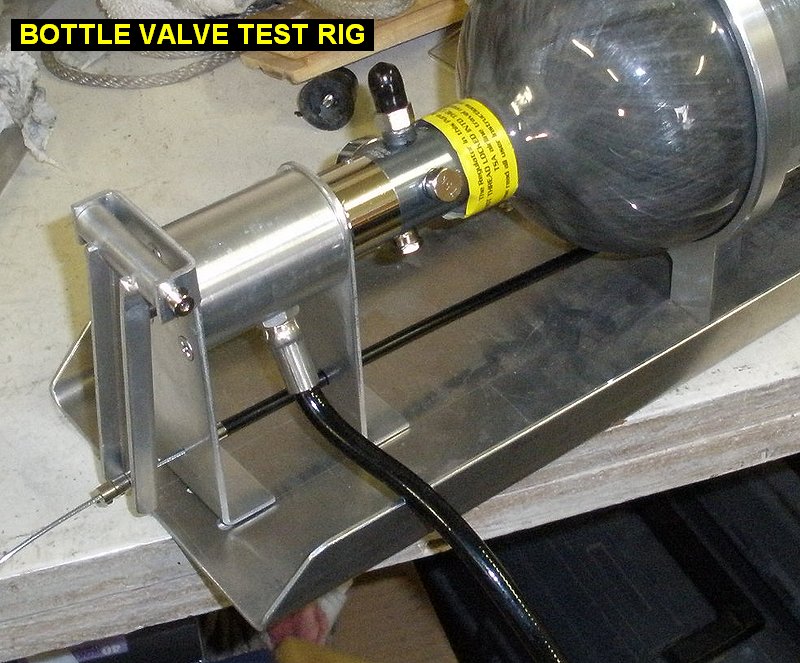
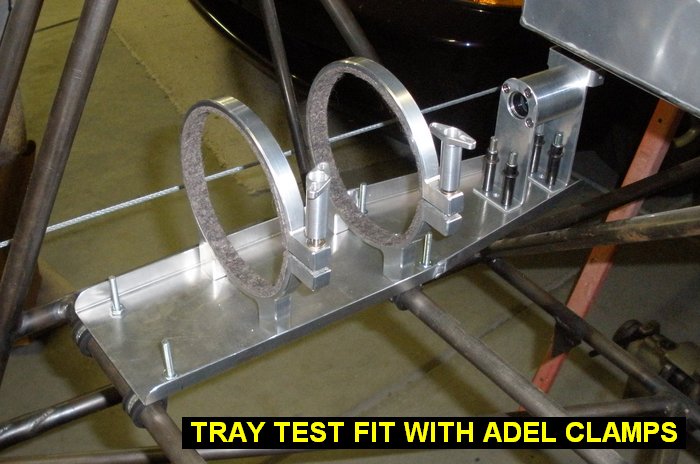
| 10/02/09 | 2.0 | 1108.9 | Not satisfied with the multiple brass wheel collars slipping I went over to Don's and he made a slick little cable keeper out of some stainless steel rod laying around. The holes for the set screws go all the way through the keeper and are a larger dia on the backside so when the cable is squeezed it is actually forced into the remaining hole a bit by the setscrew. Filled up both Pball bottles for more testing. Cut 1/2" strips of adhesive felt and applied them to the inner circles of the bottle clamps. | 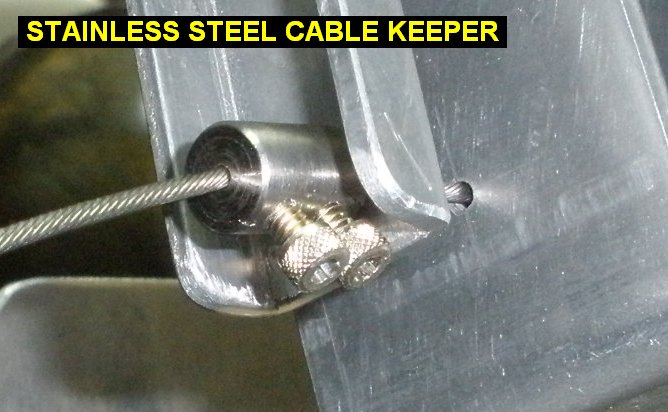 |
 |
||
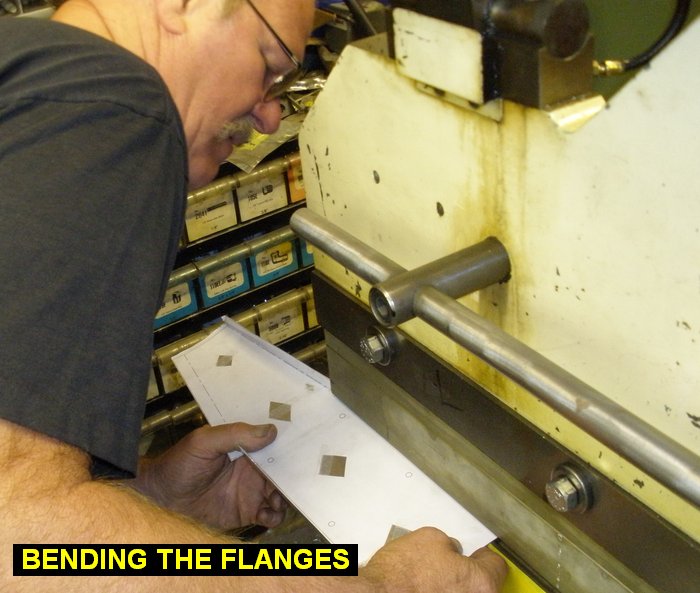
| 10/03/09 | 2.8 | 1111.7 | Drew up and printed out a template for a new Paintball bottle tray, to be made out of .050 6061-T6. The other one was heavier than it needs to be, the new one tapers to the valve reducing weight. Went over to Kens and used his bandsaw, shear and powerbrake to make the part. I then TIG welded the flange seams. | 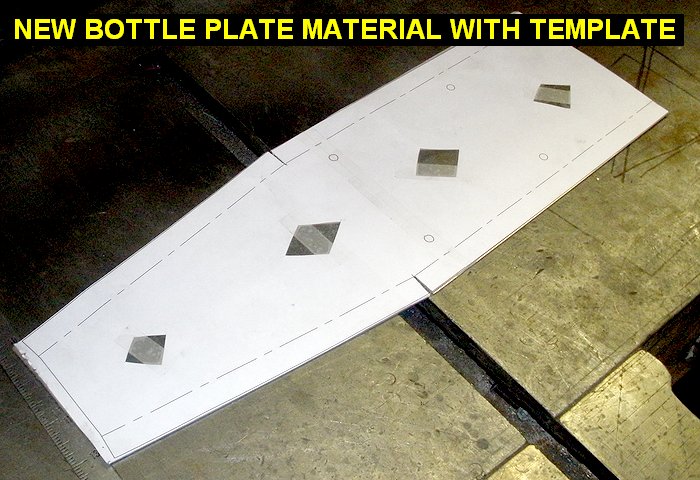 |
 |
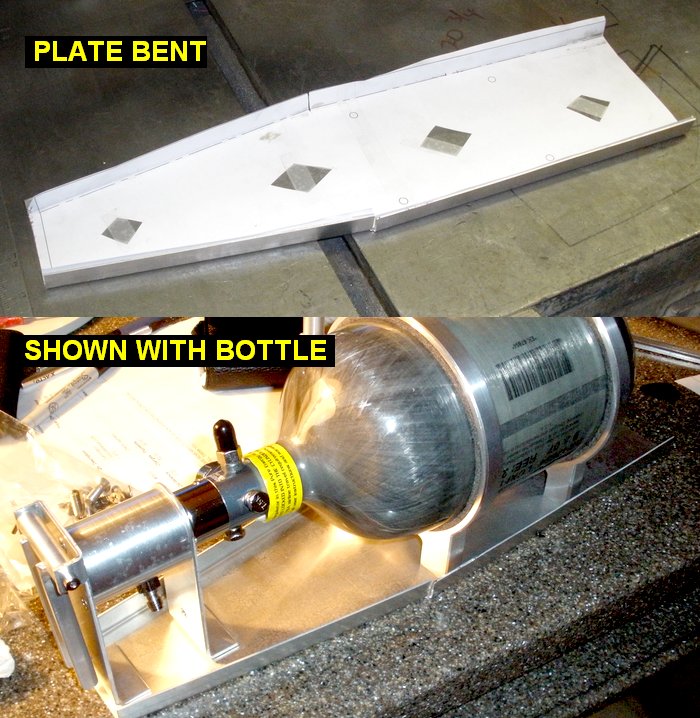 |
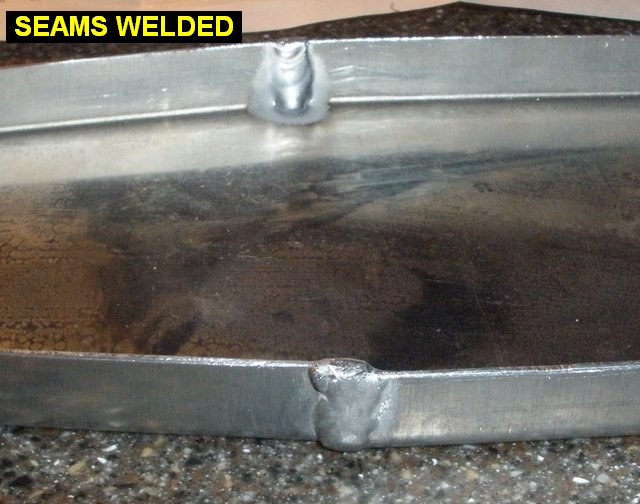 |
| 10/05/09 | 0.6 | 1112.3 | Located and drilled the 1/4" holes in the new plate to mount the bottle clamps. | 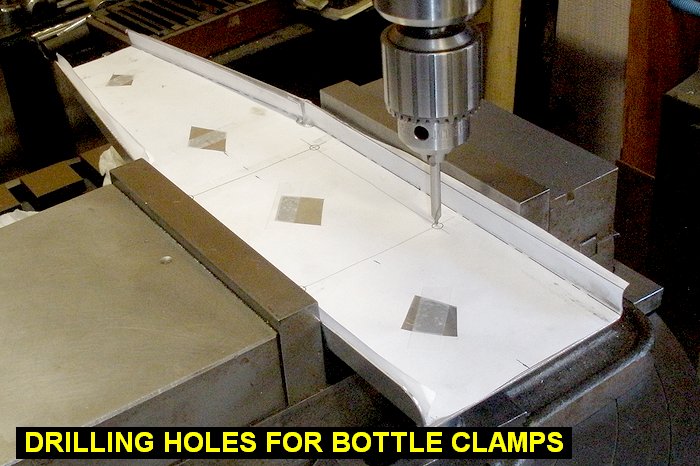 |
 |
||
| 10/08/09 | 1.5 | 1113.8 | Countersunk the holes for the bottle clamps. Drilled the valve supports and plate 3/16 then clecoed them in. Drilled the holes for the Adel Clamps to mount the assembly onto the tubes behind the seat. |  |
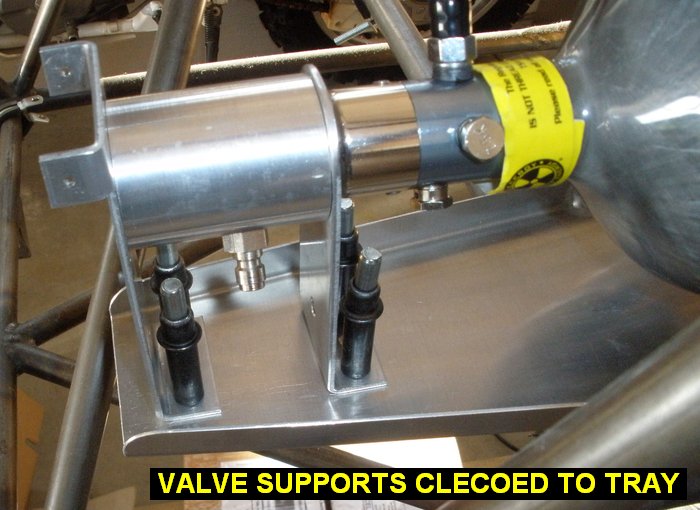 |
 |
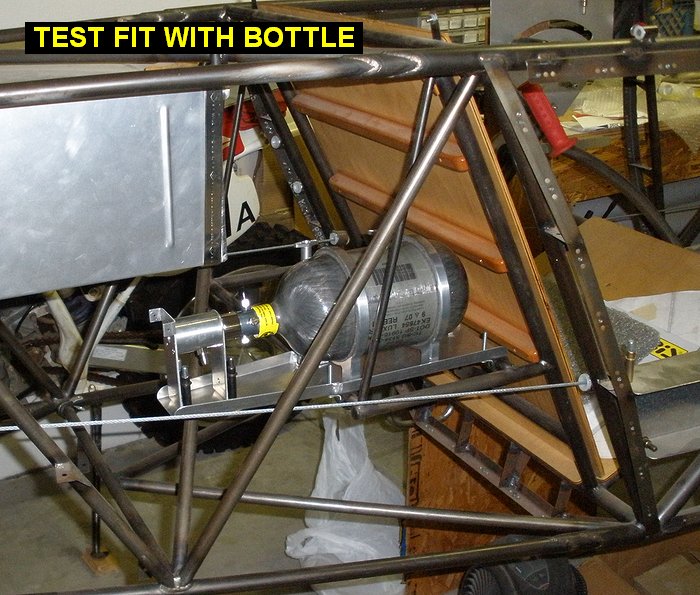 |
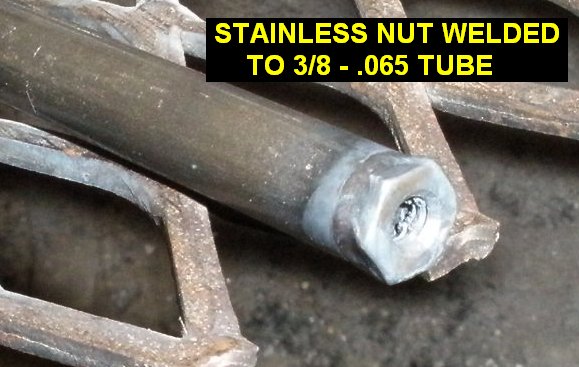
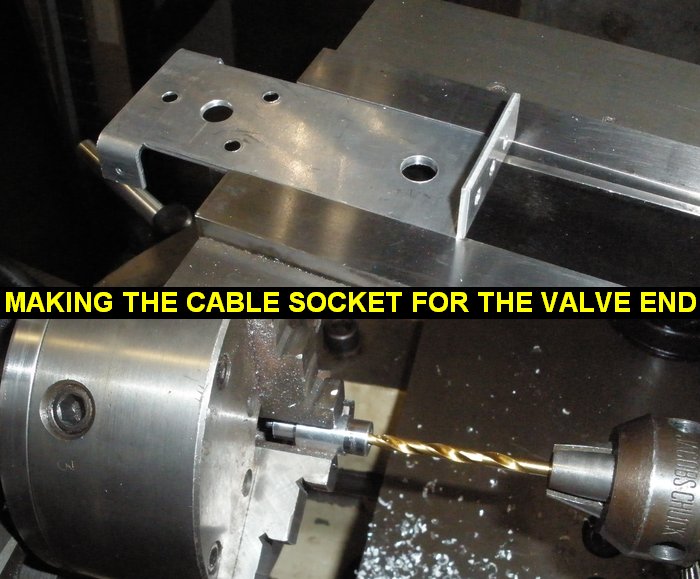
| 10/16/09 | 1.8 | 1115.6 | After looking at possible cable routings I found I'll have to have the cable come into the valve assembly from below so it doesn't interfere with the rudder cables. Cut a 5/16" slot in the tray and then slid a small section of fuel tubing over the cable to protect it from wear in the slot. Made a cable socket for the fuselage to locate the cable end. I welded a stainless 10-32 nut to a section of 3/8-.065 tube then machined it down and cut it off. I then ran a drill up into the nut a little bit to make in conical and thus center the cable. | 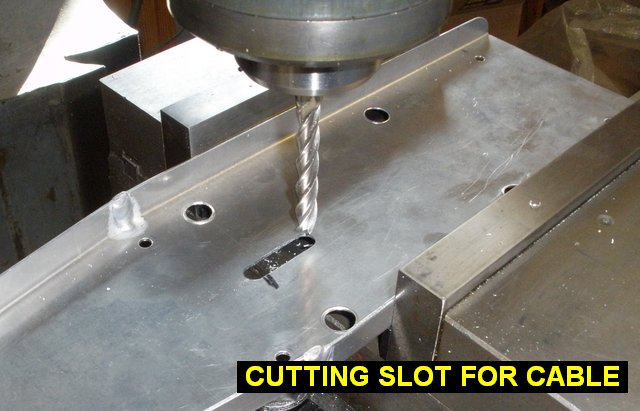 |
 |
||
 |
 |
||||||
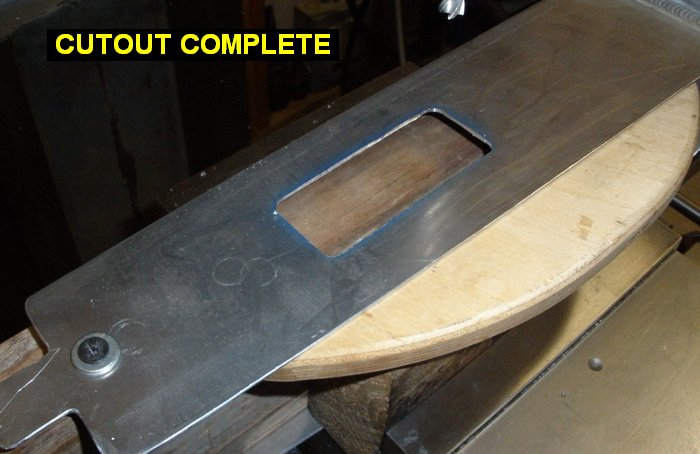
| 10/17/09 | 0.7 | 1116.3 | Sat down in the rear cockpit and figured out where to locate the air lever in the side console. Masked it off and painted the cutout area. Used some wood blocks to clamp the console into the Bridgeport so I could mill it out. | 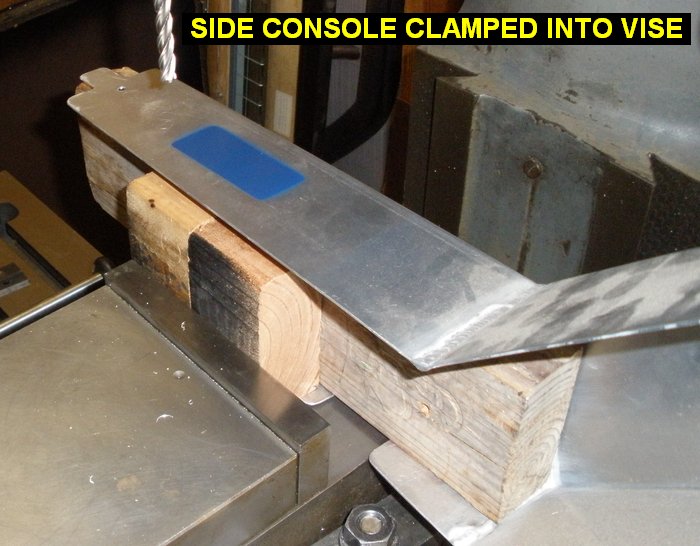 |
 |
 |
|
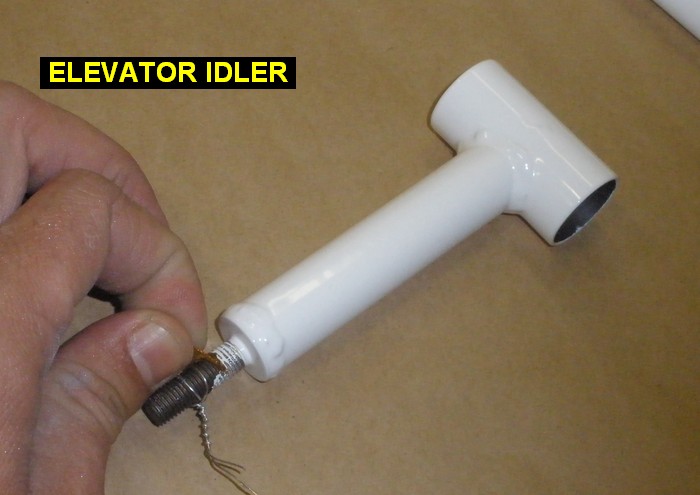
| 10/19/09 | 0.7 | 1117.0 | Located and drilled four mounting holes in the air lever. I had to consider the cable routing during actuation. Drilled matching holes in the side console and clecoed the air lever in. I'm not sure if I'll bolt it in or use screws and nutplates yet. | 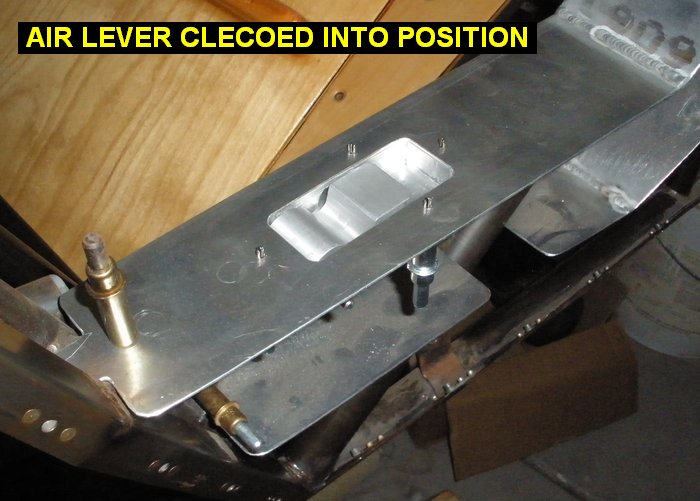 |
 |
||
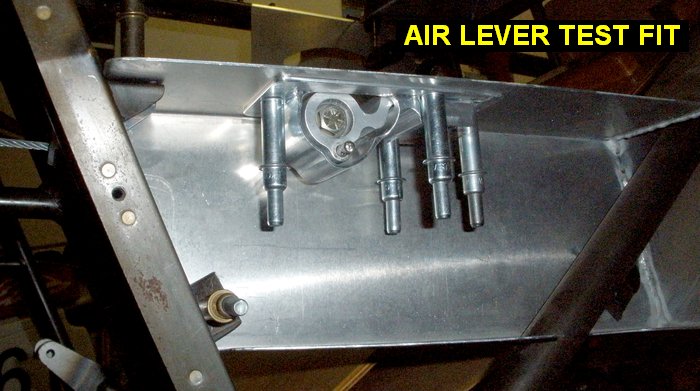
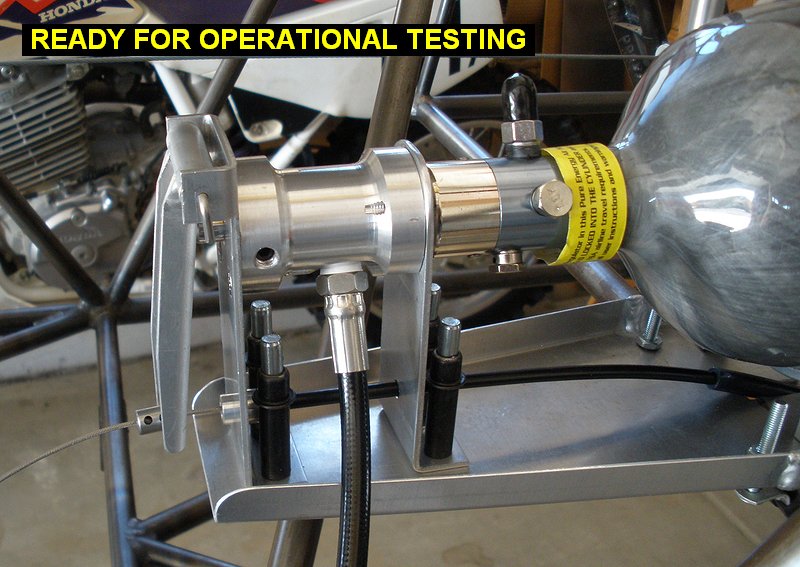
| 10/22/09 | 3.5 | 1121.5 | Located and cut a hole in the fuselage side former for the cable socket, then welded it in. Also made an aluminum cable socket for the other end of the cable and enlarged the hole in the vertical support for it. That socket is just a slip fit and the cable tension keeps it in place. Used a radiused tool bit in the lathe and turned the valve holder down in the middle section to take some weight out of it. Drilled and tapped two 1/4-20 holes in the valve holder for set screws to secure the valve. Assembled the unit and did some testing, it seems to work great..click here to see it work. |  |
 |
||
 |
 |
||||||
| 10/30/09 | 1.0 | 1122.5 | Started making posterboard templates for the rear seat side covers, which close off the cockpit from the tail section. Got the right side template kinda close. | 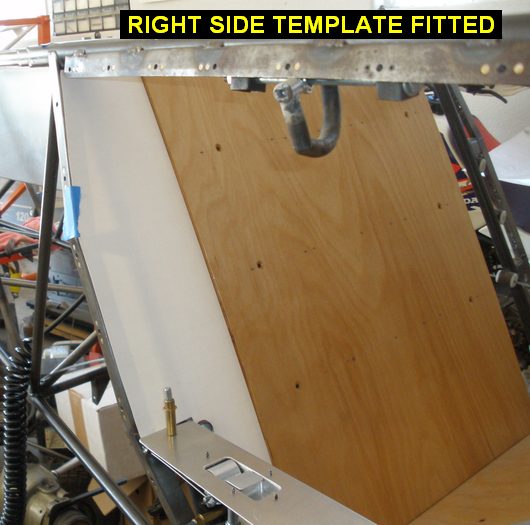 |
 |
||
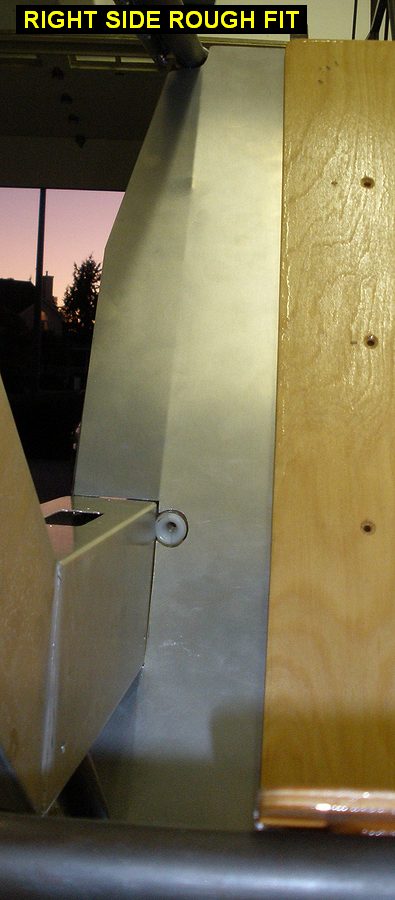
| 11/01/09 | 2.7 | 1125.2 | Cut and fit the left side template. Cut out a rough piece of .032 6061-T6 Aluminum with the air shears. Traced the templates on the sheet and cut them out. Started the long and time consuming process of fitting and trimming the covers to final shape without cutting too much. Got the right side cover close enough to fit, but it still needs work. Had to put a slight break into the cover to get it to rest against the seat tube, fuselage vertical tube and side former. |  |
 |
 |
 |
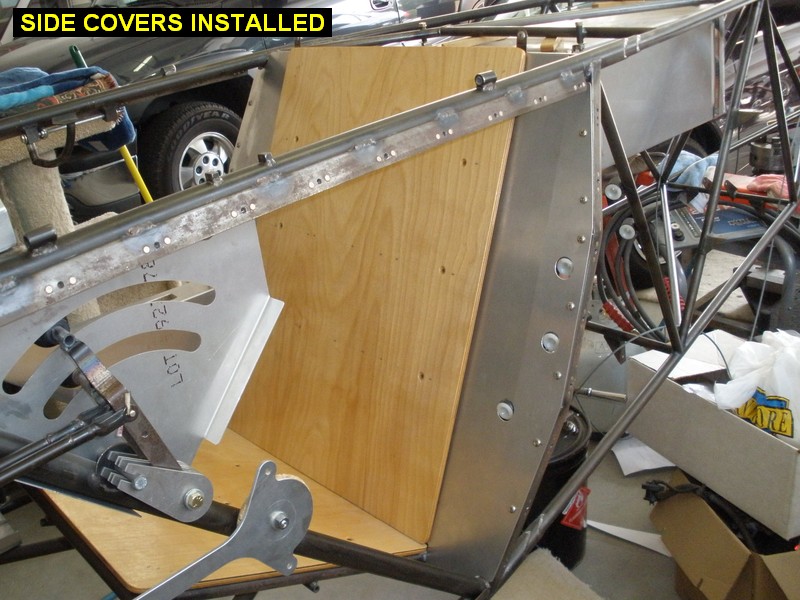
| 11/09/09 | 2.5 | 1127.7 | Cut and fit the left side cover. Did some more trimming on both covers to allow more clearance around the fairleads, and weld beads at tube joints. Once I got fit, I clamped them into position. I then determined where the screws were going and got them drilled and clecoed. | 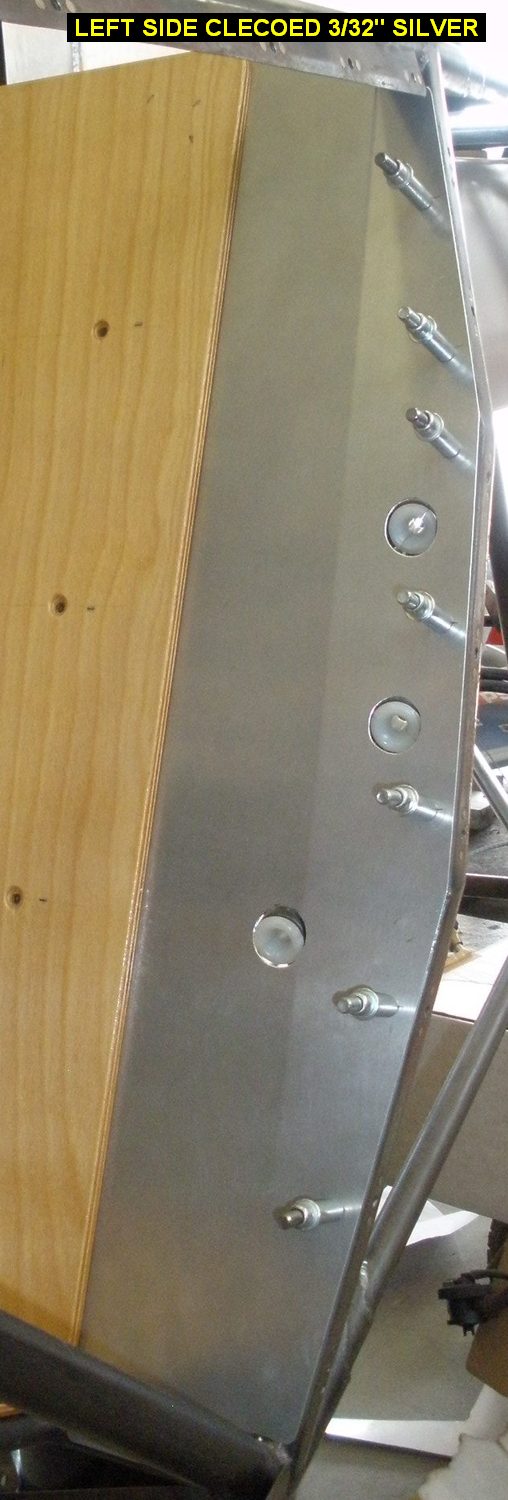 |
 |
||
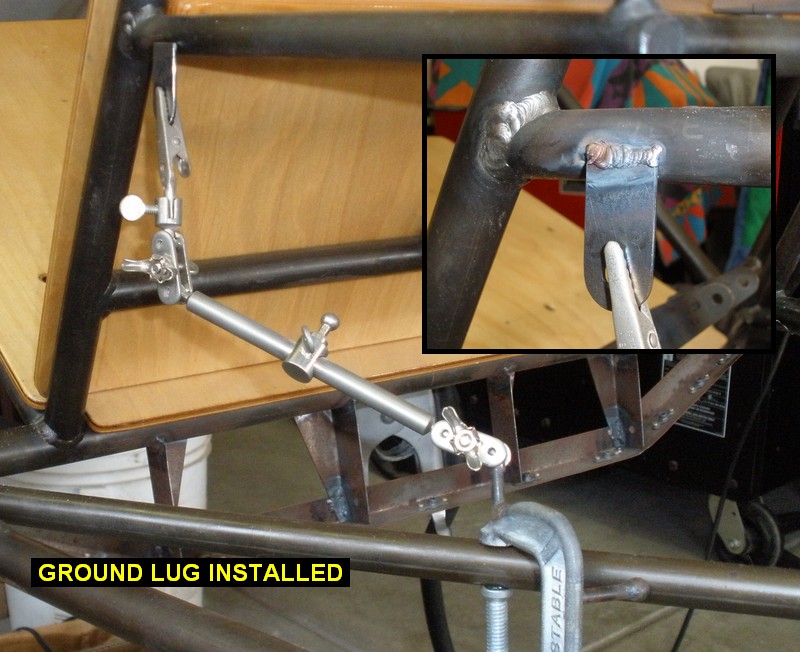
| 11/10/09 | 2.7 | 1130.4 | Installed nutplates for 8-32 screws. Filled the tiny vent hole in the rear seat cross tube. Installed a grounding lug on the left bottom side tube on the rear seat tray. | 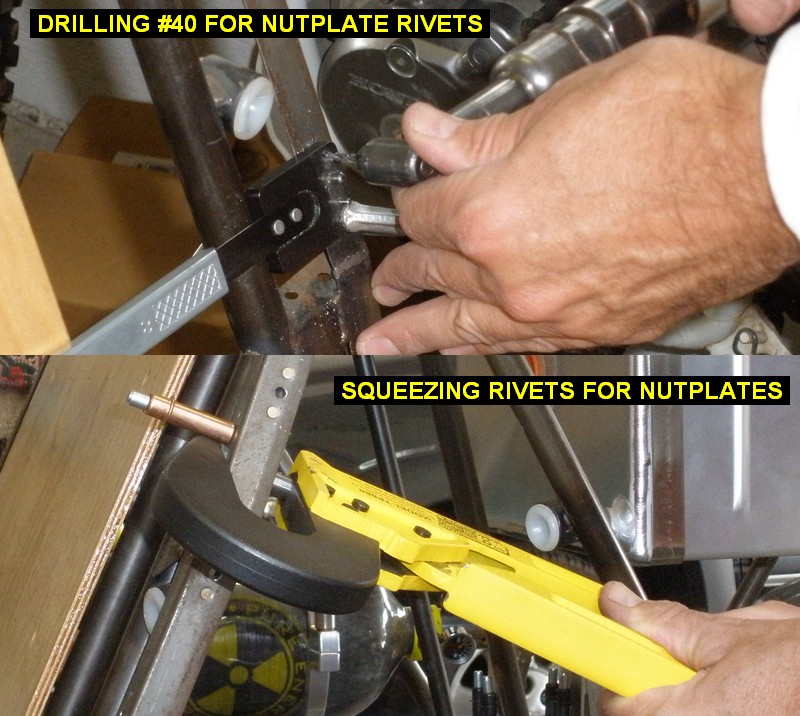 |
 |
 |
 |
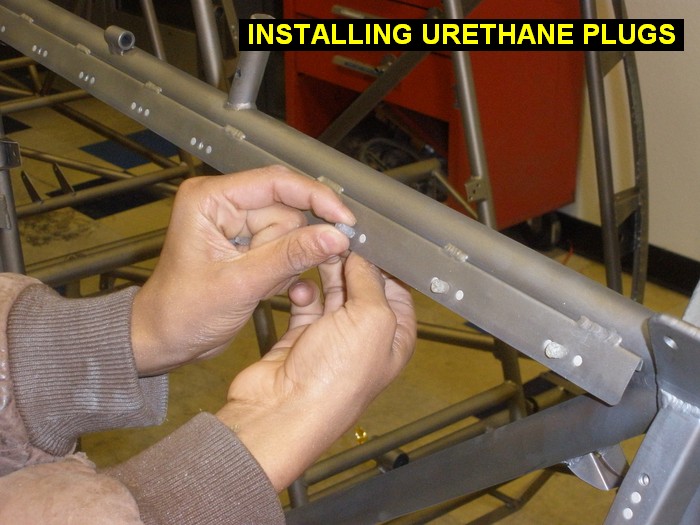
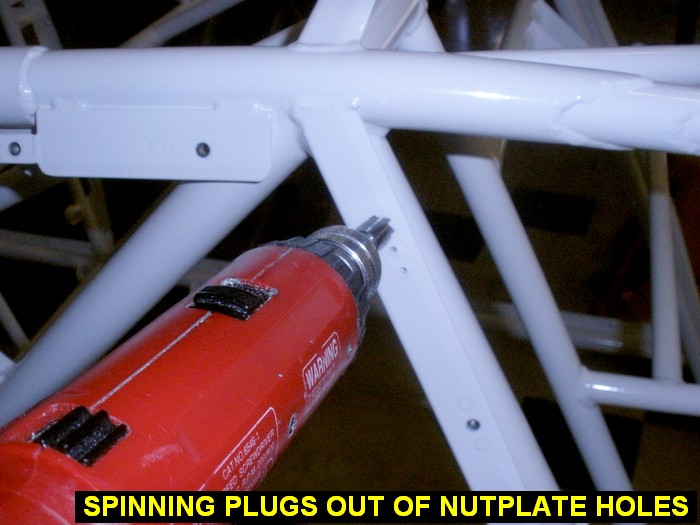
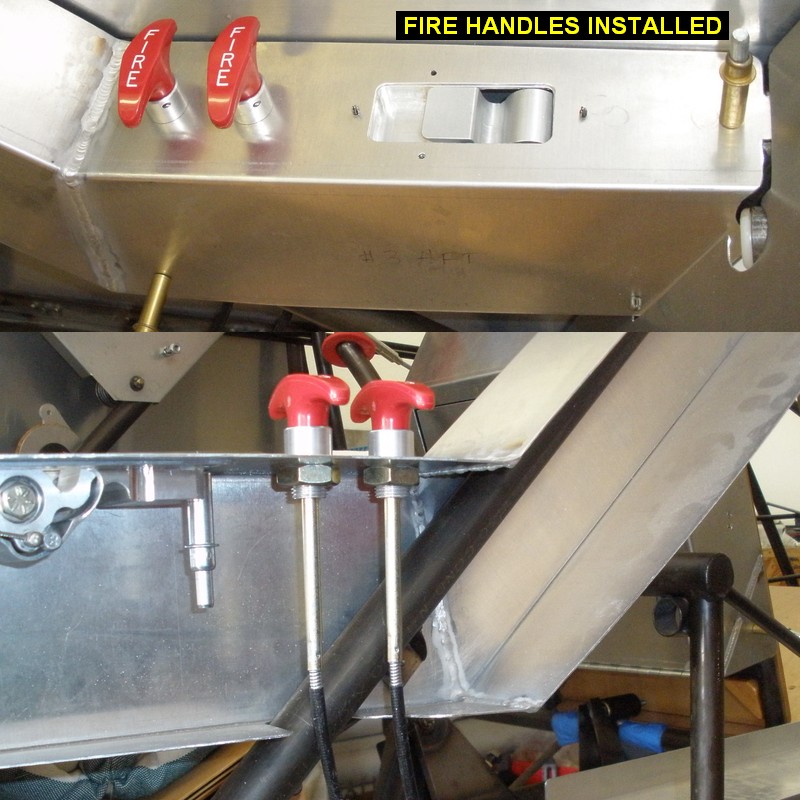
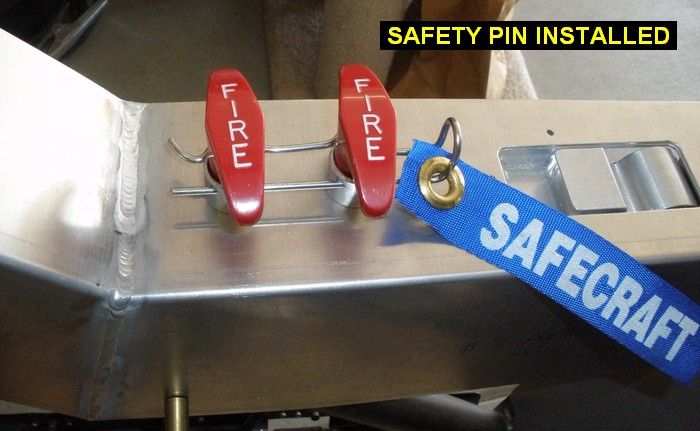
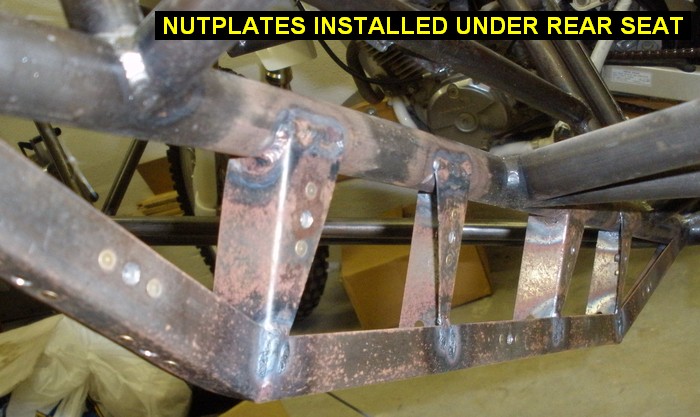
| 11/13/09 | 5.5 | 1135.9 | Located and cut two holes to mount the fire extinguisher pull handles. Made a safety pin out of stainless steel welding rod. Disassembled fuselage - removing all components in preparation for powdercoating. Installed nutplates under rear seat for later installation of a cover to keep things from getting into the tail section. |  |
 |
 |
 |
| 11/14/09 | 2.0 | 1137.9 | Worked on figuring out how to modify the rudder/fin to the latest Kimball aerodynamic balanced version. I got the needed tube and ribs, and along with a picture from Kevin I worked up a drawing. Those with passwords to my short fuselage drawings can see it here: Balanced Rudder Drawing. | 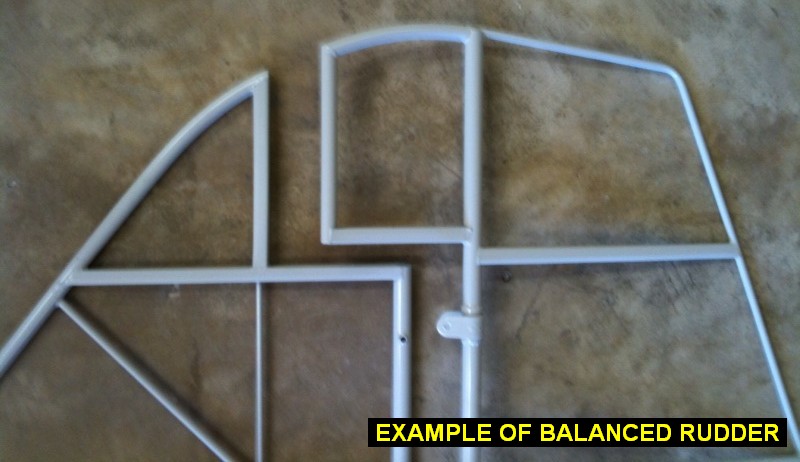 |
|||
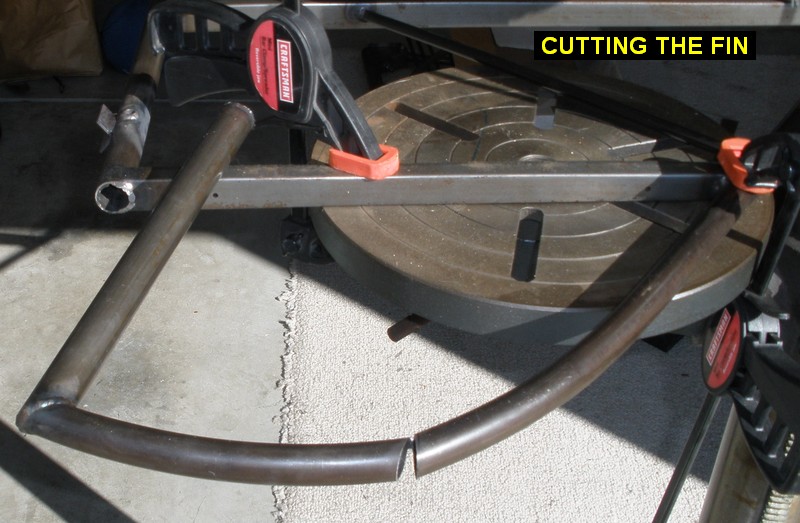
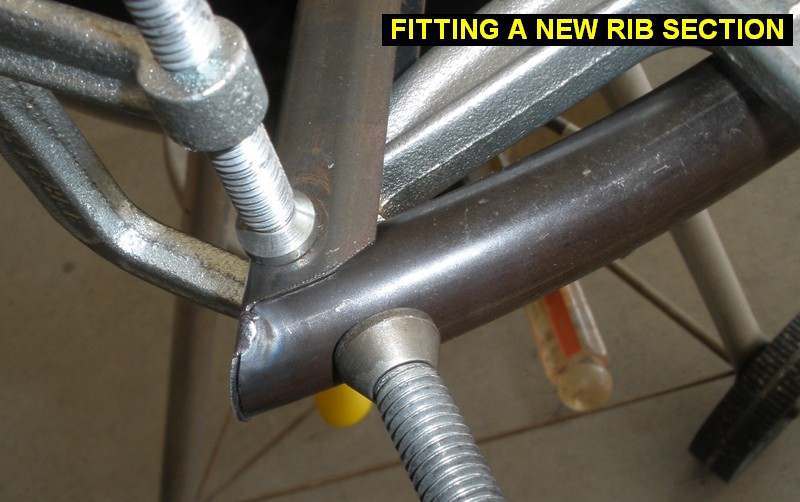
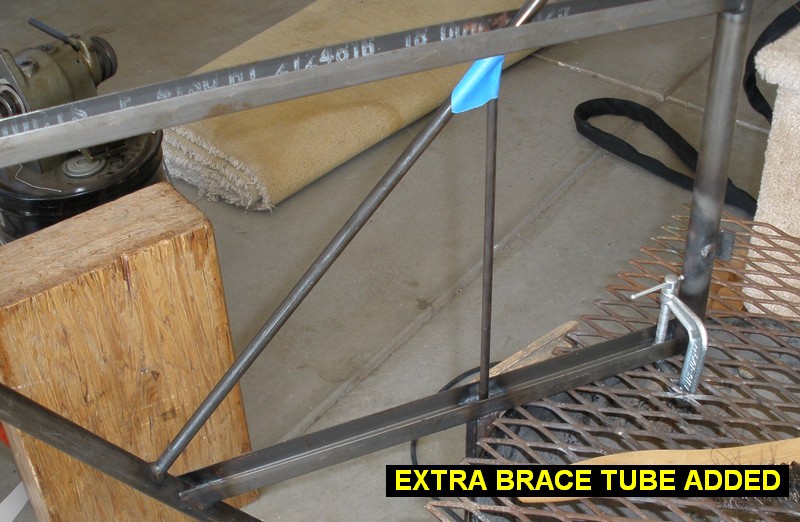
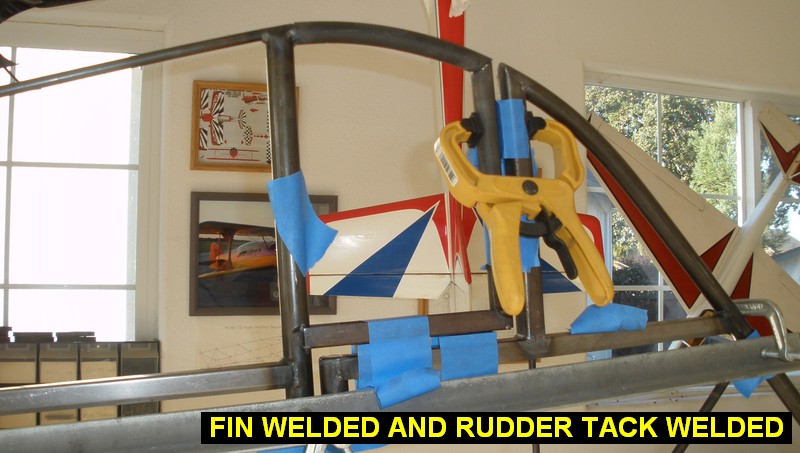
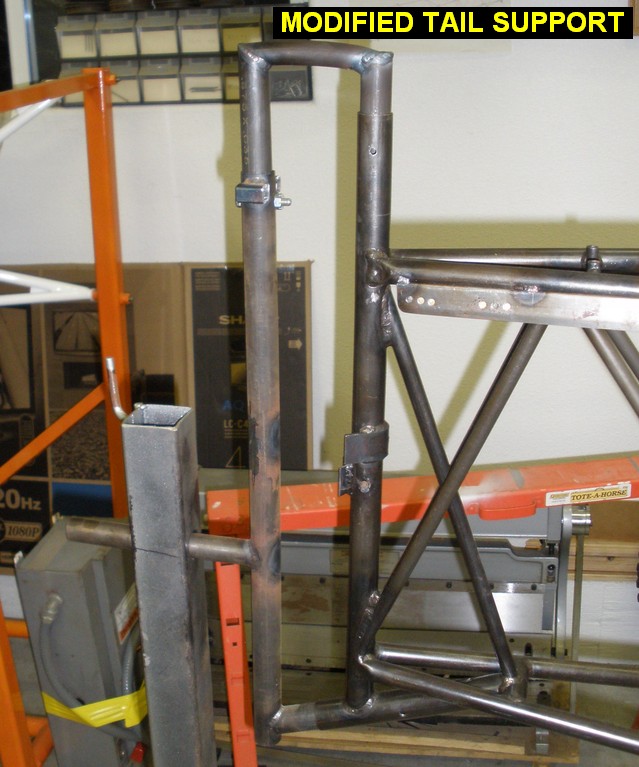
| 11/16/09 | 12.5 | 1150.4 | Crunch time trying to get it ready for powdercoating. Decided to add a plate for another cable control on the left side of the rear cockpit in case I decide to add an iris to the front of the motor down the road. Cut it out on Don's band saw. Modified the rudder and fin to the latest Kimball version of aerodynamic balance with tubes I got from Kevin. The drawing I used for this is here. Since my welding table was out at the hangar, I jigged it all up on the fuselage, doing the fin first. I had to cut a plug for the fin tube out of some .035 4130. After I got the fin welded I then added tubes to the rudder to fit a 5/16 gap and a smooth curve on top. After I got the rudder/fin done, I used the scrap fin section and modified the tail holder so it could be used during the powdercoating process and not contact the tailpost. | 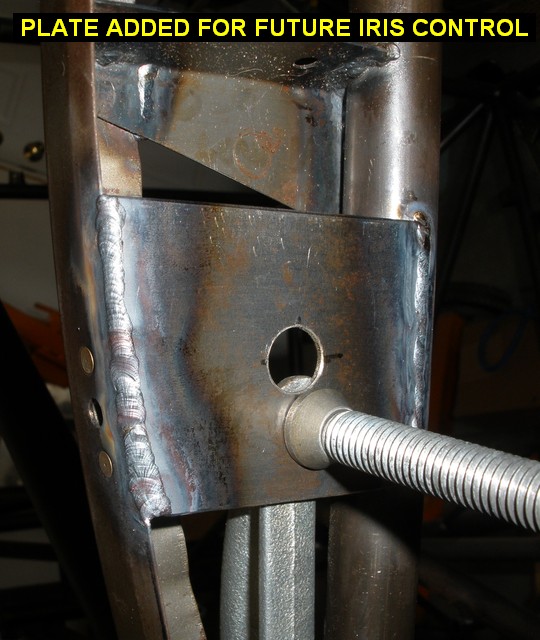 |
 |
 |
 |
 |
 |
 |
 |
||||
| 11/17/09 | 1.8 | 1152.2 | Made a stand to hold the tail of the fuselage on my motorcycle trailer. Tomorrow I'll take the fuselage to Iron Circle in Tracv to have it beadblasted. | 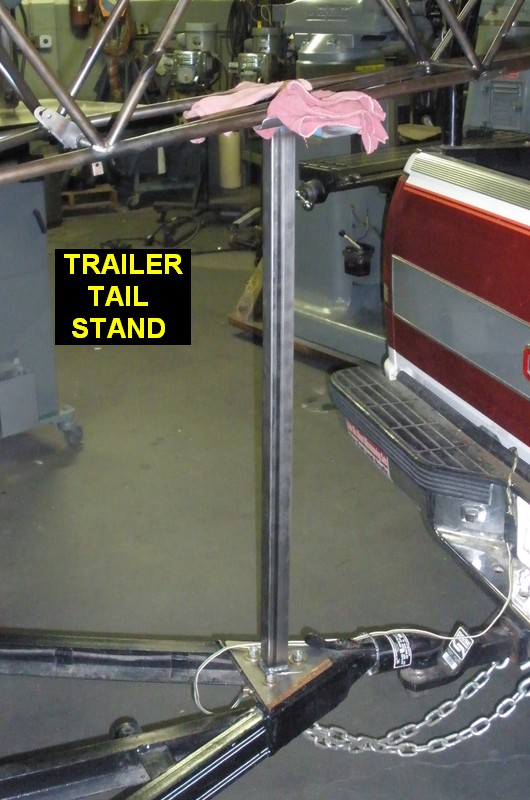 |
|||
| 11/18/09 | 3.0 | 1155.2 | Took the fuselage, tail feathers, and all other metal parts out for beadblasting. Prepared a written set of powdercoating instructions since I won't be there during that part, I'm going on vacation after I get it to the powdercoater. | ||||
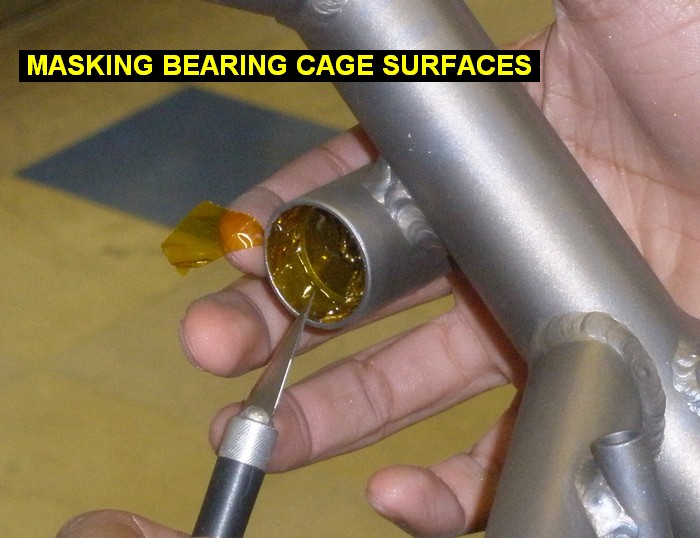
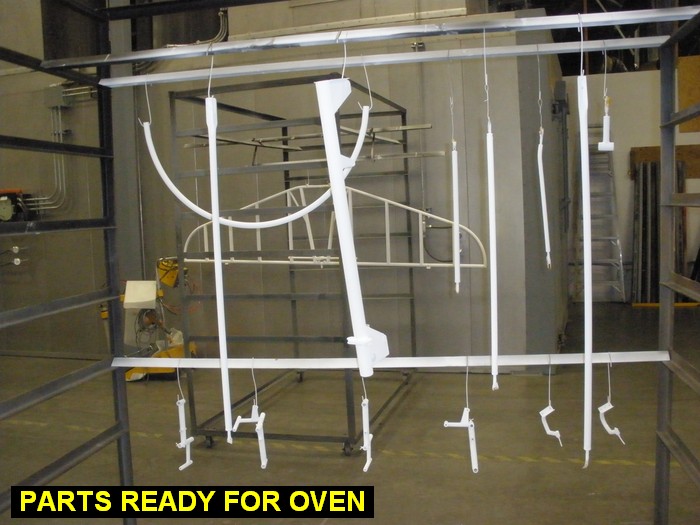
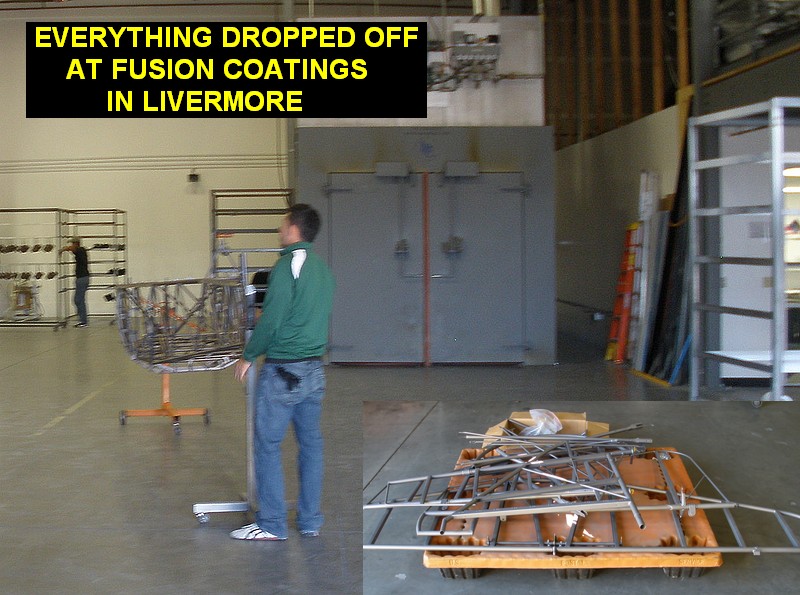
| 11/19/09 | 8.0 | 1163.2 | Got up early and picked up everything from Iron Circle in Tracy, then drove it to GB Industrial Spray in Manteca to be phosphate washed. When I got there I found out their major customer had just dropped off a huge job and I wouldn't be able to bake the parts dry there, but I was able to make arrangements with my powdercoater to bake everything in their oven right away after phosphating. Immediately after GB got it done I loaded it up again and dropped everything off at Fusion Coatings to be baked, then powdercoated over the weekend. I'm going on vacation so I left a digital camera with Rueben at Fusion to take pics of the powdercoating work he does. | 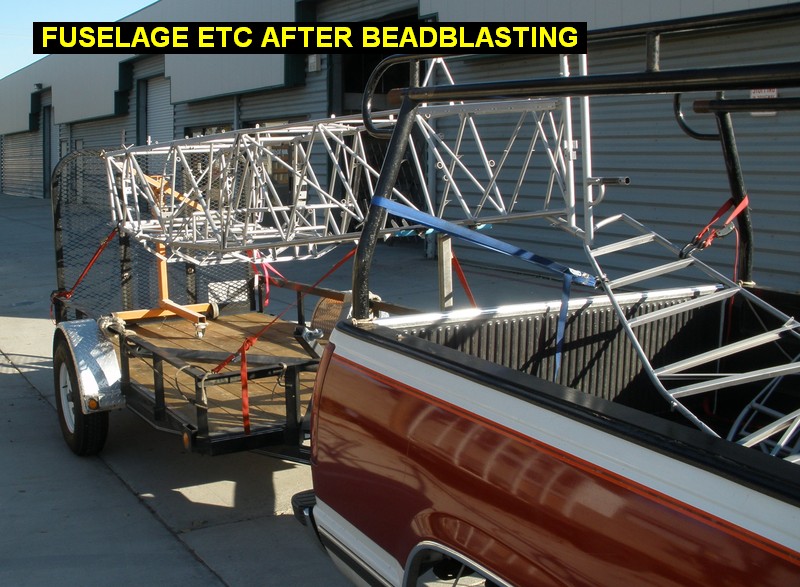 |
 |
 |
|
 |
 |
 |
|||||
|
Work at Fusion Coatings - Pictures courtesy of Rueben taken while he worked CLICK HERE TO SEE ALL THE PICTURES
|
|||||||
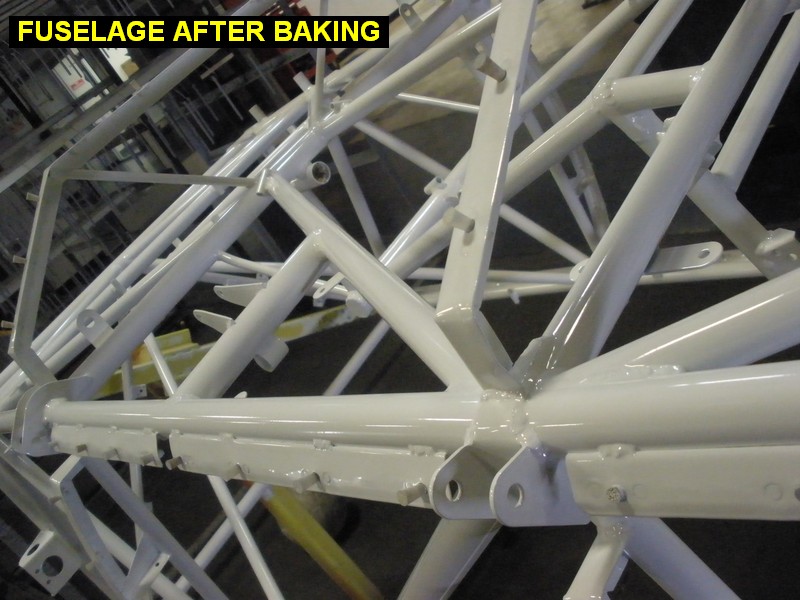
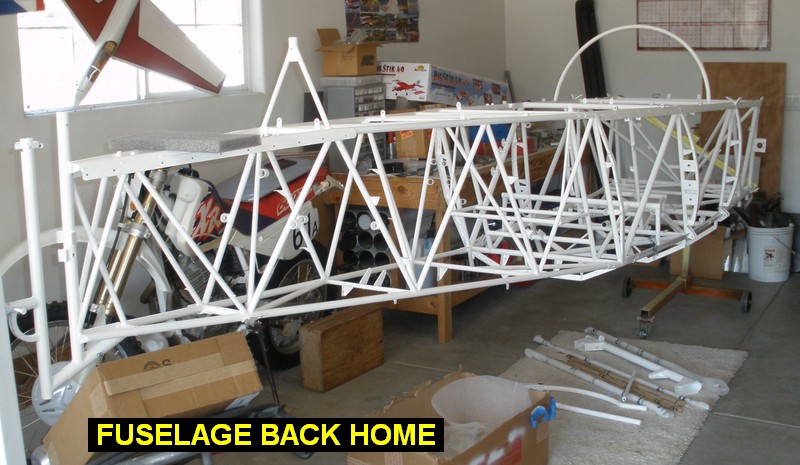
| 11/19/09 | 1.0 | 1164.2 | Picked up the fuselage and other parts from Fusion Coatings. Everything looks really nice! | 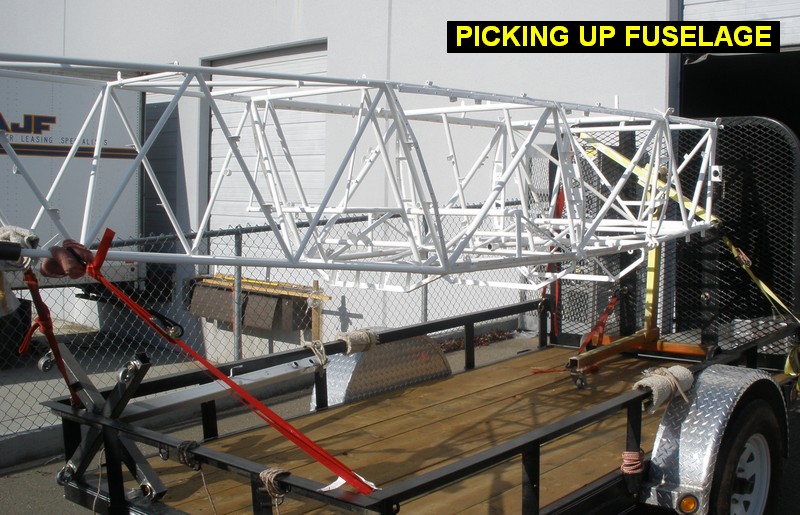 |
 |
 |
|
| QTR TOTAL | 59.8 | ||||||
| 4TH QTR 2009 |
•
•
•
|
||||||