|
3RD QTR 2007
|
 •
•
 •
•
 •
•

|
| DATE |
HRS |
TTD |
ACTION |
IMAGES |
| 07/09/07 |
4.0 |
974.5 |
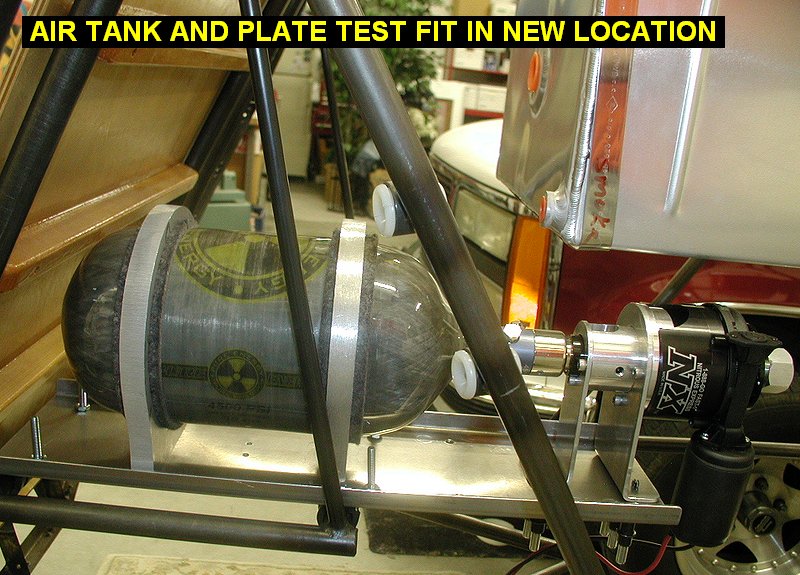
Finally figured out a location for the air
tank that doesn't waste space, allows space for a possible molded rear
seatback yet allows easy tank replacement. However it turns out that I
need to put the tank at the other end of the plate. Redrilled all the
holes to move the tank and test mounted it with adell clamps. |
 |
 |
| 07/15/07 |
2.6 |
977.1 |
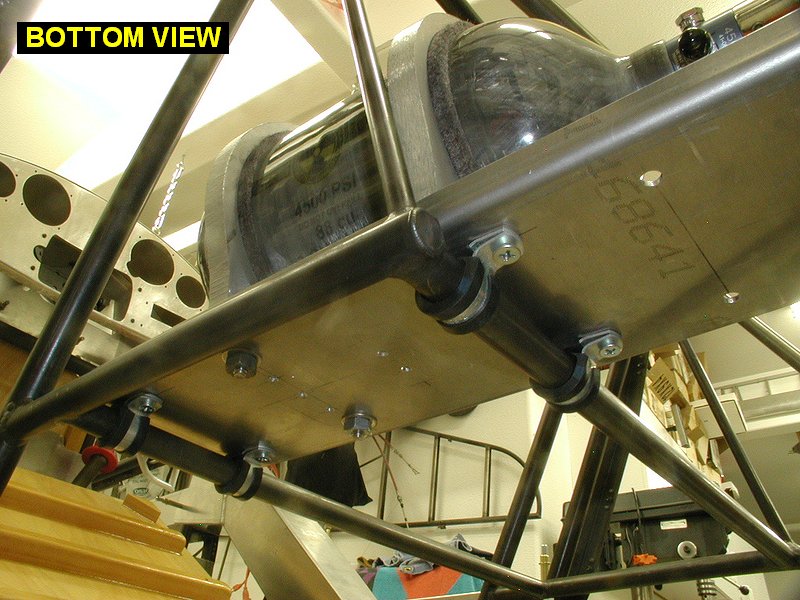
Wasn't happy with the plate for the tank,
the 1/2" vertical flanges weren't big enough and I was afraid they
would allow the plate to flex too much under high G loads. Went over to
Kens and made a new blank plate with taller flanges to stiffen it up. The
new one is a little longer which allows me to move the tank back a little
further back too in case I decide to make a more conformal rear seat back
to replace the wood one. |
| 08/01/07 |
4.0 |
974.5 |
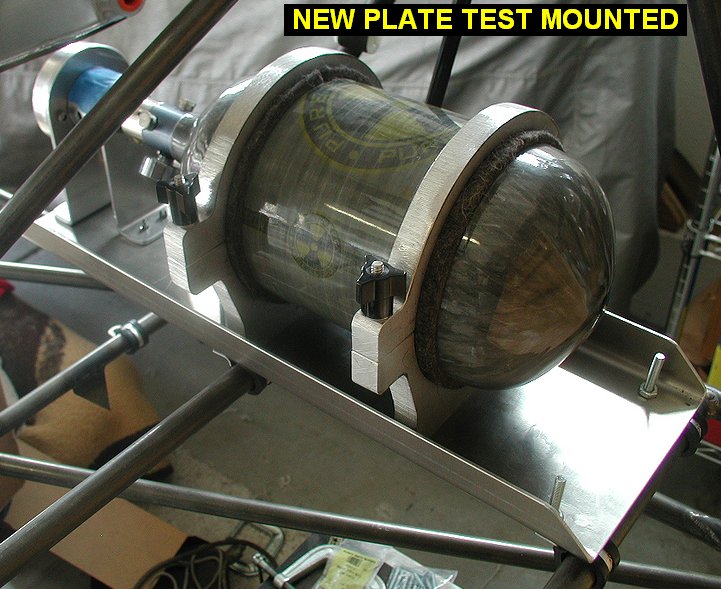
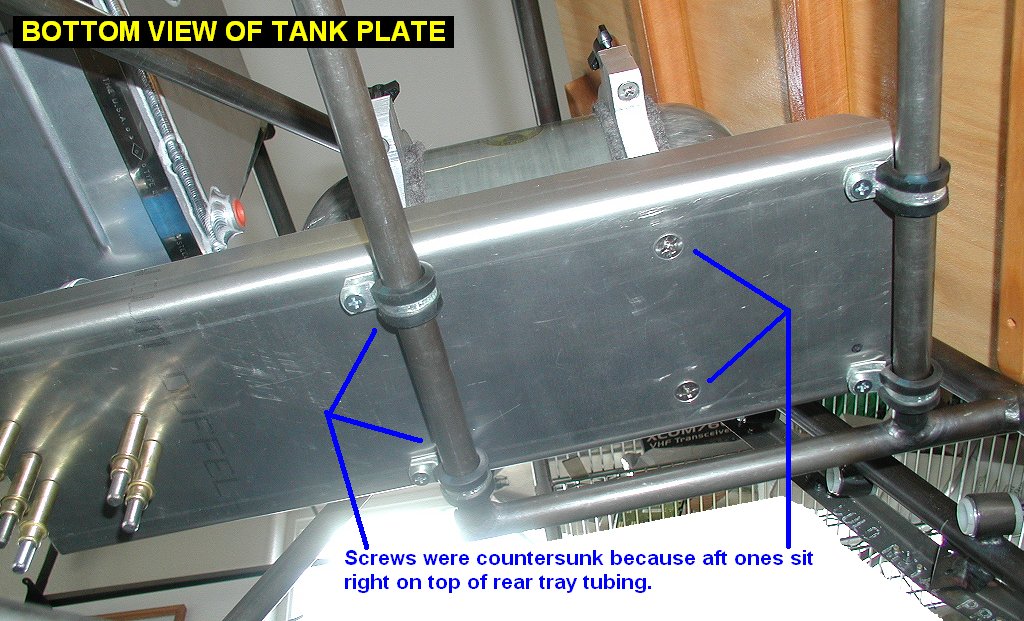
Drilled holes in the new plate. Ended up
countersinking the 1/4-20 holes in the billet clamps, so I could keep the
bottom of the plate flat and mount it anywhere on the battery tray tubes.
I will eventually do some machine work to lighten up the bottle clamps,
they have way too much material and weight in them. |
 |
 |
| 08/17/07 |
2.5 |
977.0 |
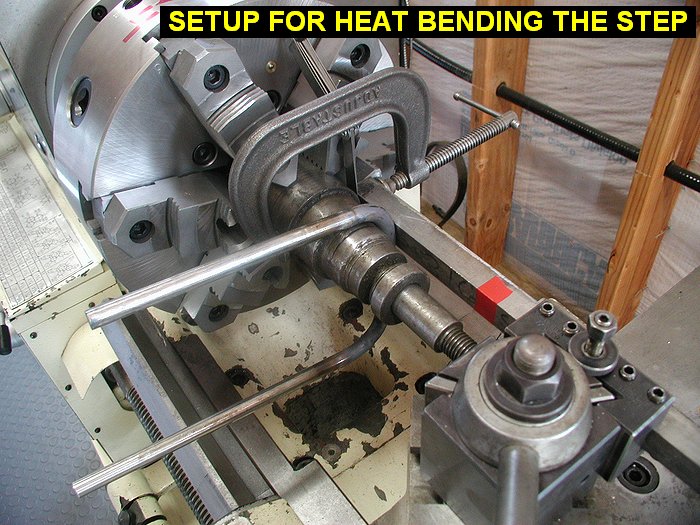
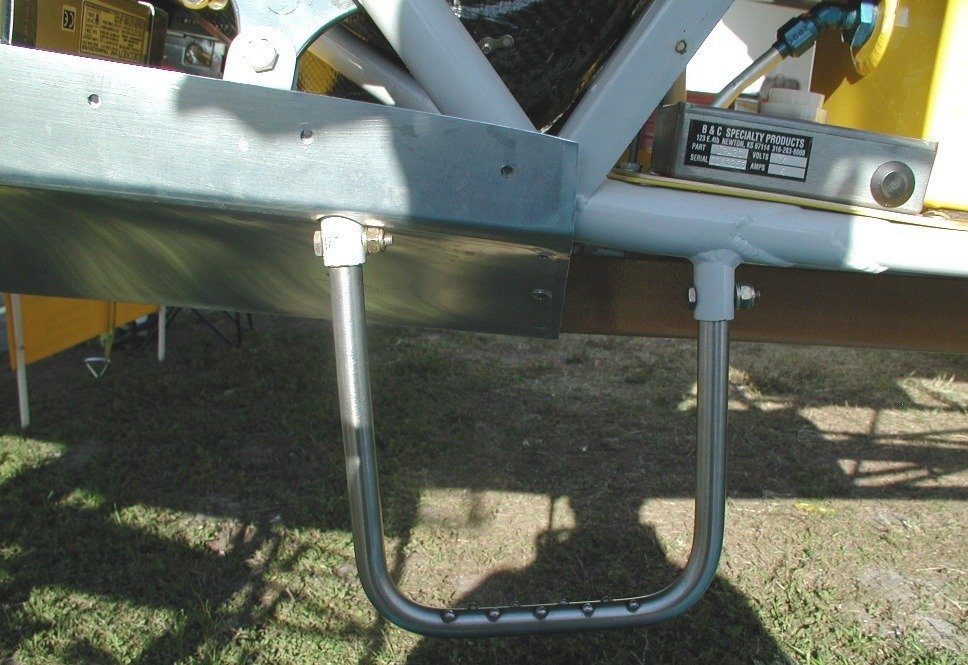
Shifting gears a little, awhile back I drew
up plans for a fuselage step
like first seen on N393DG
but located more like on N247AG.
My step will be made of 1/2" diameter stainless rod. I rigged
up tooling in my lathe for heat bending it. Basically the lathe acted like
a big stationary vise to hold the scrap round piece that I bent the step
around. I then used sandpaper and wire brush to clean up the step to look
good. |
 |
 |
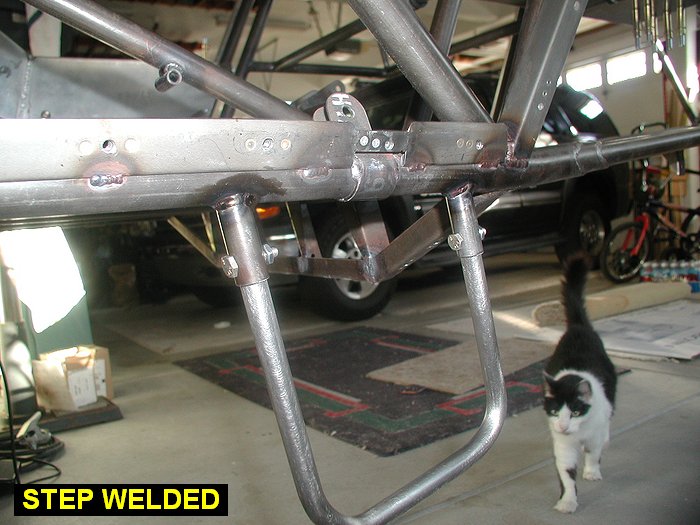
| 08/20/07 |
4.2 |
981.2 |
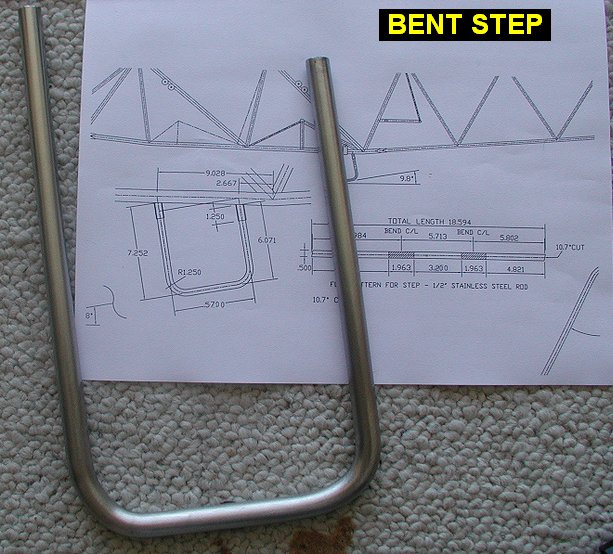
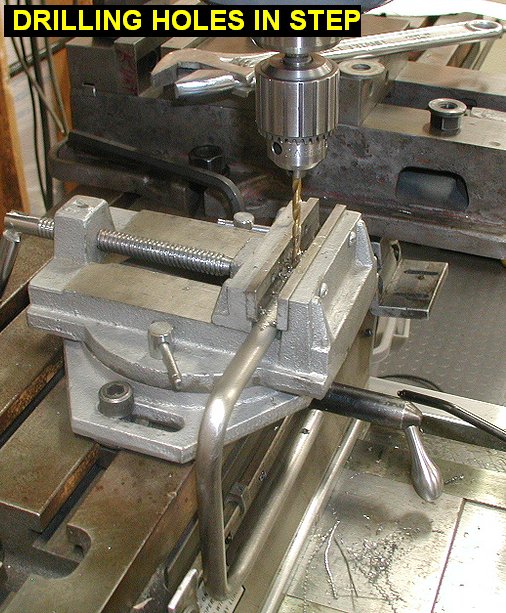
Cut the ends off step at the 9.8 degree
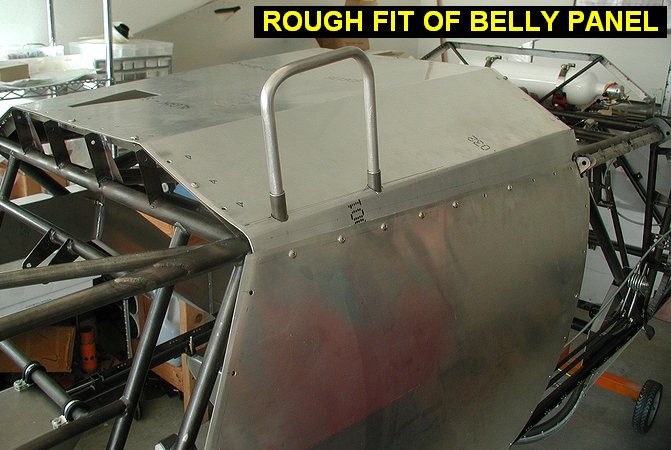
angle. For the step sockets, I took some .625 dia .065 wall tubing and
reamed the inside from .495 out to .500 so the step would slide in.
I then cut and fit them to the 1" diameter lower longeron at the same
angle. Fitted the lower belly panel and cut two preliminary holes in it to
locate the position for the step. Drilled holes in the socket tubes, then
marked and drilled 3/16 holes in the step ends. |
 |
 |
 |
 |
| 08/21/07 |
1.2 |
982.4 |
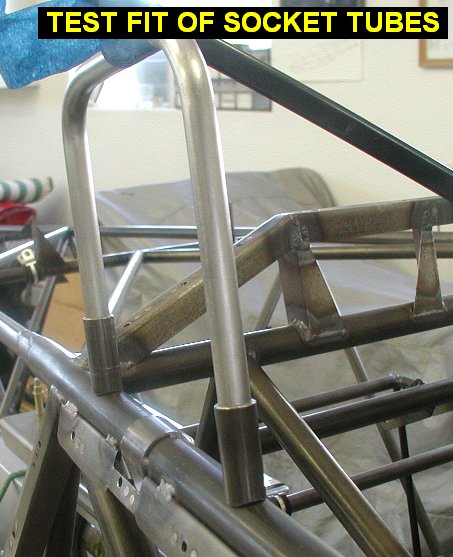
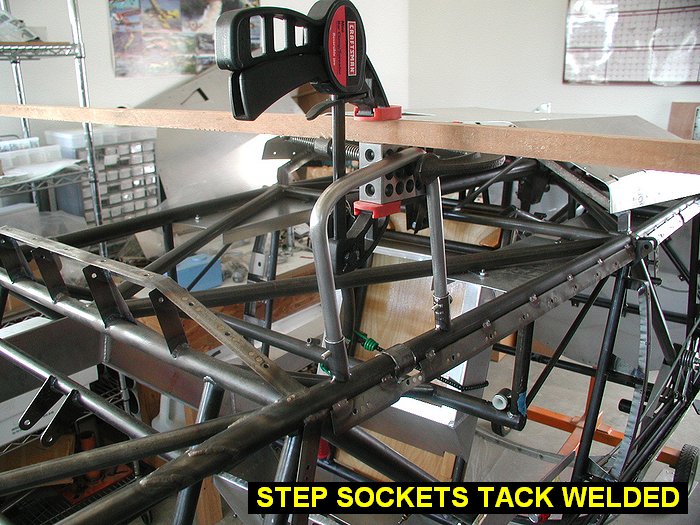
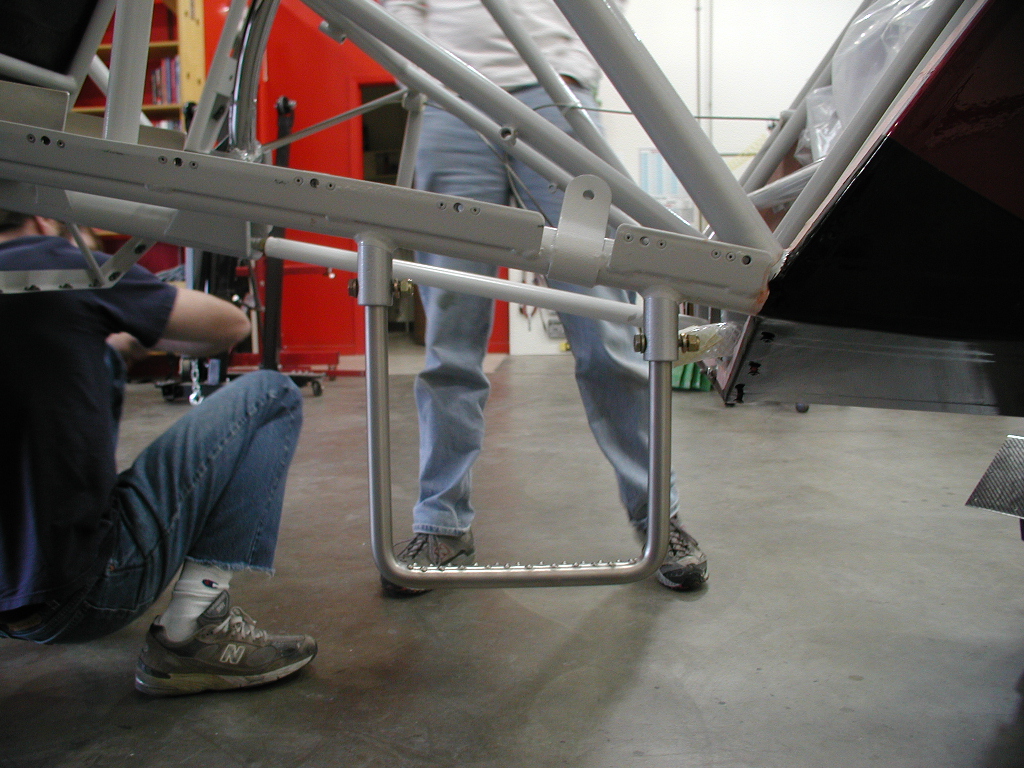
Leveled the fuselage, then
clamped the step / socket so it was vertical, and thus plumb when the
airplane is on gear. Tack welded the step sockets in. |
 |
| 08/29/07 |
1.5 |
983.9 |
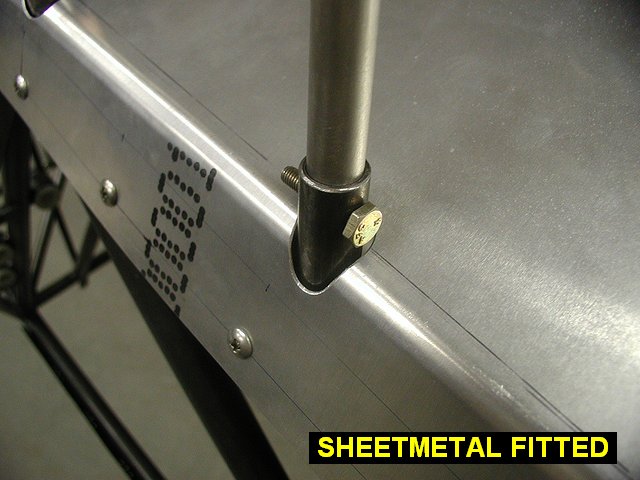
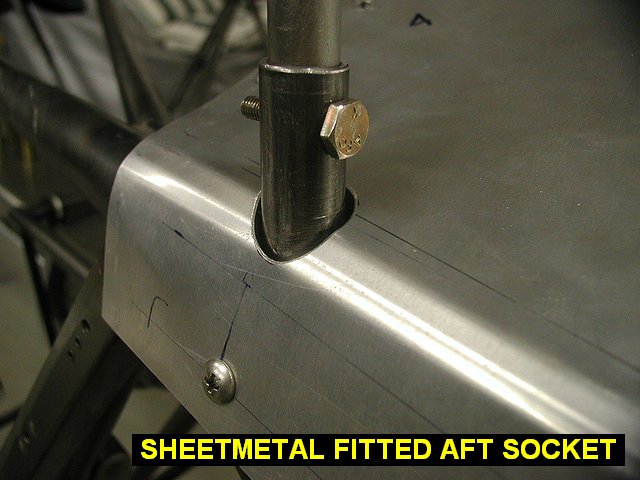
Spent some time with the sharpie
pen and die grinder adjusting the fit of the sheetmetal to the sockets. |
 |
 |
| 08/30/07 |
1.0 |
984.9 |
Welded up the sockets. Did the
welds with 30 minutes of cooling between short bead sections so as to not
put too much heat into the longeron and cause it to distort and mess up
the fit of my sheetmetal. |
 |
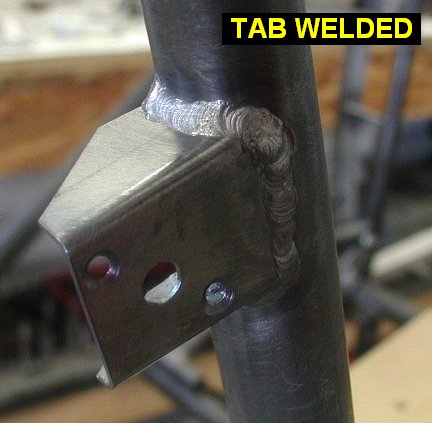
| 09/03/07 |
3.0 |
987.9 |
Back to the mounts for the seat box. Located
the mounting tabs on the seat box with 3/16 clecos, then tack welded the
four tabs. After that I finish welded them up. |
 |
 |
 |
 |
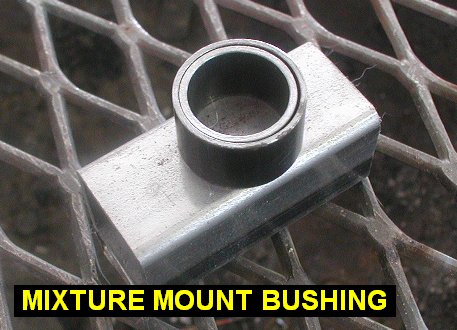
| 09/05/07 |
3.0 |
987.9 |
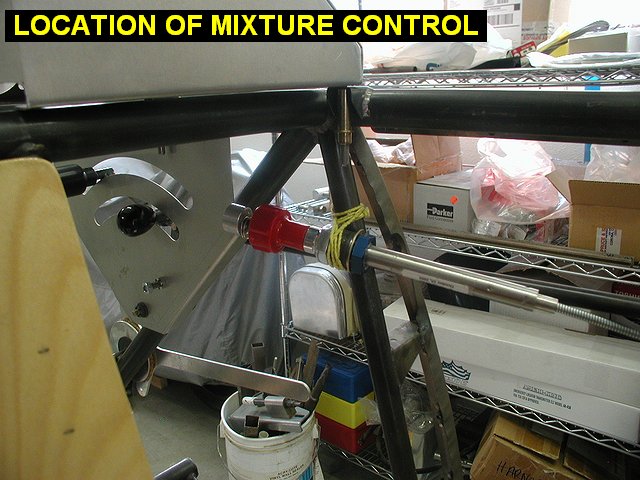
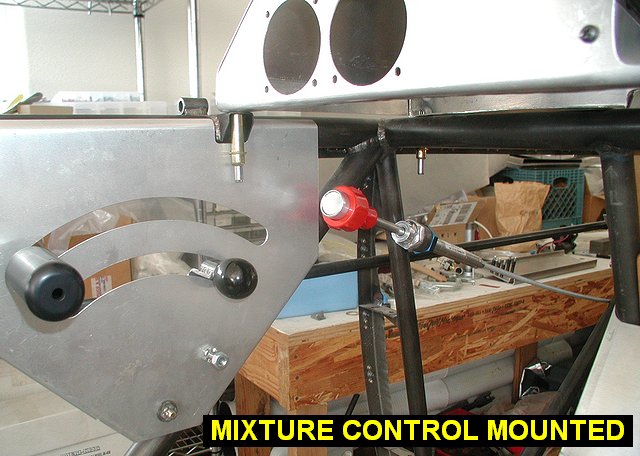
Decided to install a mount for a mixture
control in case I decide to put fuel injection on the motor down the road.
The mount bushing is two sections of tube edge welded together. It took
some time to find a decent location that wouldn't interefere with the
pilot's leg, the throttle/prop controls, the throttle/prop control rods or
instrument panel. |
 |
 |
 |
 |
| QTR TOTAL |
27.0 |
|
|
3RD QTR 2007
|
•
•
•
|


