|
2ND QTR 2012
|
 •
•
 •
•
 •
•

|
| DATE |
HRS |
TTD |
ACTION |
IMAGES |
| 4/7/12 |
2.5 |
1178.8 |
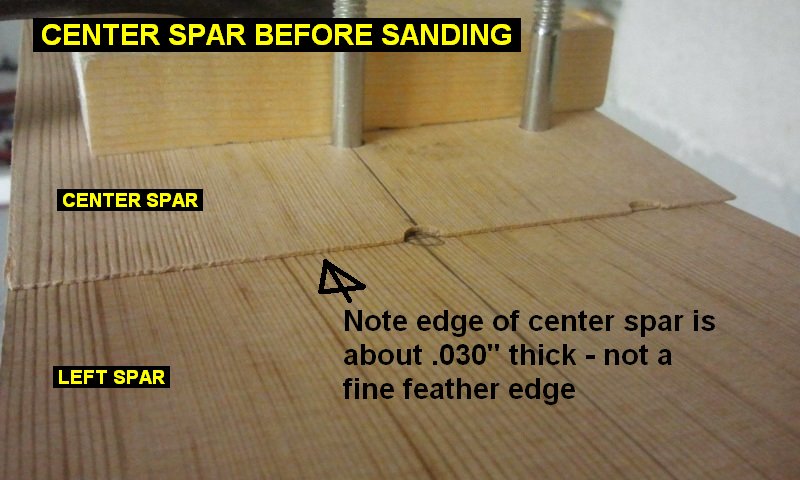
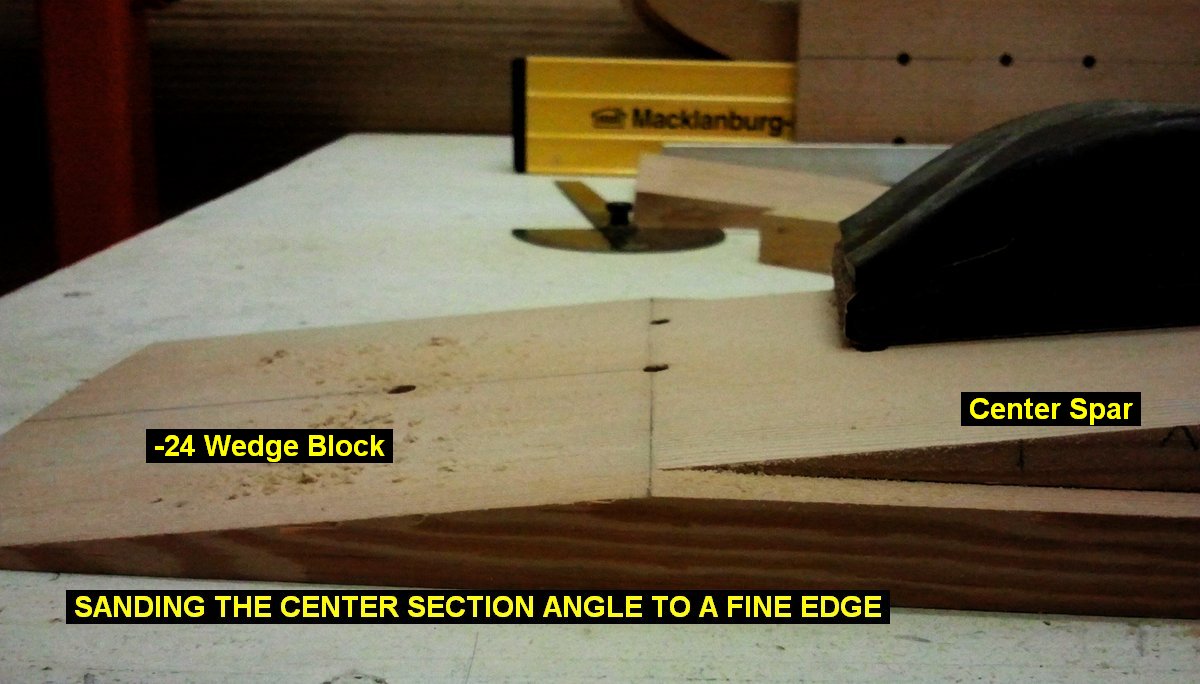
After measuring and drawing up all the spar parts in autocad to examine their fit, and consultation
with Kevin, we determined that the angle cuts on the center section needed to be sanded to a fine
feather edge point while leaving start of the taper on the forward face alone, thus very slightly
steepening the angle. It should be noted that the instructions say to sand splice parts to acheive
a perfect fit and I had done no sanding prior, since they seemed to fit fine at the time. |
 |
 |
 |
 |
| 4/17/12 |
1.8 |
1180.6 |
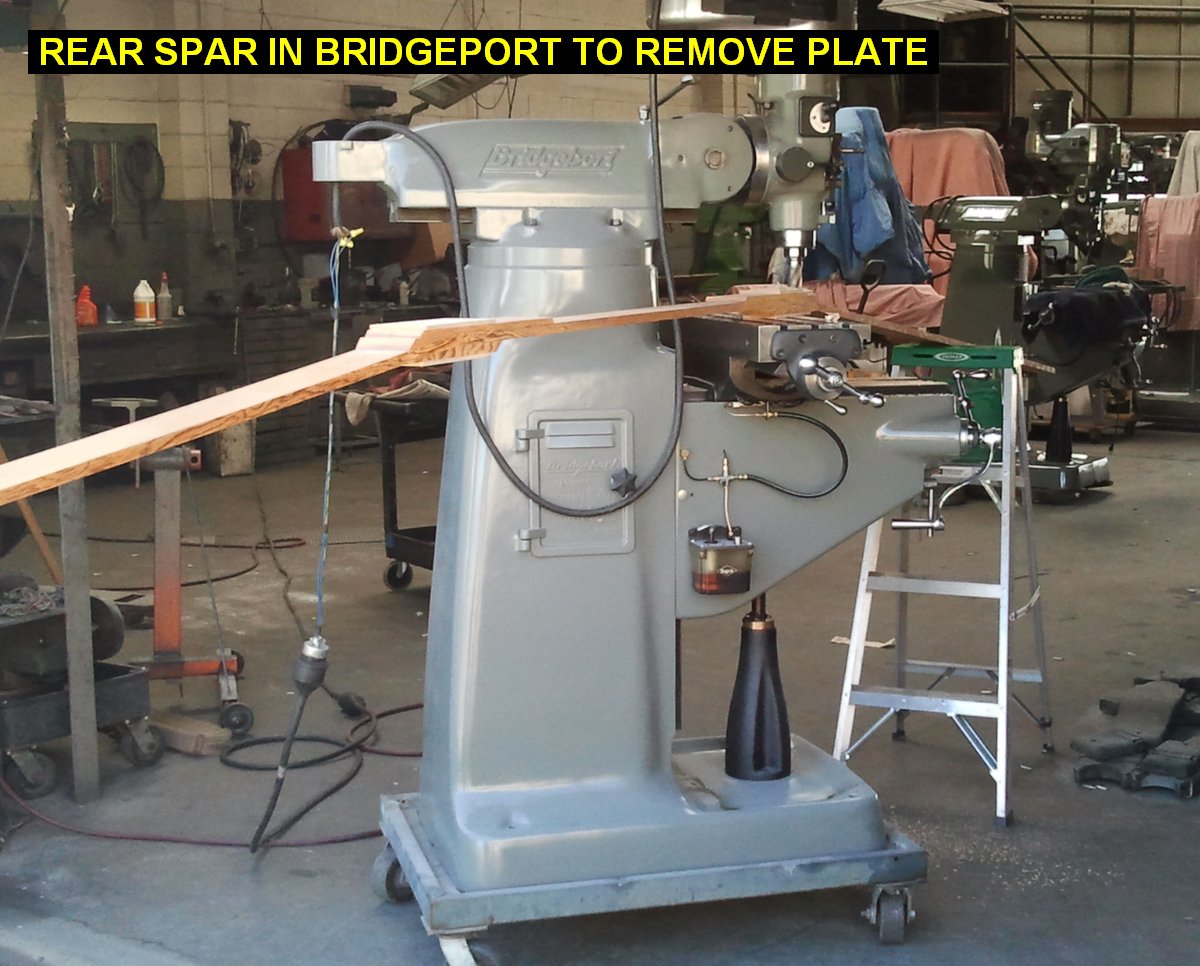
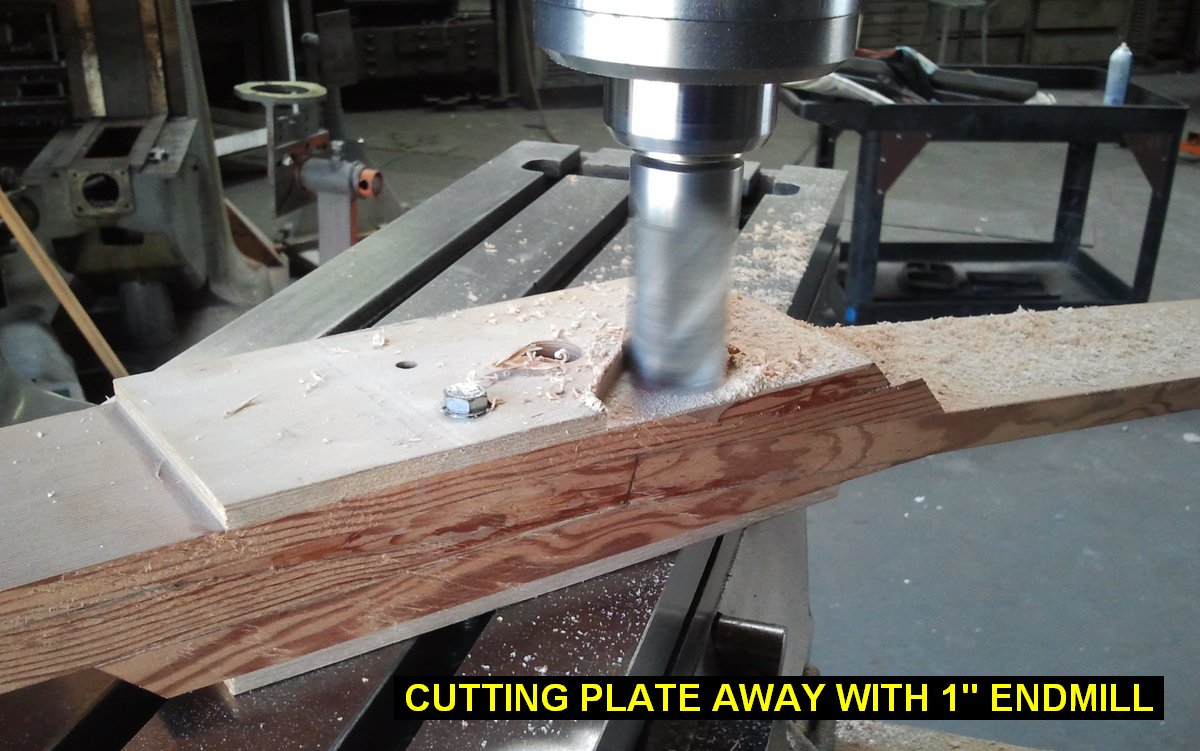
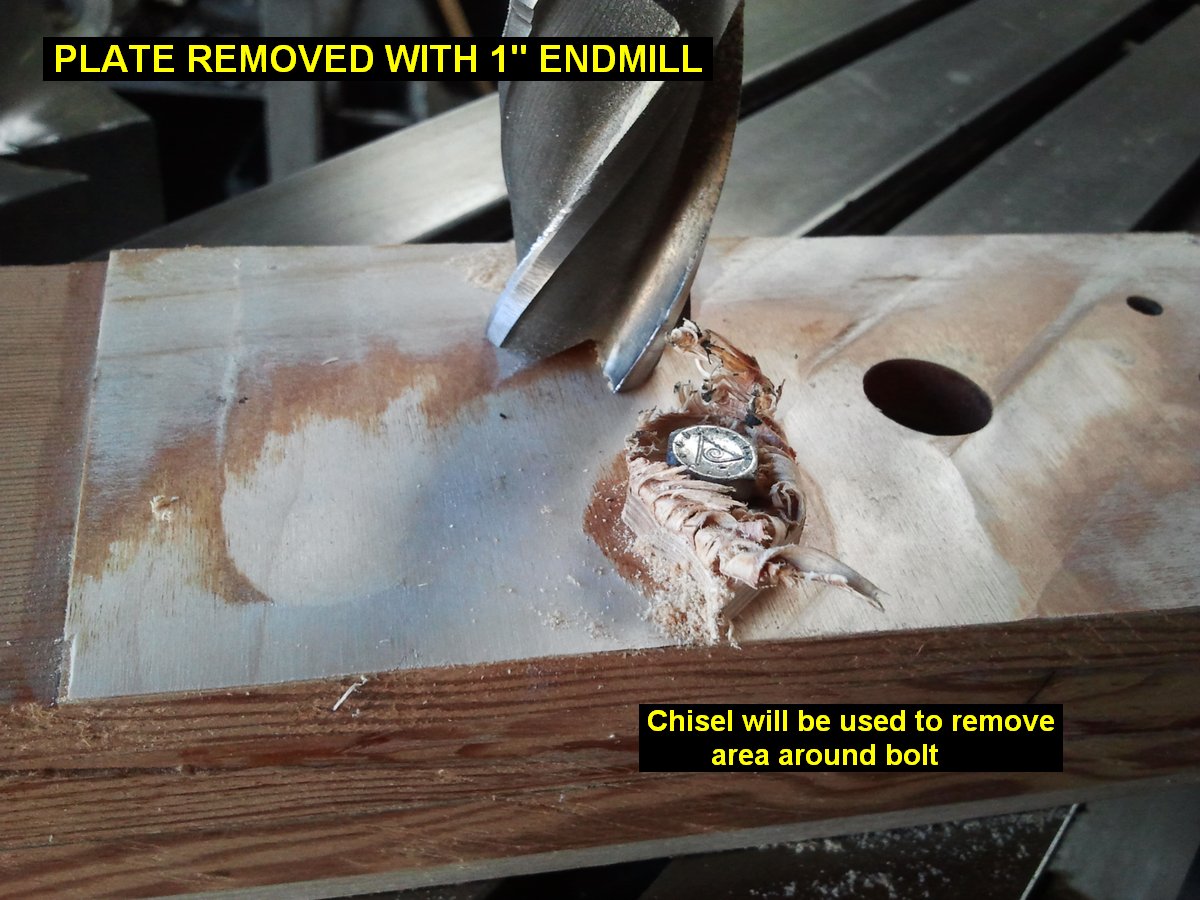
Another problem I discovered with in-progress spars I bought was that the plywood crush
plates had been installed prematurely - thus the center section compression ribs won't slide on.
The front spar was fixed by making a new spar, and I fixed the rear spar by milling off the
forward (fat side) plate on one side. I didn't have room around my milling machine at home
so I went down to Don's shop and used one of his machines.I got it pretty close, and will
use a heat gun to soften and remove theglue remaining from the joint. After I slide the ribs
past this section, I'll glue another plate on to replace the one I removed. Spar was held
tight to table with 1/4" bolt down thru spar into a 1/4" T-nut. |
 |
 |
 |
| 4/18/12 |
1.5 |
1182.1 |
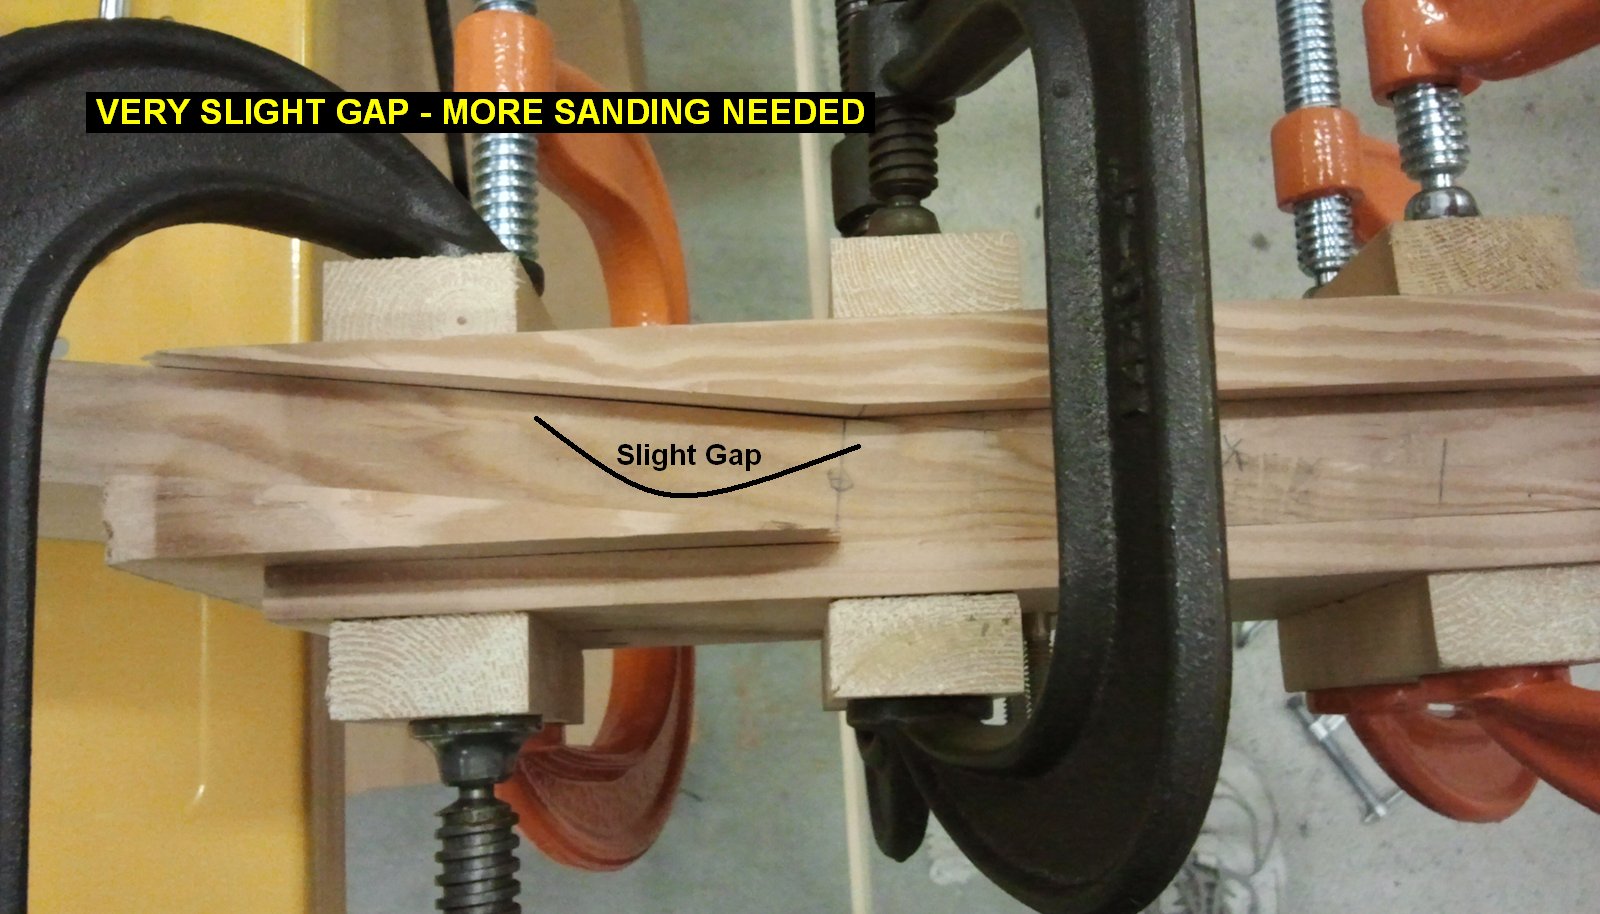
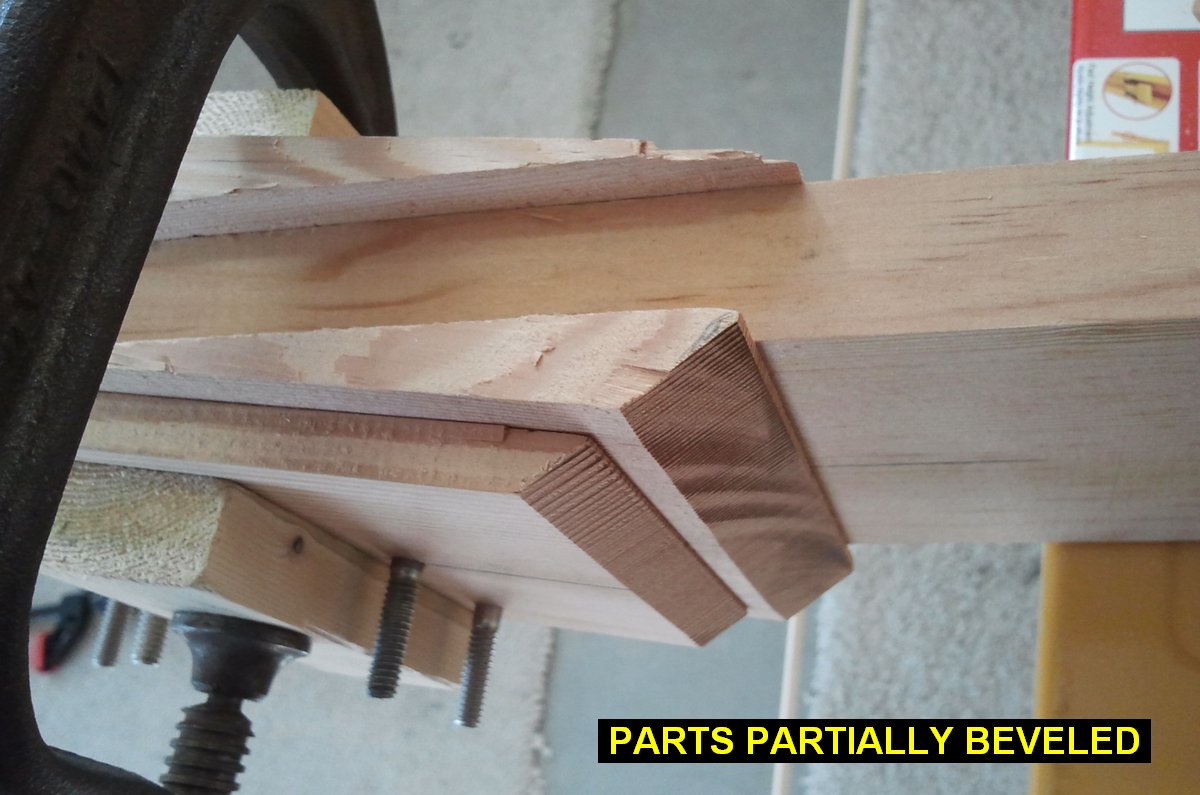
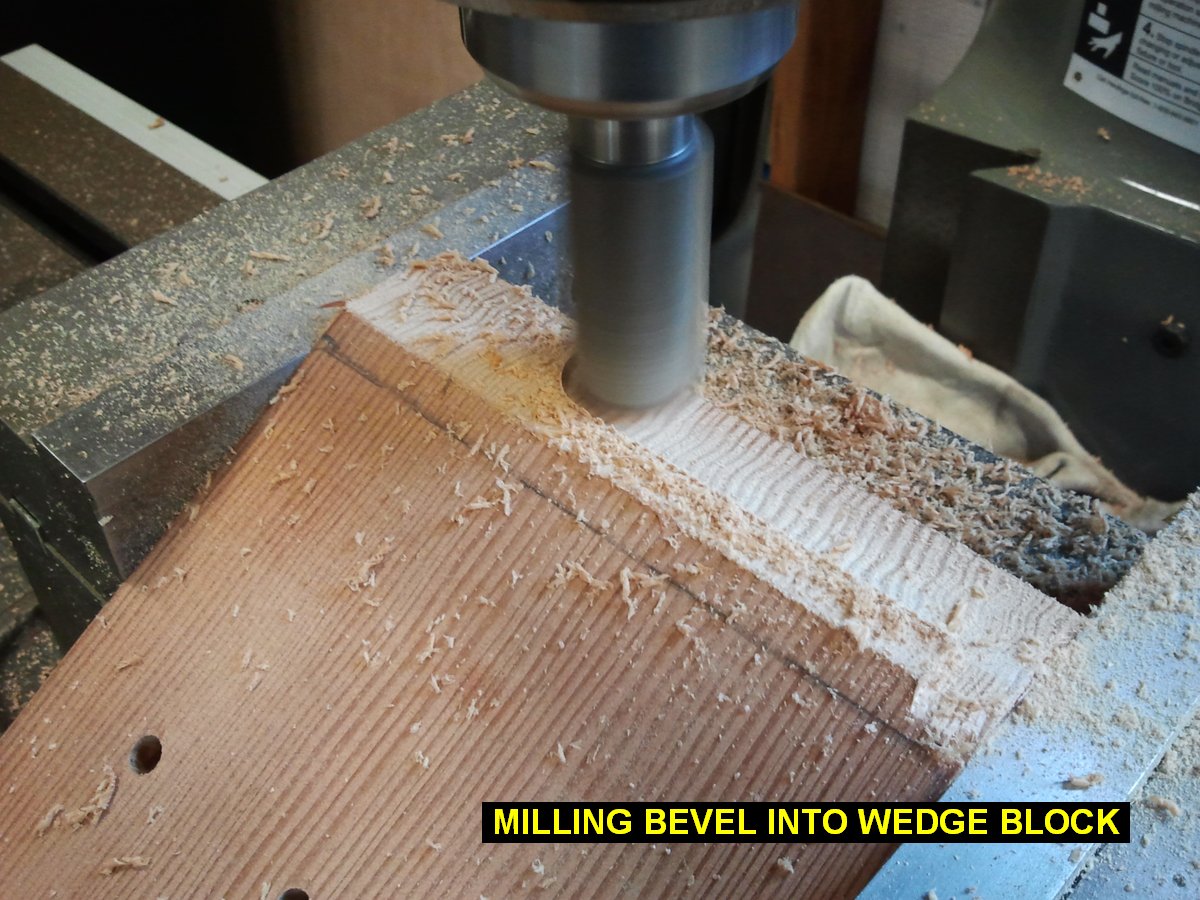
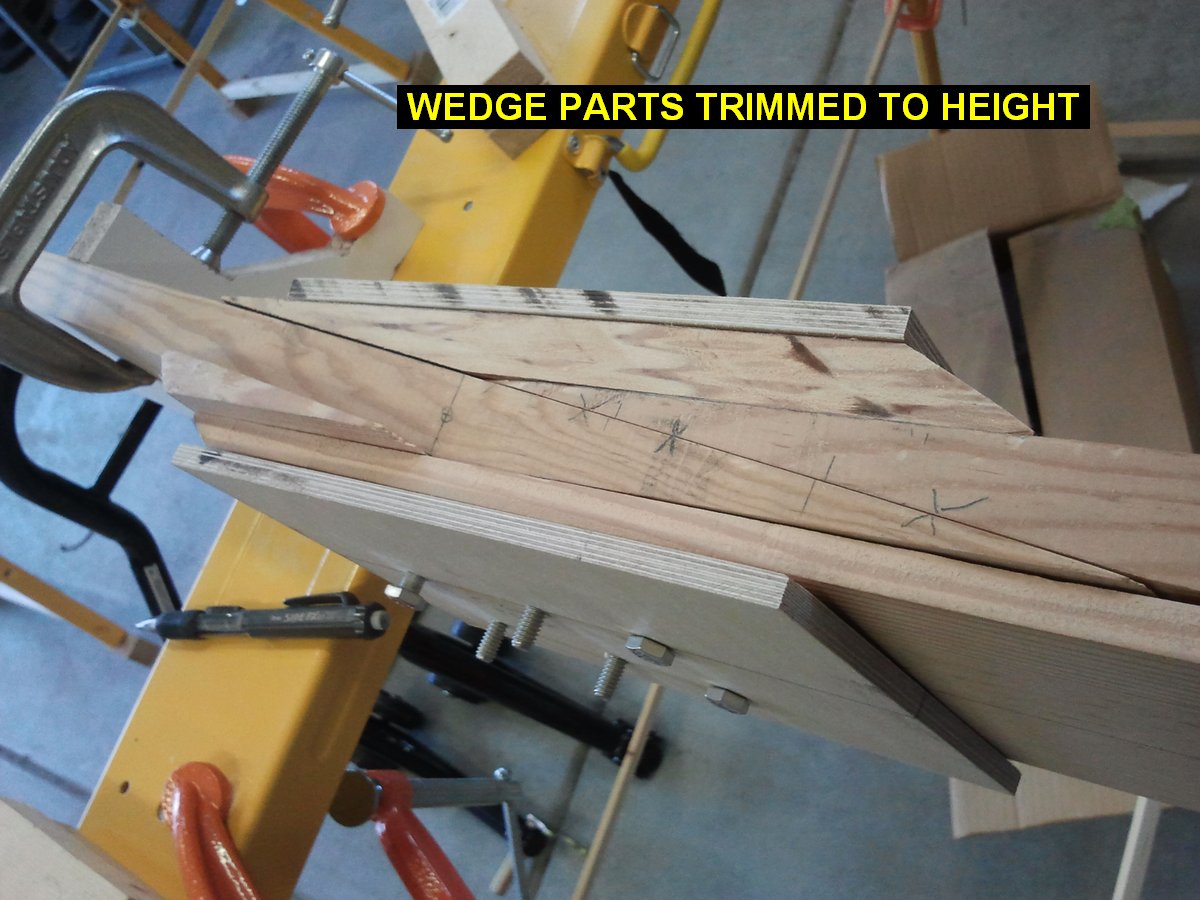
Since I finally got the splice joints fitting correctly, I drilled the remaining holes through the outer
spars and wedges etc. I then set the table saw up to put the bevels on the ends of the wedge
blocks etc, but could only cut 45 degrees. I'll have to figure out some way to cut the more
acute angles needed. Then when I went to put the parts back together I discovered I cut one of
the wedge blocks the wrong way.Ouch! I had pencil lines drawn, but on one of them that line wasn't
visble the way it went onto the saw and somehow I flipped it as I put it in.
Now awaiting a replacement one from Kevin.....at least I now know how to sand it to fit! |
 |
 |
| 5/10/12 |
0.5 |
1182.6 |
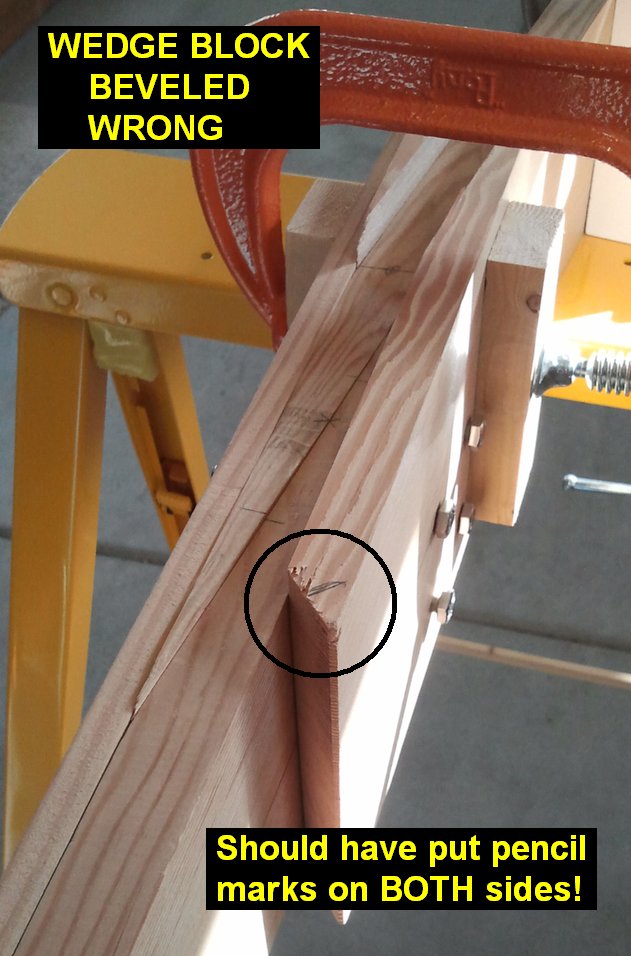
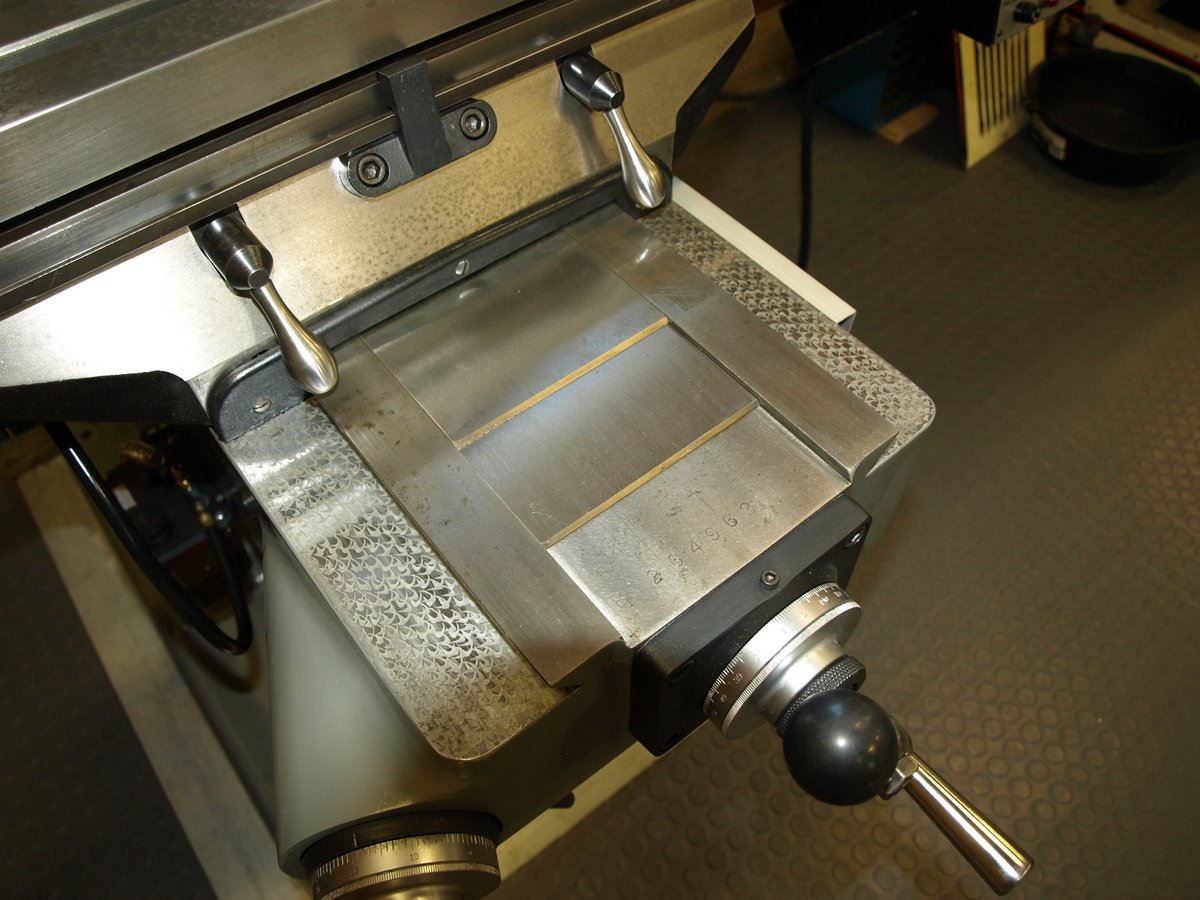
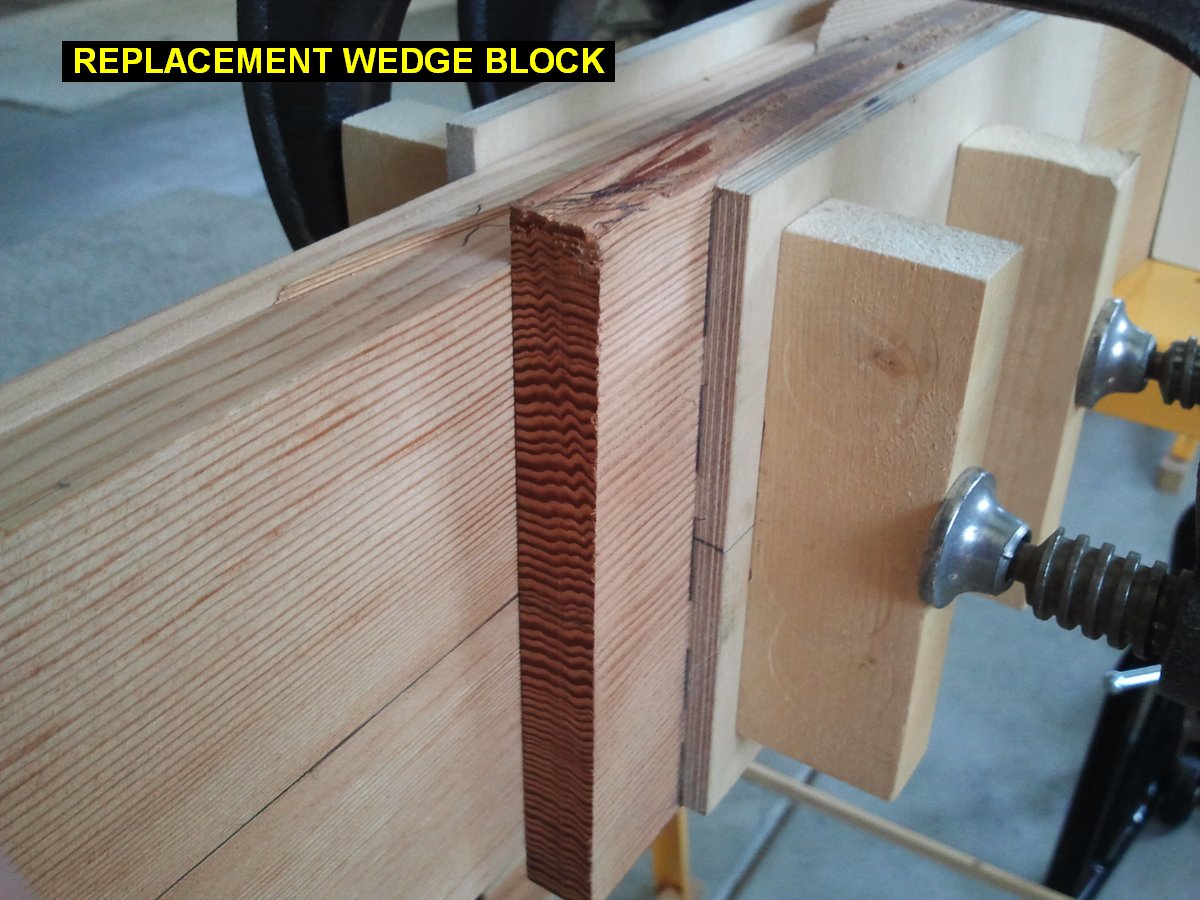
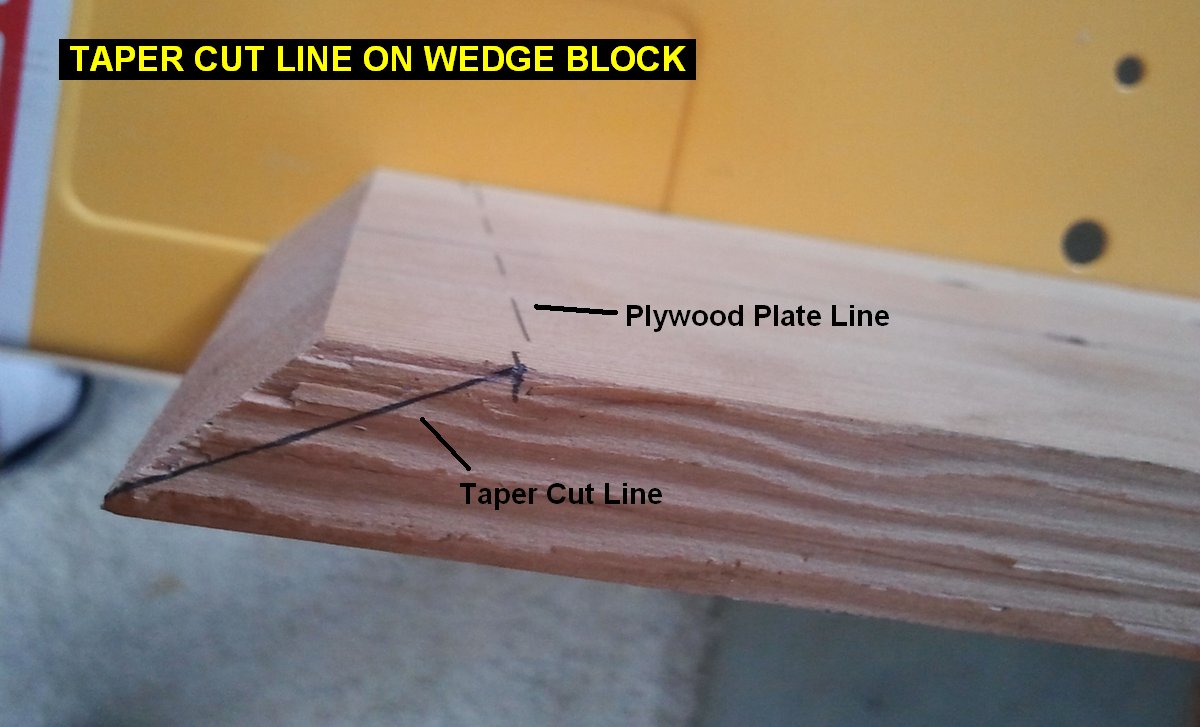
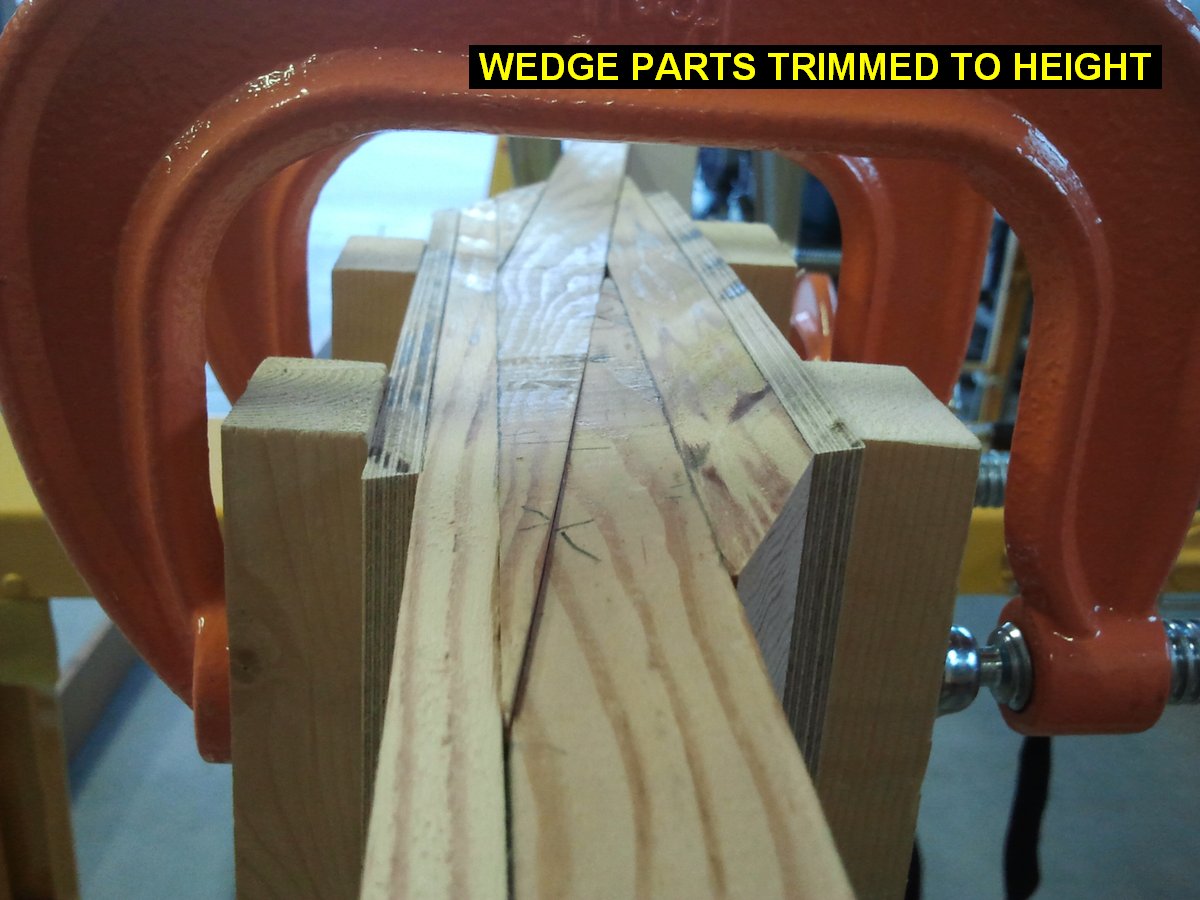
I got the replacement wedge block from Kevin, and decided I would cut the bevels to the more acute angles
using the bridgeport. I installed the plywood outer plates and drew pencil lines on the wedge blocks
so I could see where to end the tapers at.I then drew pencil lines on BOTH side of the wedge blocks
to avoid mis-cutting another one.
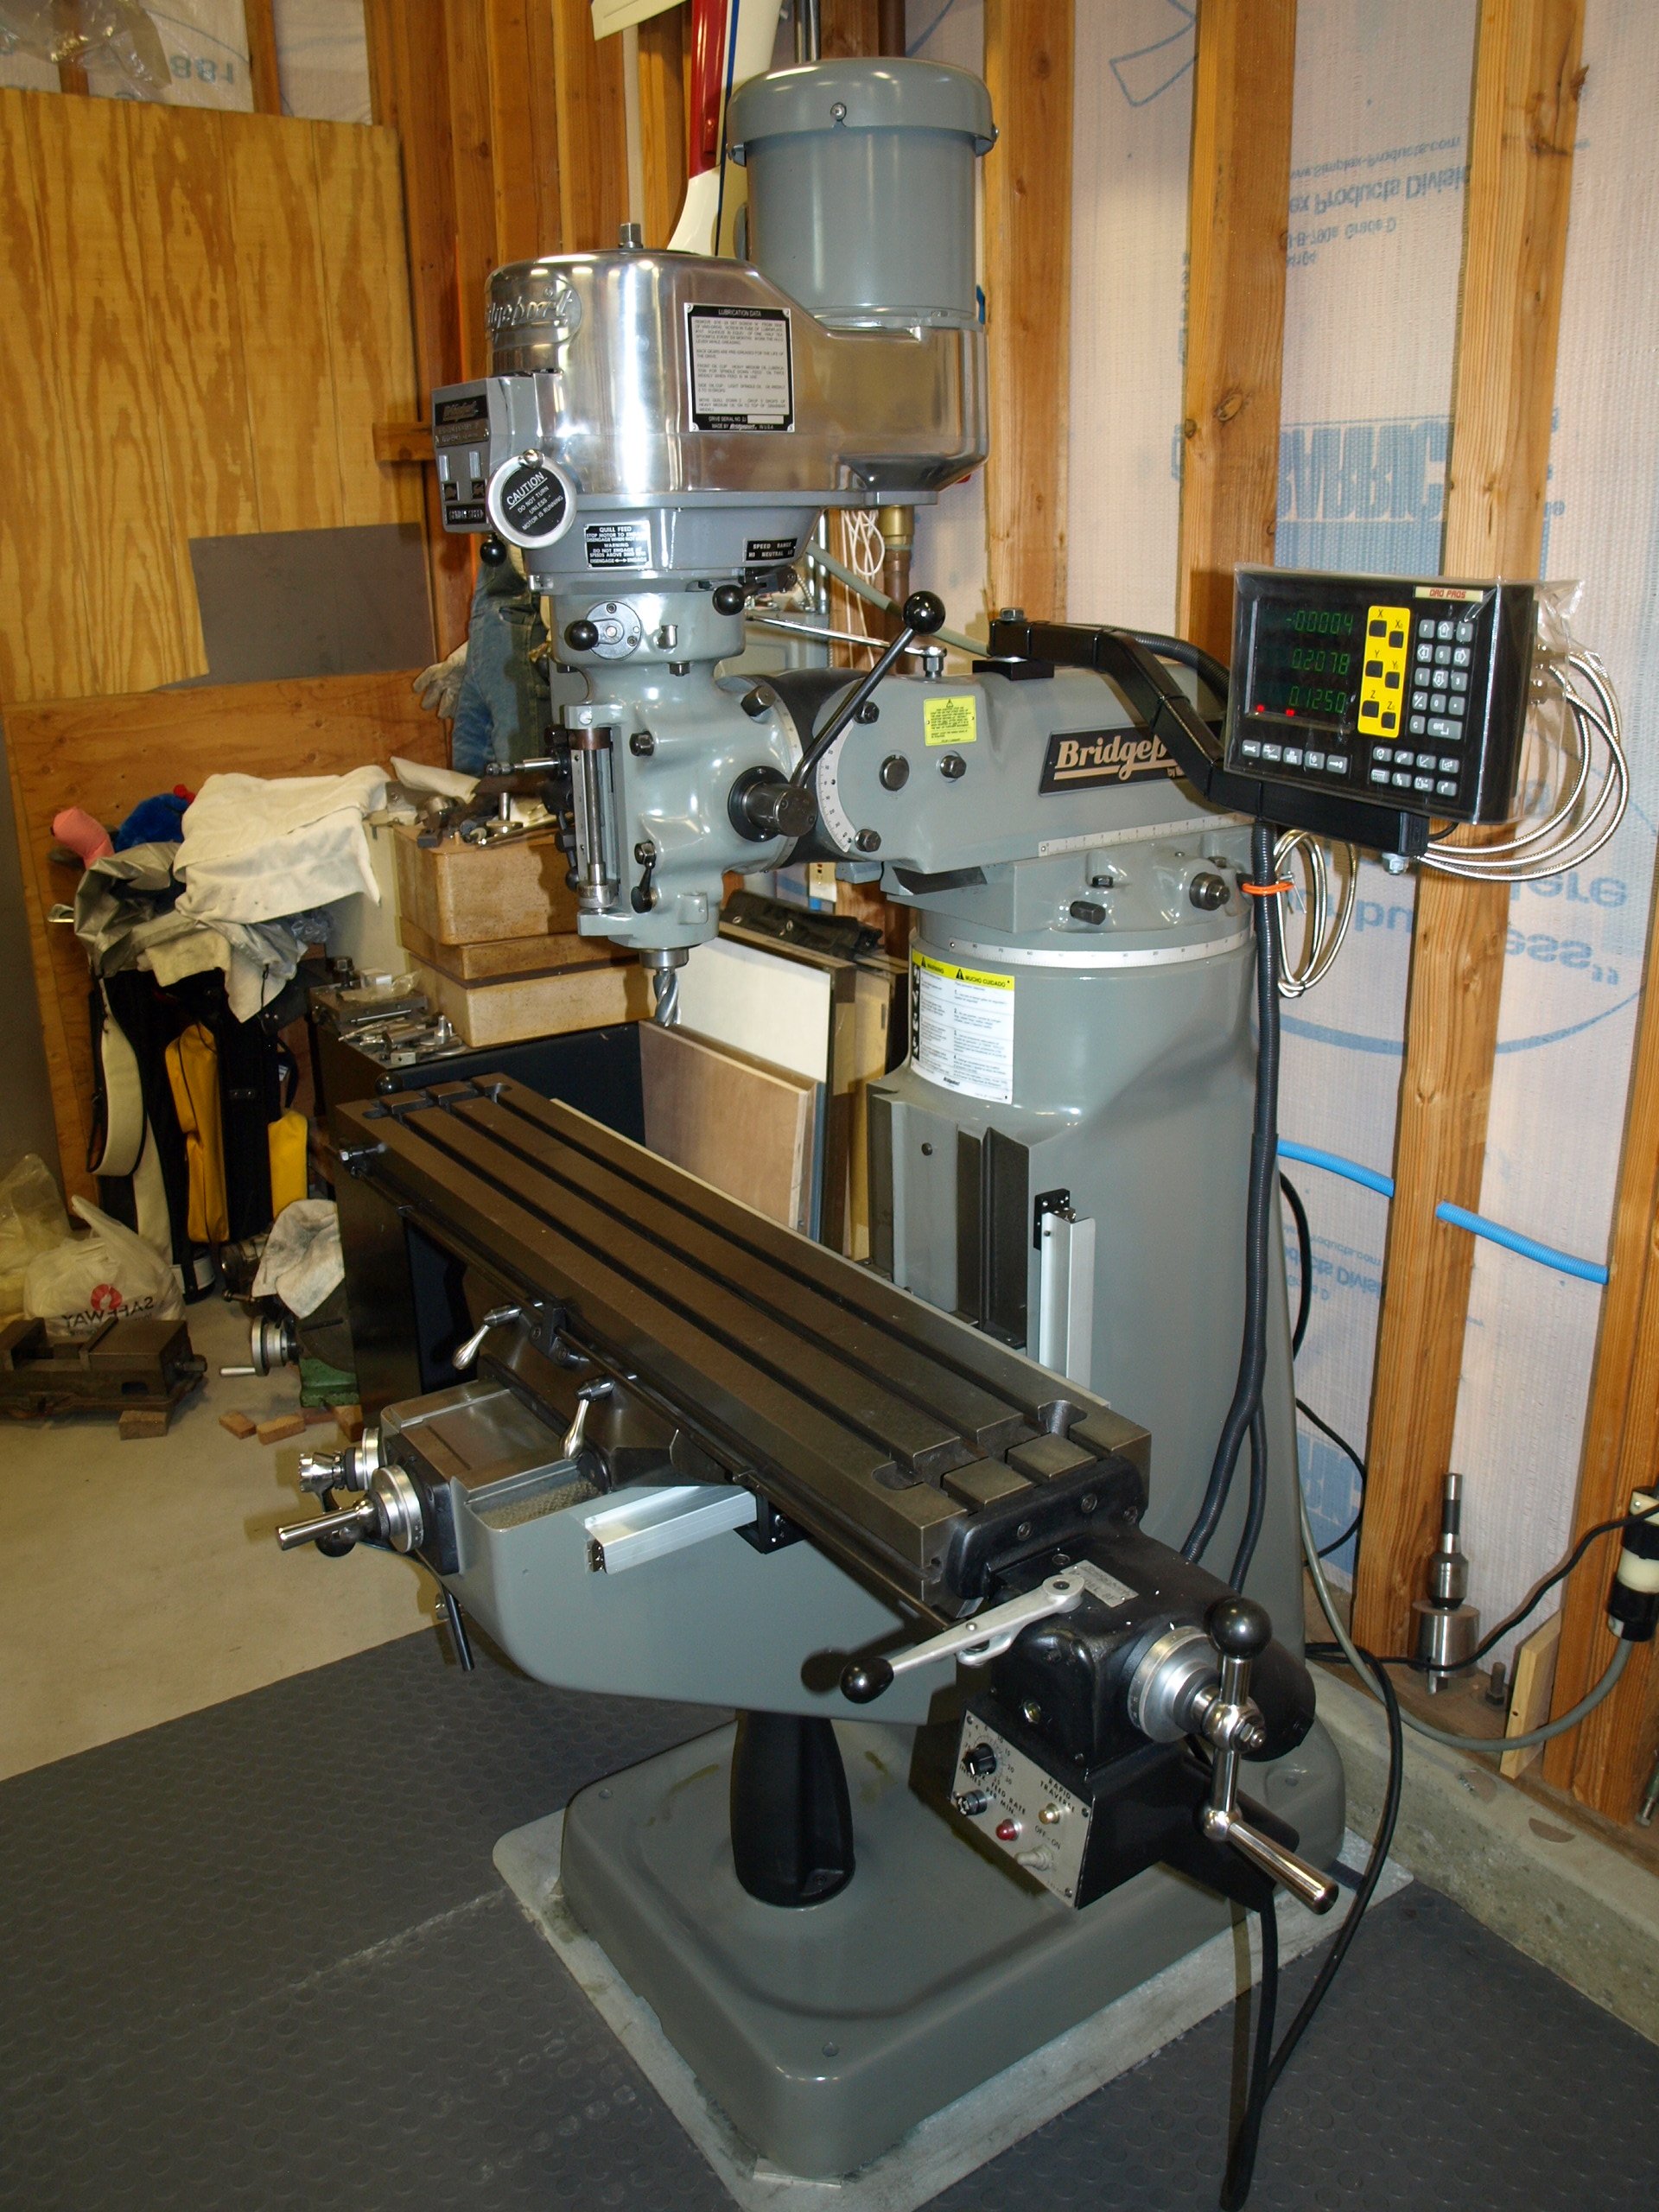
Only problem I was in the process of setting up my new Bridgeport Milling machine.
My friend Don who restores and then sells Bridgeports as a hobby, came across a batch of late model, lightly
used machines and saved one for me in return for me doing his craigslist ads all these years.
He recently finished it, and took my old one in on trade, so I now have a beautiful machine with chrome ways
that are barely worn, totally rebuilt head with all new bearings bushings and pulleys, and a longer 48" table.
Since Don stripped it down to bare metal, bondo and repainted it, it looks better than it did when new.
It took me awhile to install my 3-axis DRO on the new machine and then get it set in position and
wired up so I could use it.
|
 |
 |
 |
 |
| 5/14/12 |
2.5 |
1185.1 |
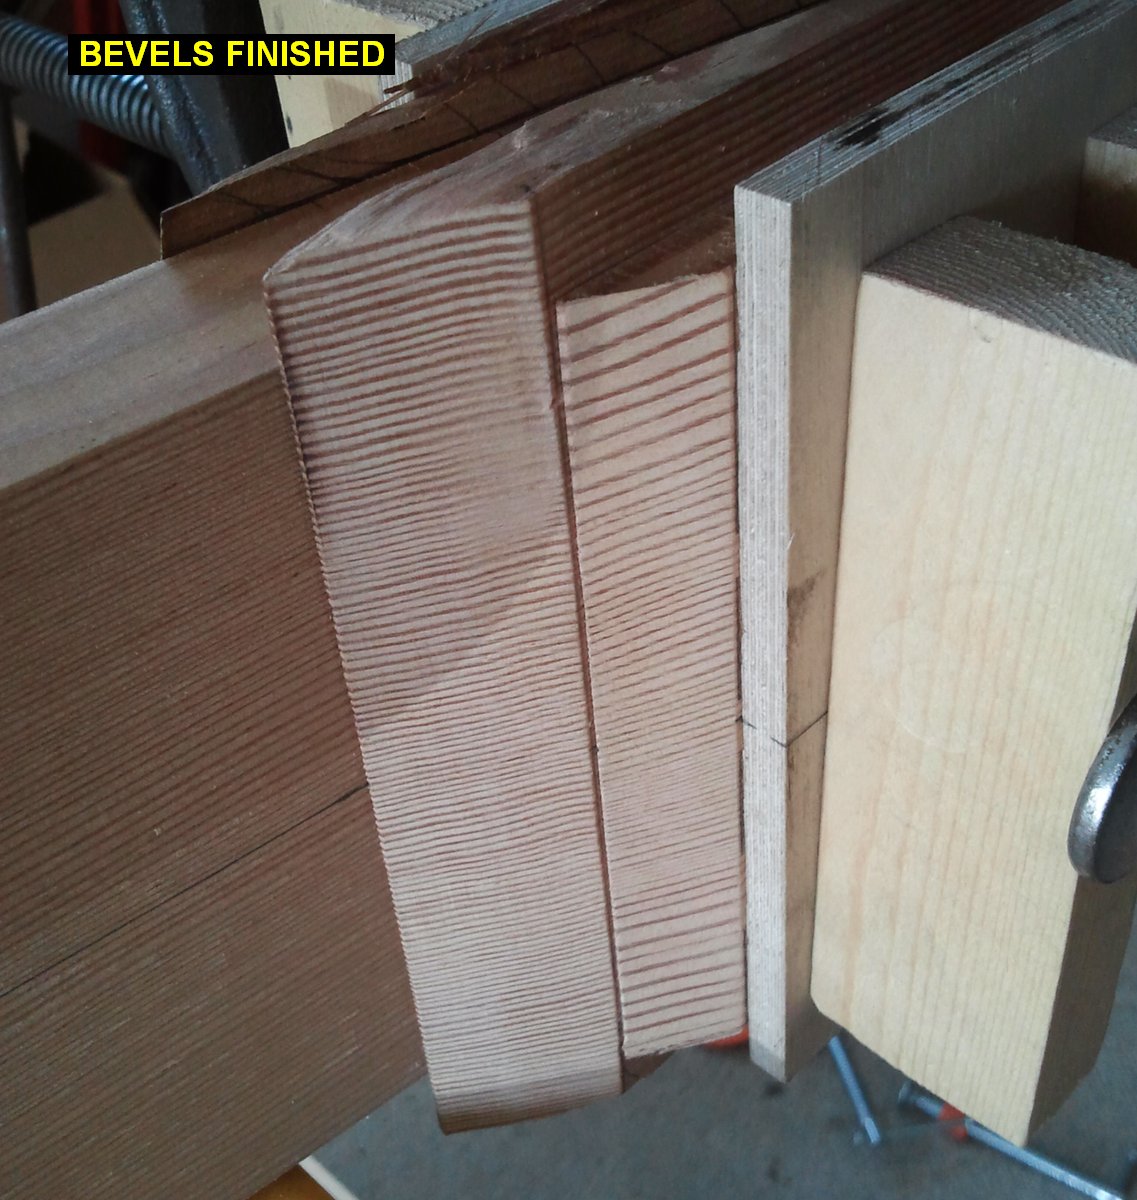
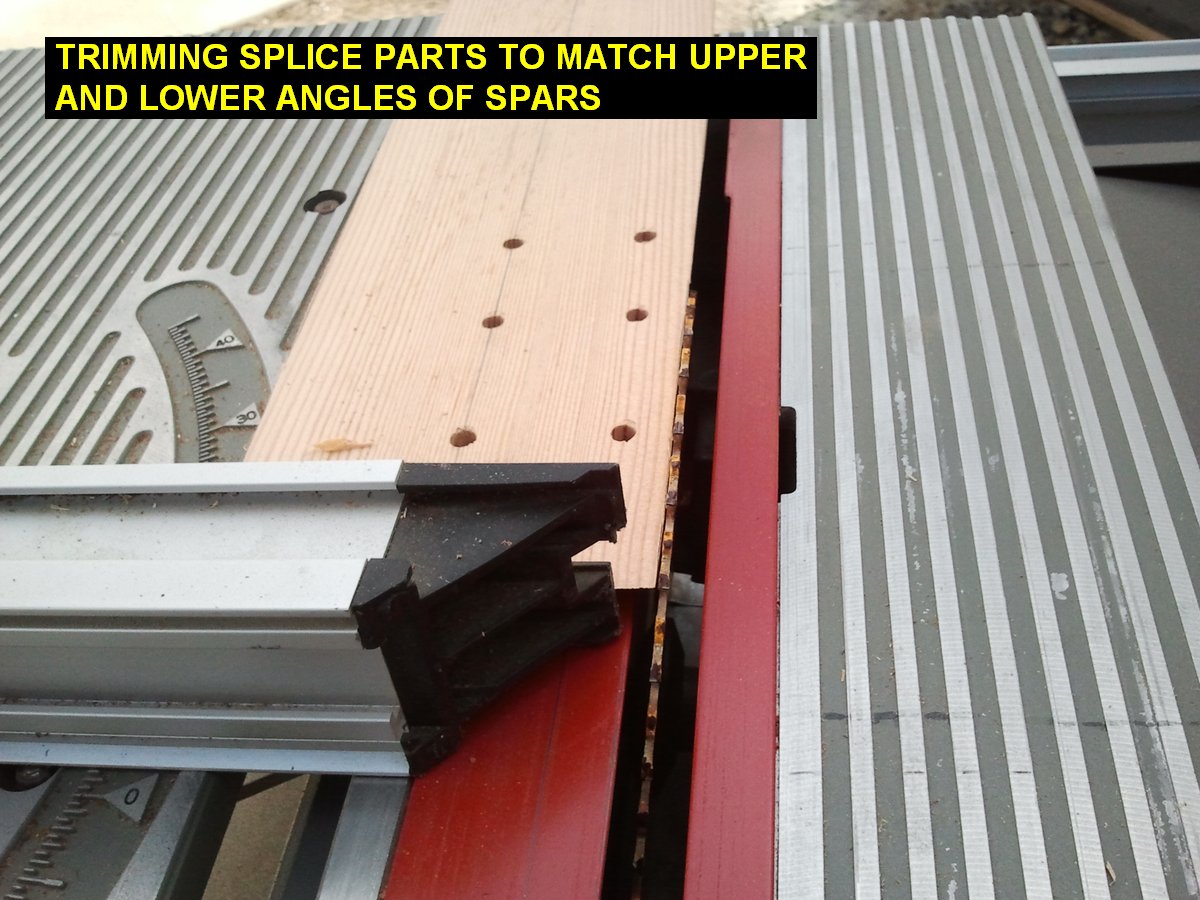
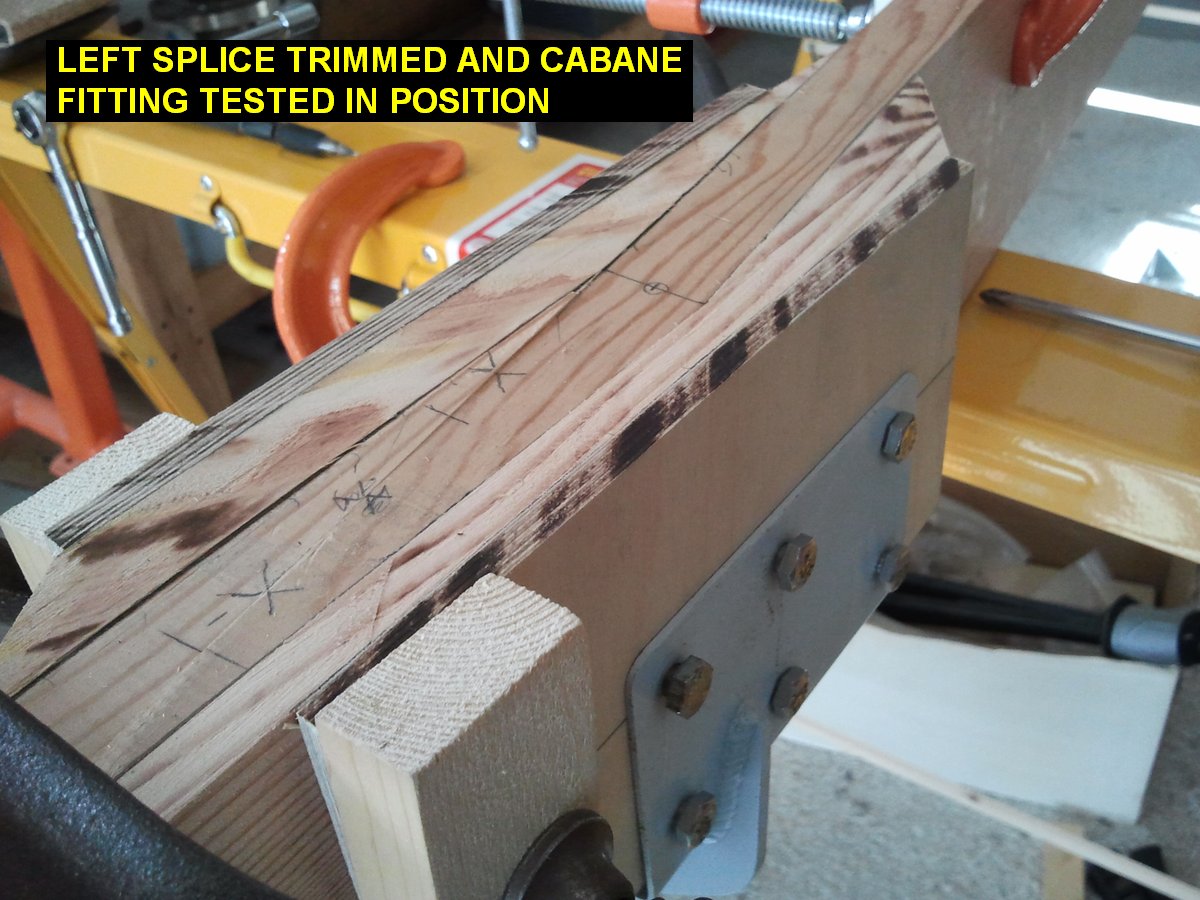
Cut the bevels on the wedge blocks etc and sanded them to final shape. Set my table saw at the
correct angle and started ripping the upper and lower edges of the joint parts to match the spar joint. I
got the left joint done and then test fit the cabane fitting there to see how it fits. It fits tight!
|
 |
 |
 |
 |
| 5/15/12 |
2.5 |
1187.6 |
Used my air powered die grinder with a carbide burr to reshape the wedge block bevels on the rear spar
joints. When the rear spar was glued up they were just beveled at 45 degrees. I also cleaned up section
on the rear spar where I had milled off the plywood crush plate. I used my hot air gun to soften the glue
a bit and most of it came up with a chisel. I then block sanded the rest of off.
|
 |
 |
 |
 |
| 5/16/12 |
0.8 |
1188.4 |
Finished ripping the upper and lower edges of the right spar joint parts to match the spar edges. |
 |
 |
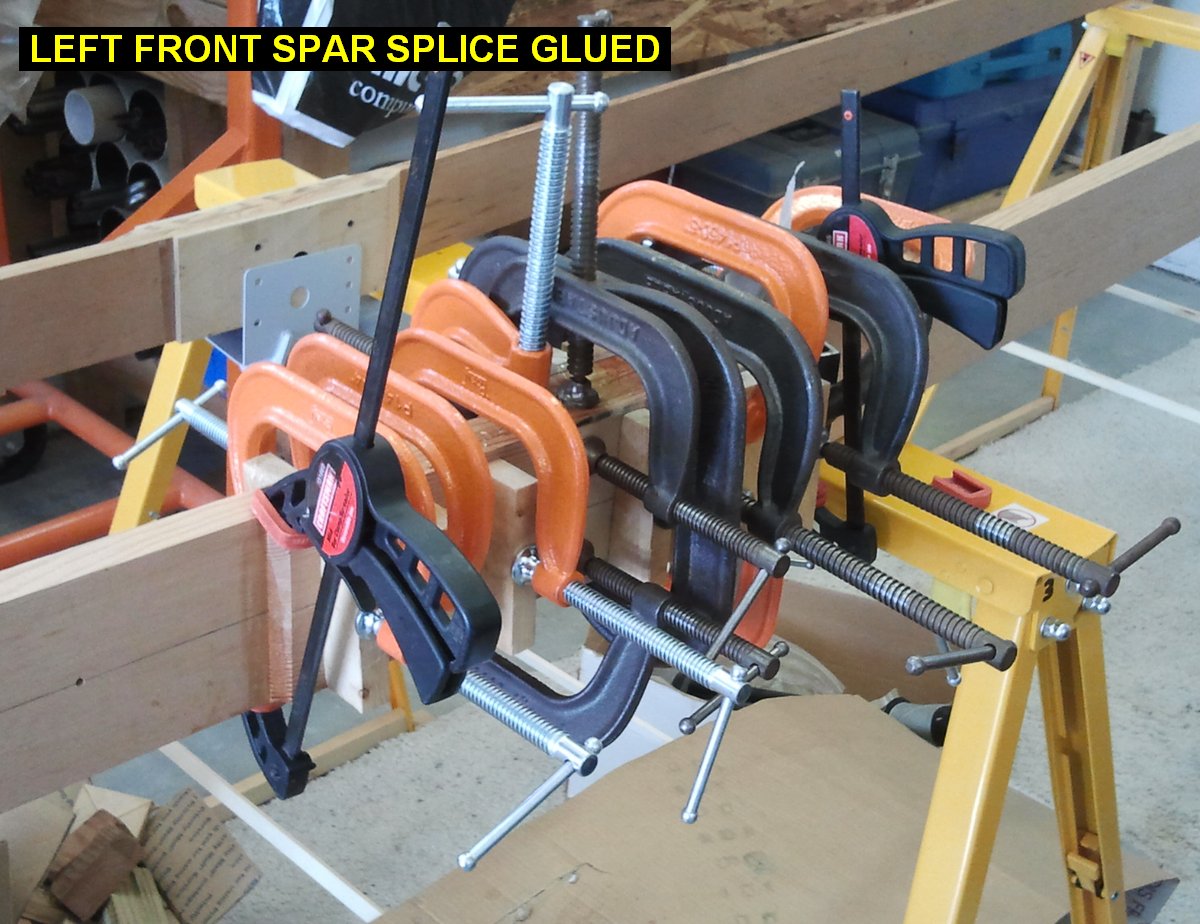
| 5/23/12 |
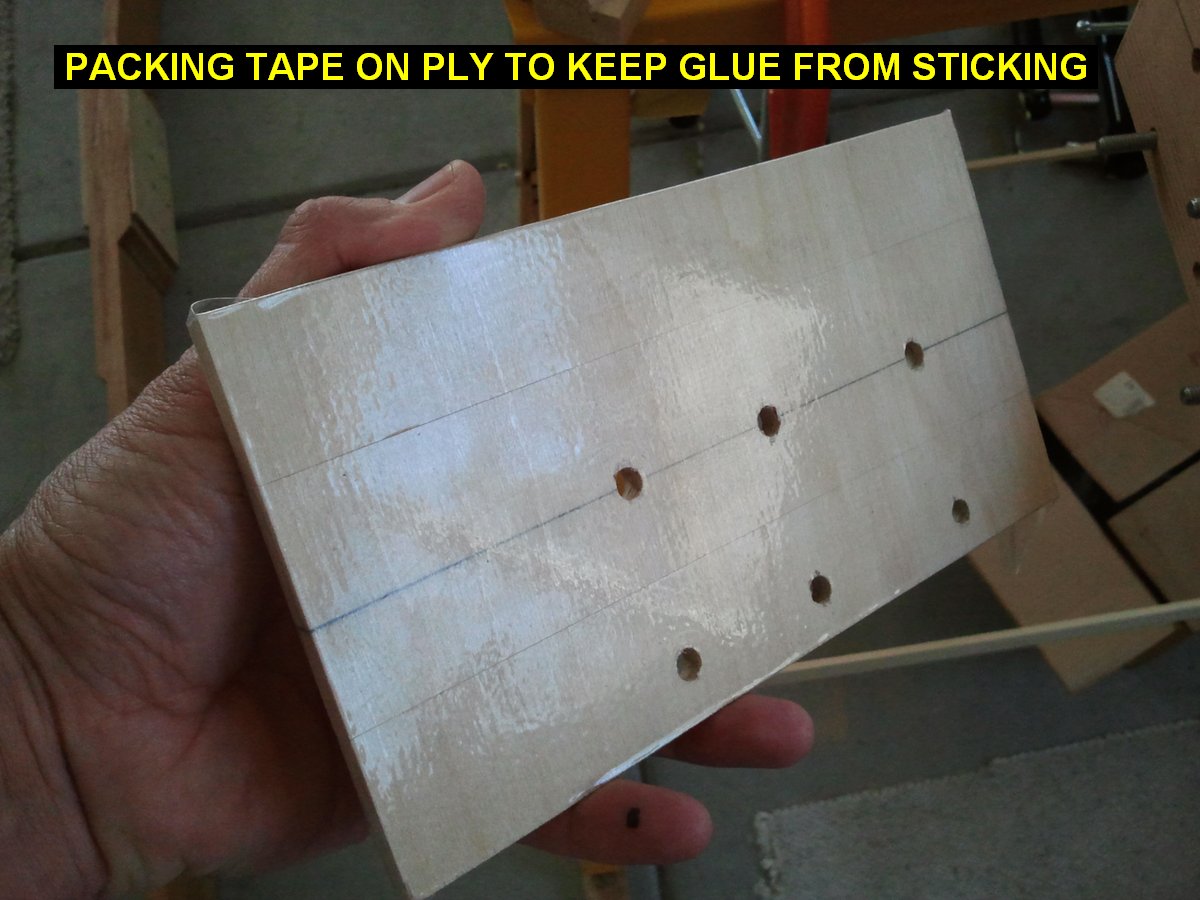
3.5 |
1191.9 |
Prep for gluing the right spar joint. Put packing tape on the -27 ply crush plates so they won't get
glued. Put a little grease on the six bolts then glued up the spar splice joint. |
 |
 |
 |
 |
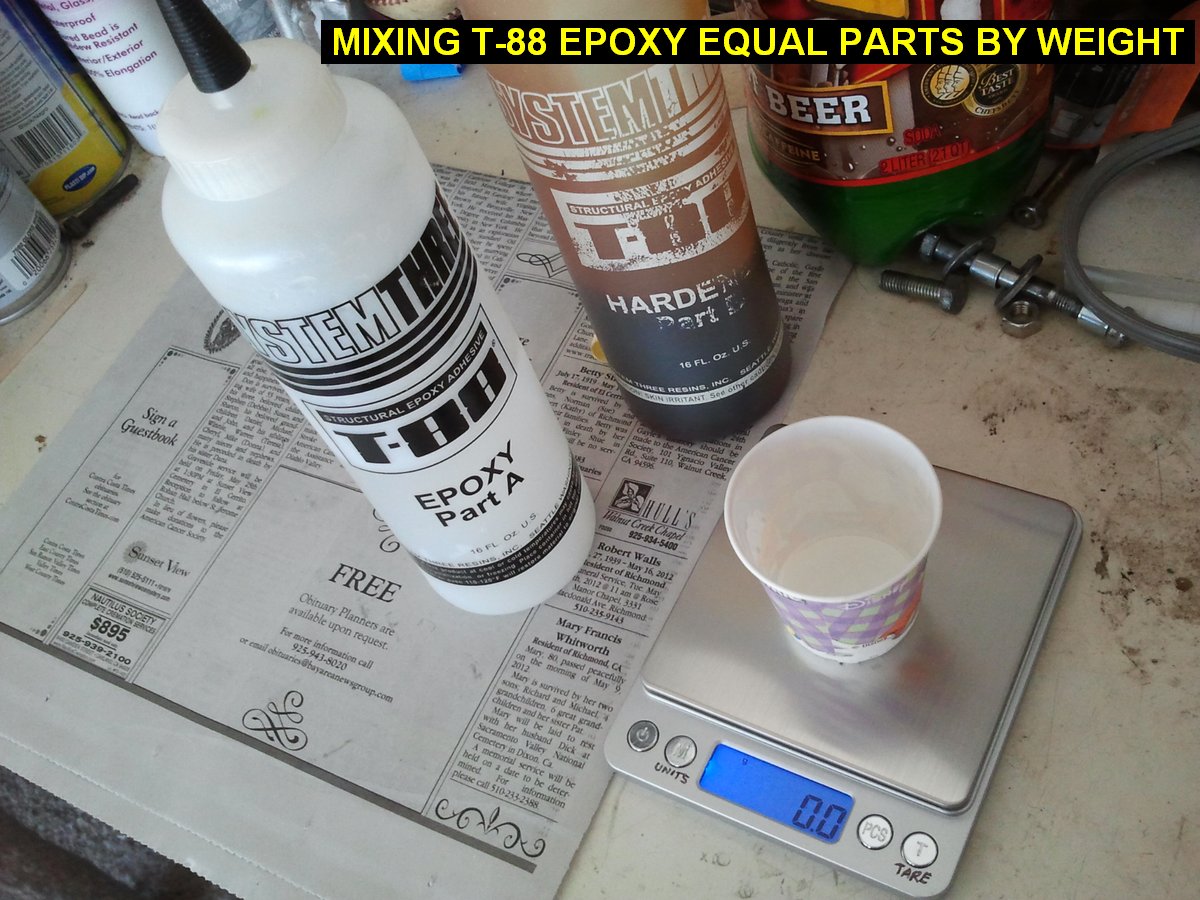
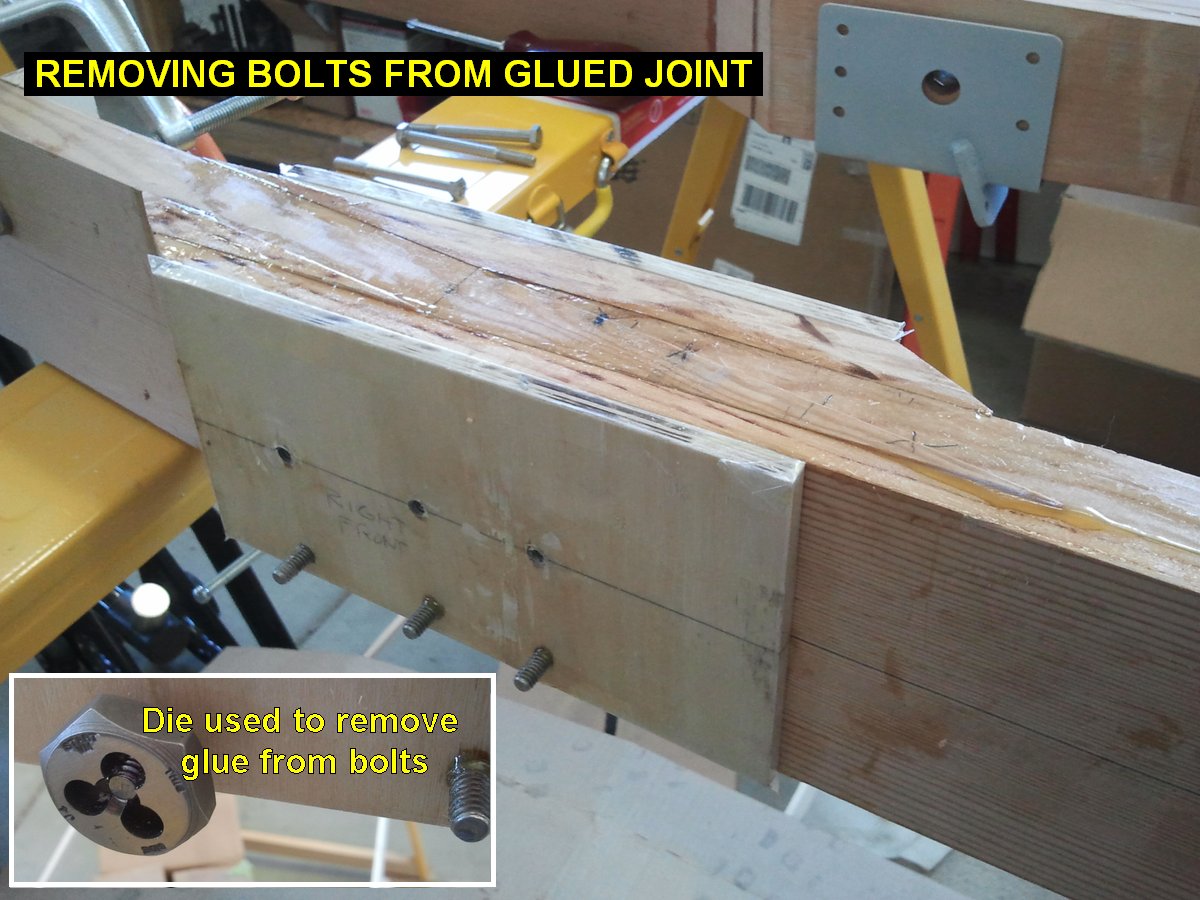
| 5/24/12 |
3.5 |
1195.4 |
Removed clamps from right joint and took out the bolts. I had to run a die over the ends of them to get the epoxy off
but it worked well and the bolts just spun out. I then mixed up another 60 grams of epoxy and glued up the left splice.
|
 |
 |
| July-Dec |
|
|
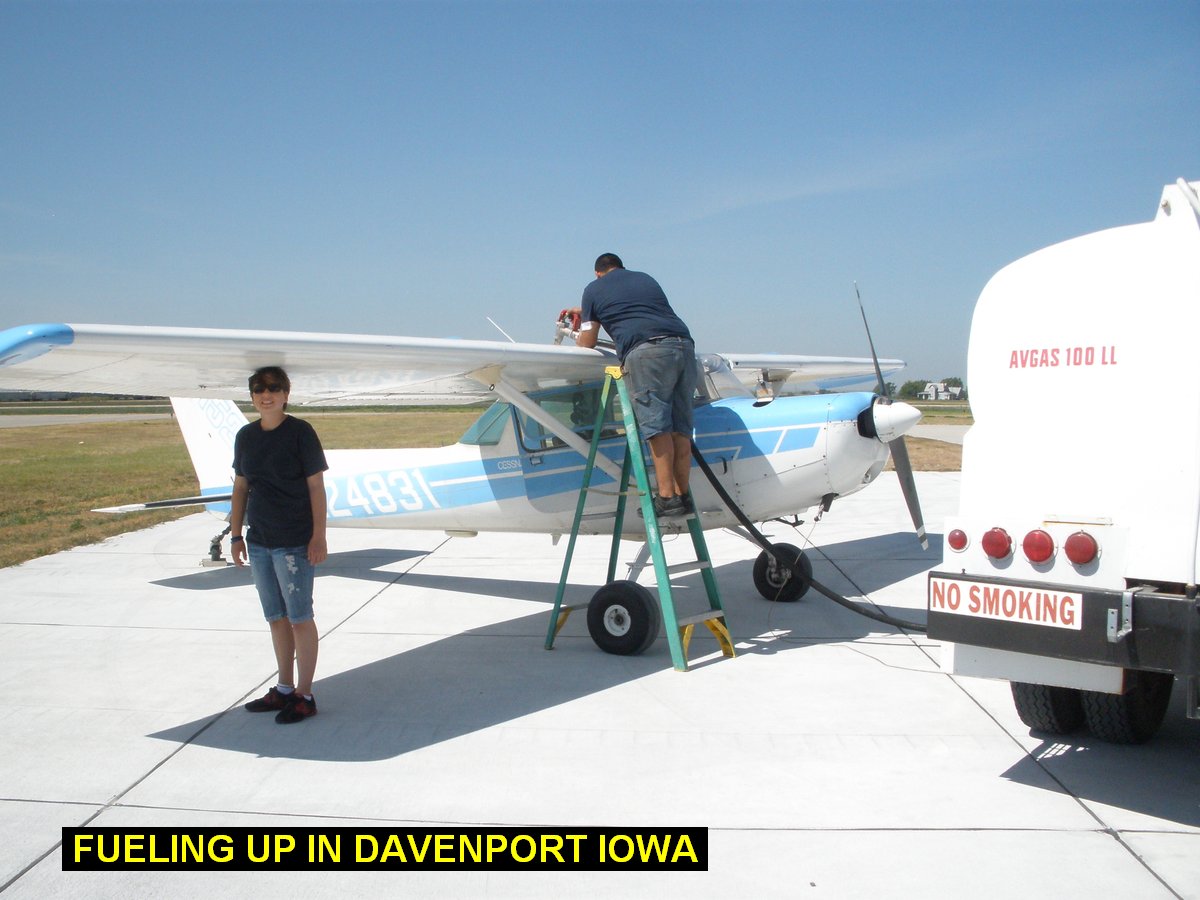
Bought a 1978 Cessna 152 Taildragger in July, and my daughter and I flew it home from Michigan. Teaching the kids how to fly it.
Did a pretty extensive annual on it at the end of the year, putting new Millenium cylinders on it, and overhauling everything else
fwf except the alternator. Thanks to Barrett Performance Engines for prepping the new
cylinders for me!
|
 |
 |
 |
 |
| QTR TOTAL |
19.1 |
|
|
2ND QTR 2012
|
•
•
•
|