|
2ND QTR 2004
|
 •
•
 •
•
 •
•

|
| DATE |
HRS |
TTD |
ACTION |
IMAGES |
| 04/01/04 |
2.5 |
743.3 |
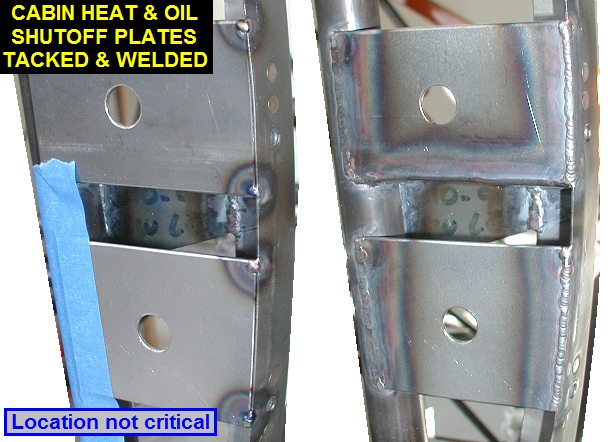
Made another handle plate out of
.063 4130 sheet, similar to the laser cut oil shutoff handle plate that
comes with Kimball's Laser Cut parts set. The additional plate will hold
the cabin heat handle. Welded them both on tube 210-9 below the fuel
handle. The oil shut off will use ACS A-700 (solid end) cable 7ft.
long with a red knob and the cabin heat will use the same with a black
knob. |
 |
 |
| 04/25/04 |
2.1 |
745.4 |
Wow I haven't worked on it for
25 days, how'd that happen?! Anyway, I'm back from SNF where I bought most
of the stuff I need for the instruments and radios, so I haven't been
totally away from it. I also picked up my cables swaged by Kimballs and
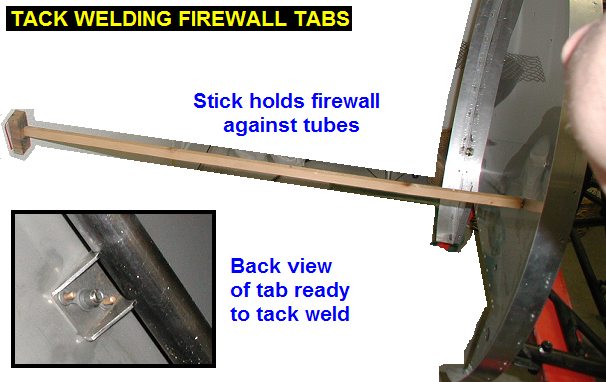
also my airtank & valve plate that goes on the firewall. Today, I got
out the air tank tabs and oil tank tabs and countersunk the holes for
10-32 nutplates. Tack welded the 4 air tank tabs on the front diagonal
tubes using the firewall as a guide. |
 |
 |
 |
| 04/26/04 |
1.0 |
745.4 |
Did some planning for the
location of my fire extinguisher system. I'm planning on installing a 5lb
Halon bottle and a 7lb Fireade (water/foam AFFF) bottle. I'll probably put
the AFFF bottle under the rear seat and the halon under the air tank on
the firewall, or maybe both bottles under the seat. Total fire
extinguisher systems weight is 15 lb. |
 |
| 04/28/04 |
2.4 |
748.8 |
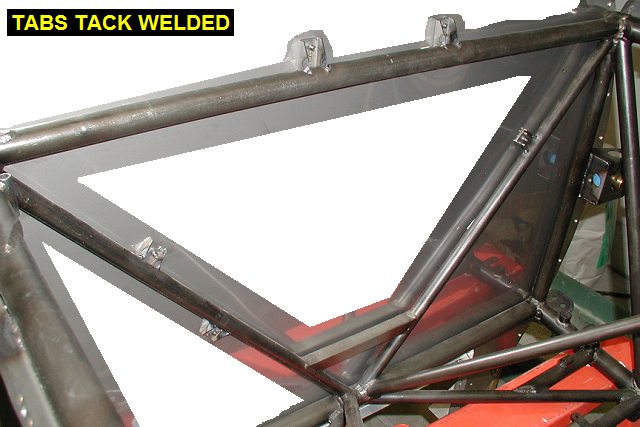
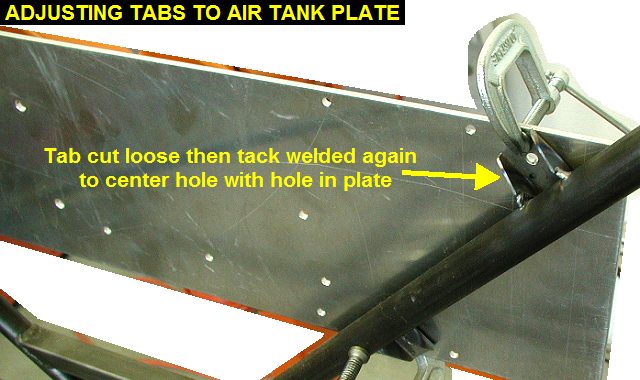
Discovered that while the
firewall had located the tabs in the right spot, they were off angle just
a little. So I cut them loose and retacked them one by one using the
aluminum plate used to hold the air bottle and valves. I then welded them
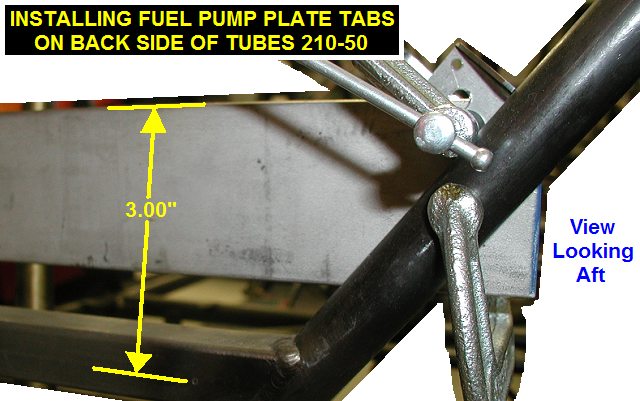
up. After that I located and welded in the 2 rear facing tabs for the fuel
pump/gascolator plate. |
 |
 |
| 05/06/04 |
1.5 |
750.3 |
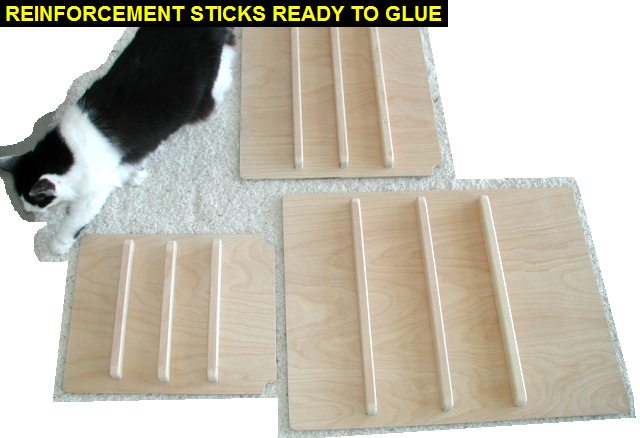
Started work on the wood seats.
I'm going to use 1/4" Birch 7 ply and 3/4" x 1" spruce
reinforcement sticks. Today I measured and cut out the basic rectangular
shapes on the table saw. Next I will trim them to fit like the seats shown
on my Kimball
Visit 3b fuselage image page. |
 |
| 05/07/04 |
1.0 |
751.3 |
Trimmed and sanded to fit all
the seat boards except the front seat back at the top. I still need to
make room for the shoulder harnesses. See
Picture |
| 05/14/04 |
1.6 |
752.9 |
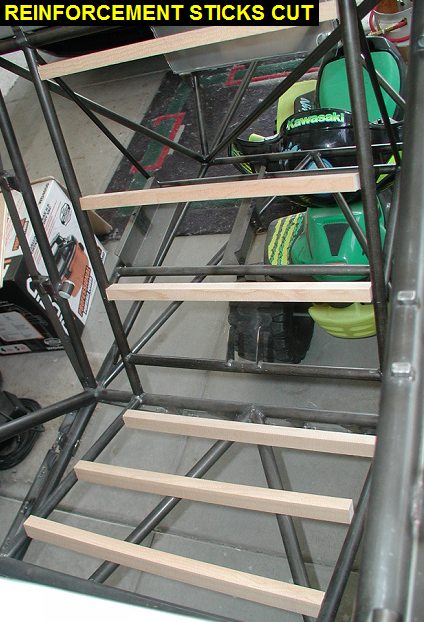
Measured and cut 9 reinforcement
sticks for the two seat bottoms and the rear seat back. |
 |
| 05/26/04 |
2.5 |
755.4 |
Rounded the corners of the
sticks on the sanding wheel, then used my router table to cut radius edges
into the sticks. Used some sand paper to fine sand the surfaces that won't
get glued. Measured and marked centerlines of the seatboards and sticks,
then figured out their spacing on the seat boards. I then put pencil lines
on both sides of the seat boards so I could know where to shoot staples
in. Glued and stapled the sticks onto the seat boards with T-88. |
 |
 |
| 06/07/04 |
1.5 |
756.9 |
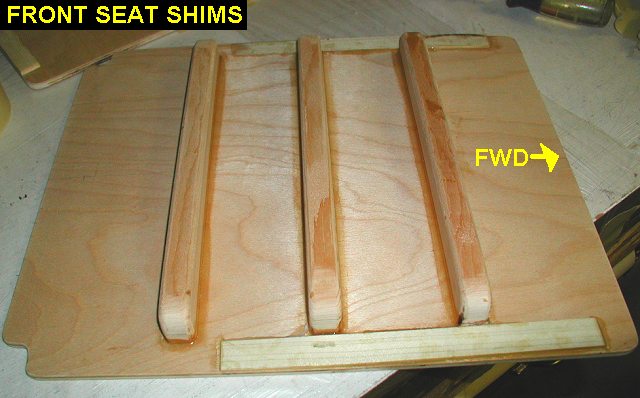
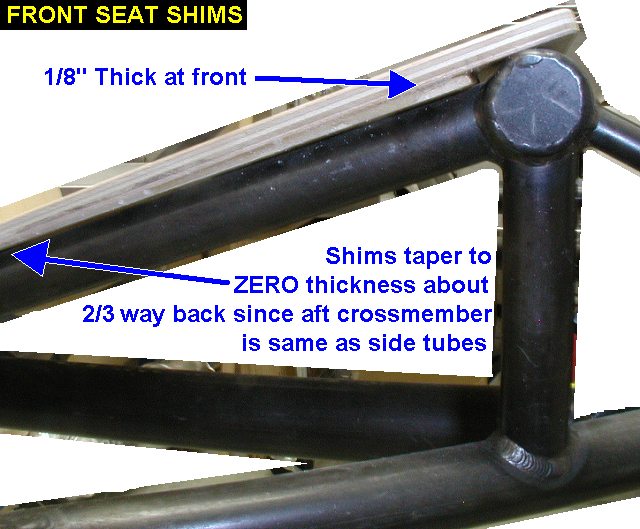
I noticed that the seat boards
don't sit flat on the side tubes because they are 3/4" while the
front seat crossmember is 1" diameter. This isn't a problem at the
rear of the seat because the crossmember is smaller at the rear of the
seats, 7/8 for the rear seat, and 3/4" for my modified front seat. To
allow the seat boards to sit flat on the tubes, I cut some thin tapered
shims out of some scrap poplar and glued them to the front seat sides. |
 |
 |
| 06/12/04 |
0.7 |
757.6 |
I glued shims on the sides of
the rear seat board to allow it to sit flat. |
 |
| QTR TOTAL |
16.8 |
|
|
2ND QTR 2004
|
•
•
•
|


