|
3RD QTR 2004
|
 •
•
 •
•
 •
•

|
| DATE |
HRS |
TTD |
ACTION |
IMAGES |
| 08/13/04 |
1.0 |
758.6 |
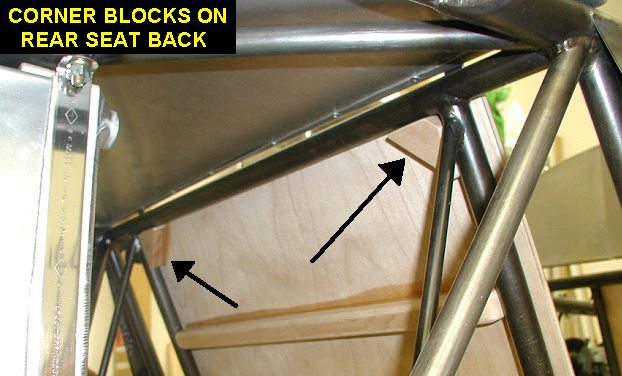
Cut four corner blocks out of
some 3/4 x 1" spruce. I glued them into the upper corners of the rear
seat back tubes and forward corners of the rear seat bottom. The corner
blocks will lock the seat boards in and keep them from sliding. |
 |
 |
| 09/03/04 |
2.0 |
760.6 |
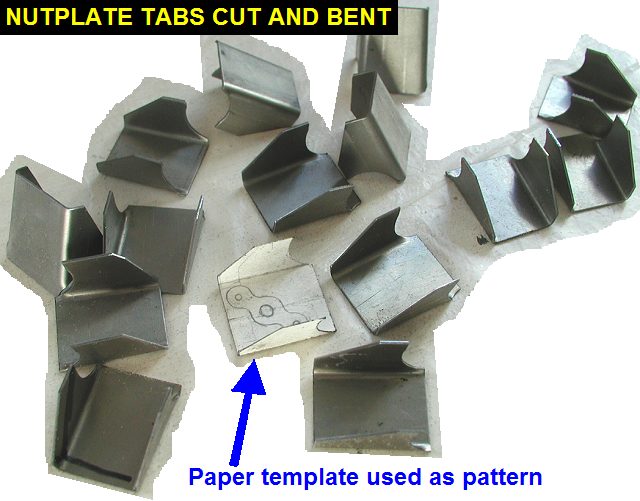
Went over to Kens and made some
more 210-83 brackets to weld on the seat tubes to hold the front seat
boards. I used .035 thick 4130 sheet and a paper template that I cut to
fit the 3/4" seat tubes. I then used Ken's shear, punch press and
corner notcher to cut each tab to the flat pattern. After that Ken bent
them up for me on his power brake. Thanks Ken! Two hours at your shop
saved me a few days at home cutting those things out with hand shears and
beating on them in the vise. |
 |
| 09/09/04 |
1.8 |
762.4 |
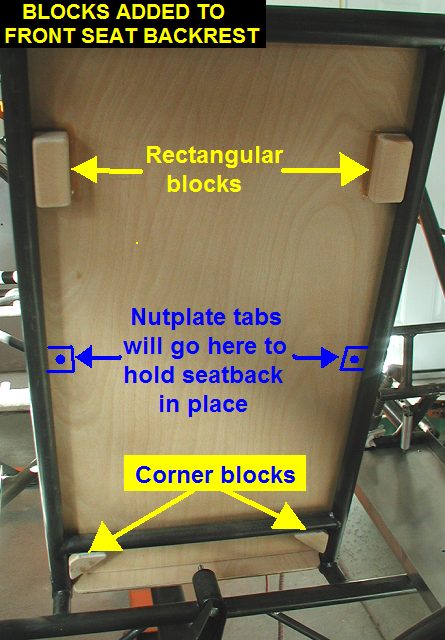
Cut and shaped four corner
blocks and 2 rectangular 3/4 x 1" spruce blocks for the front seat
boards. I glued and stapled two corner blocks at the front of the seat
bottom. I also put two corner blocks on the bottom of the seat back and
two rectangular blocks in about 3/4 up the seat back. I couldn't put
corner blocks in at top since shoulder harnesses will go through there. |
 |
 |
| 09/15/04 |
1.6 |
764.0 |
Removed turtle deck. Welded in
the rear shoulder harness plates (See
example) at FS135. It was tough getting in close enough to do
the welding, there's a bunch of tubes there all close together! |
 |
| 09/17/04 |
2.1 |
766.1 |
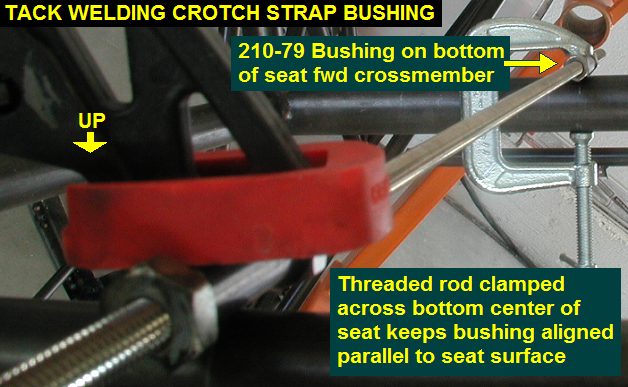
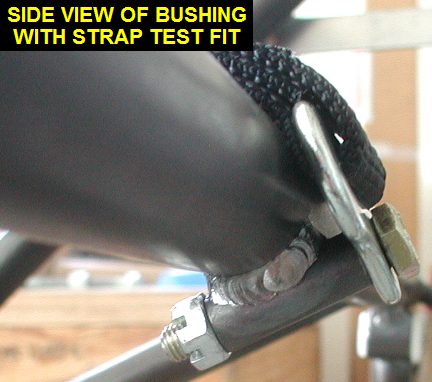
Used a length of 1/4
threaded rod to locate the 210-79 (3/8x.058x1) bushings that will hold the
crotch straps of the harnesses. I marked the centerline of the tubes and
then clamped the rod with two bushings across the bottom of the seat
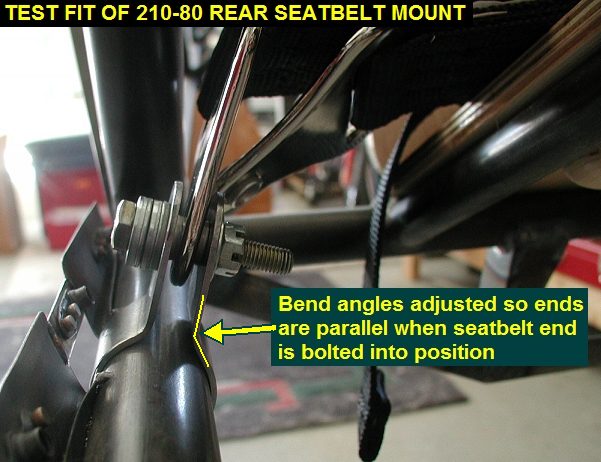
tubes. After welding them in, I turned to the 210-80 rear seat belt clamps
that go on the longeron. After test fitting them I discovered that the
angles weren't bent enough because the ends came together towards a point
when brought close enough together to hold the belt end. A little hammer
and vise work on them got them looking good when the belt end was
tightened up. |
 |
 |
 |
 |
| 09/22/04 |
2.6 |
766.7 |
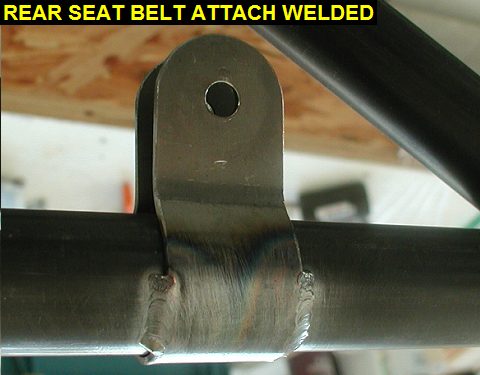
Sat in the rear seat
with various height pads to simulate different seat cushions and parachute
thickness, and determined what angle to set the 210-80 rear seatbelt
clamps at. The belt fittings ride on a bushing that gets squeezed in the
mount, so they can rotate and change angle some. It's pretty easy to
figure out a good place to put them. I then skip welded them in. See example.
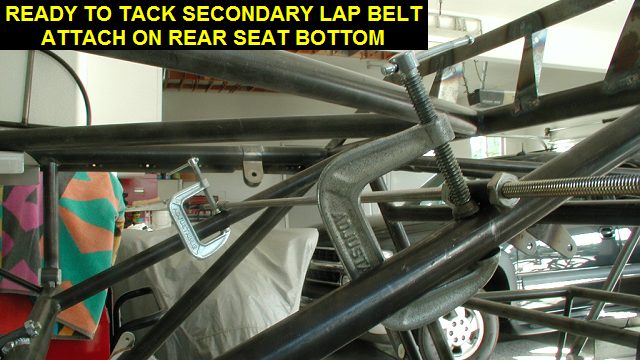
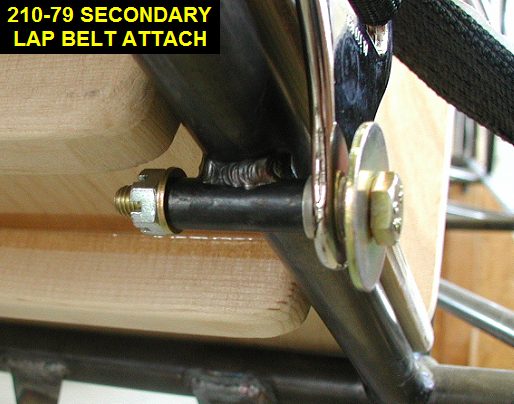
Next I located and welded in the 210-79 secondary lap belt attach
bushings. They got mounted about 6.95" up from the crossmember like
Kevin does on the HP fuselages. See drawing. |
 |
 |
 |
 |
| 09/30/04 |
2.0 |
768.7 |
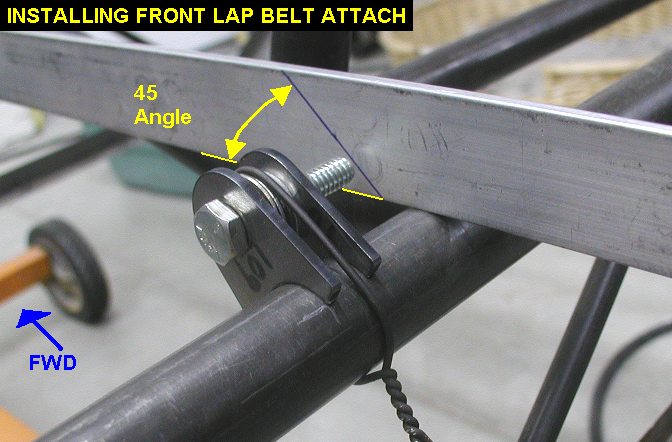
Tacked and then welded the
210-109 front seat harness attach plates on the 210-29 crossmember. They
were clamped together with a .31 gap using a bolt and some washers. I then
tightened up some wire around the crossmember and the bolt to hold them to
the tube for tack welding. The C/L of the attach plate assembly gets
welded 2.00 inches outboard of the seat tube C/L where it hits the 210-29
crossmember and at a 45° angle. See drawing. |
 |
 |
| QTR TOTAL |
13.1 |
|
|
3RD QTR 2004
|
•
•
•
|


