|
2ND QTR 2003
|
 •
•
 •
•
 •
•

|
| DATE |
HRS |
TTD |
ACTION |
IMAGES |
| 04/10/03 |
1.8 |
610.7 |
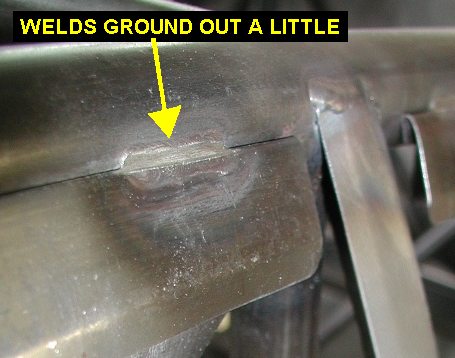
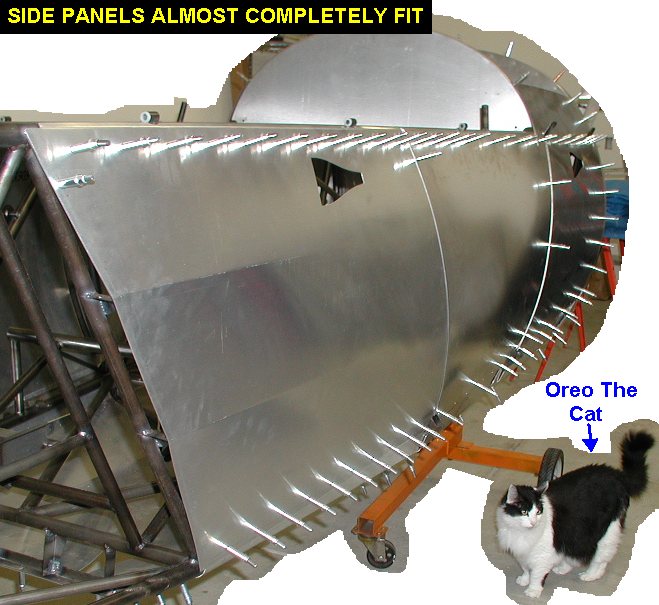
Removed windshield, canopy and
some sheet metal so I start fitting the L2 & R2 panels. Turns out I
had welded the screw angle strips on the top longeron with them sticking
out too much, so rather than bend them down and have the weld stay
sticking out I ground out the welds a bit so they bend easy. Then
I'll redo the welds after I get the panels fit. From now on I'm just going
to tack the strips on until the panels set the permanent angles for
welding. Did some fitting of the panels, they are longer than needed, so I
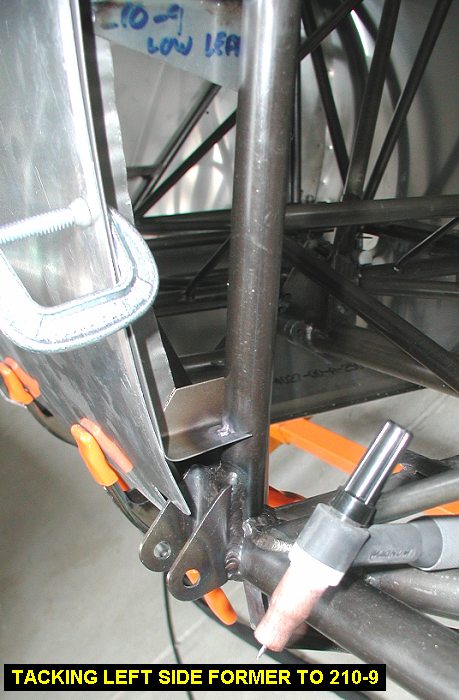
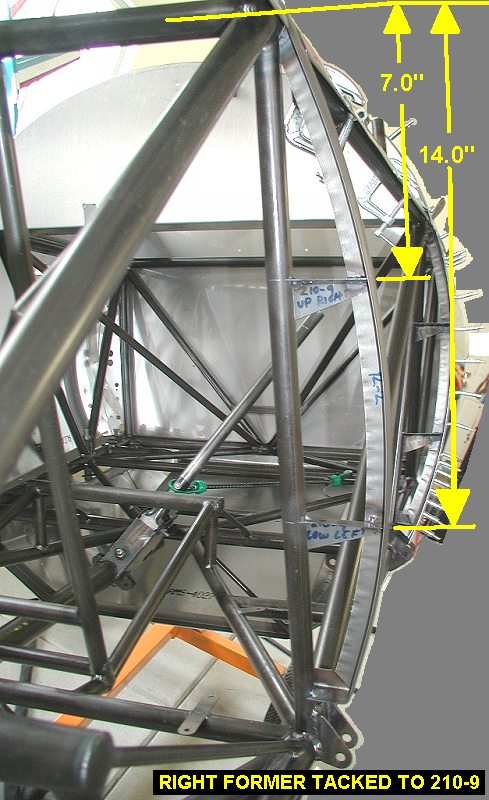
will trim the front edge later. Fit and tack welded the formers on the
210-9 tubes. |
 |
 |
 |
| 04/11/03 |
2.0 |
612.7 |
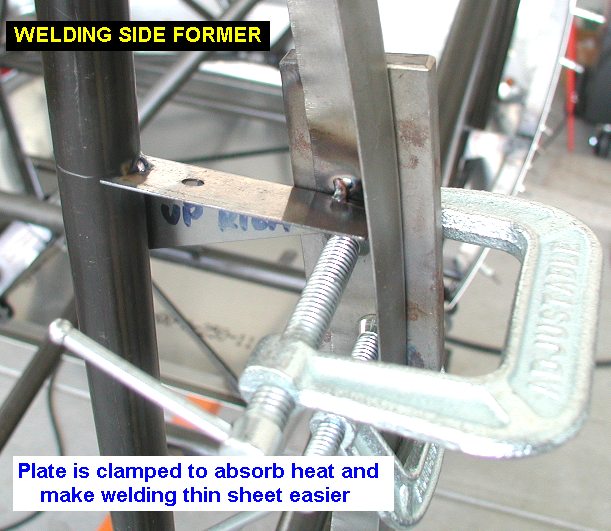
Welded up the formers at the
210-9 tubes. I discovered that clamping a scrap of 1/8" thick
steel behind the thin former metal keeps it from melting away as easily
during welding with less "sugared" looking metal on the backside
of the weld. |
 |
| 04/12/03 |
1.8 |
614.5 |
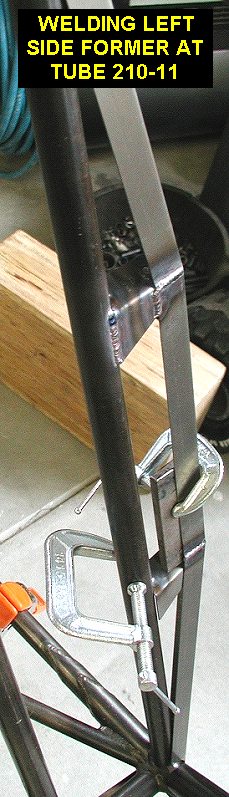
Cut a short little piece of
stringer stock. Temporarily clamped the #3 panels in place to determine
the proper height to locate the standoffs so the stringer centerlines will
line up with the breaks in the aft end of the panels. Located and tack
welded the standoffs for the formers on tube 210-11 in. Then Tack welded
the formers in themselves. |
 |
 |
| 04/16/03 |
1.7 |
616.2 |
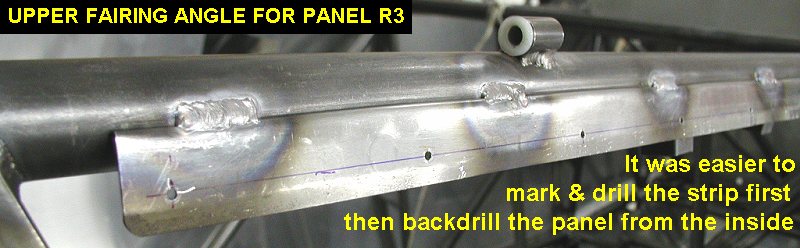
Used the dremel cutoff wheel to
take off the welds holding the upper fairing angles to the top longerons
at the rear cockpit. They were too high on the longeron, causing the sheet
metal to ride too far off the longeron. I welded them on a little lower
which is a better position to hold the side panels. |
| 04/18/03 |
0.7 |
616.9 |
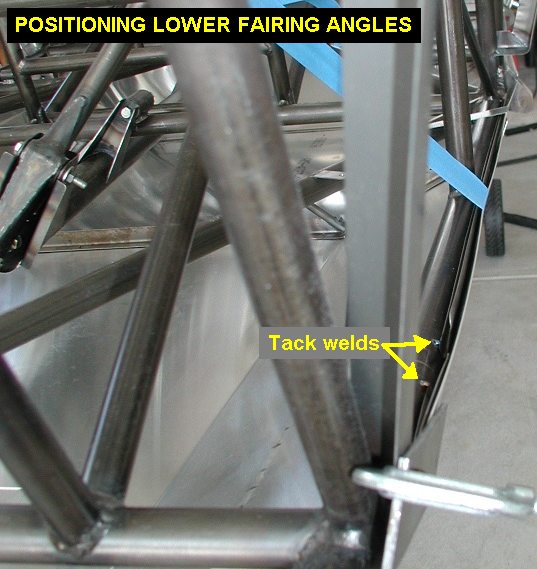
Fit the lower fairing angles
with the bottom sheet metal in place to get an idea what angle to put them
at. Then I put tiny tack welds in to hold them. |
 |
 |
| 04/22/03 |
2.4 |
619.3 |
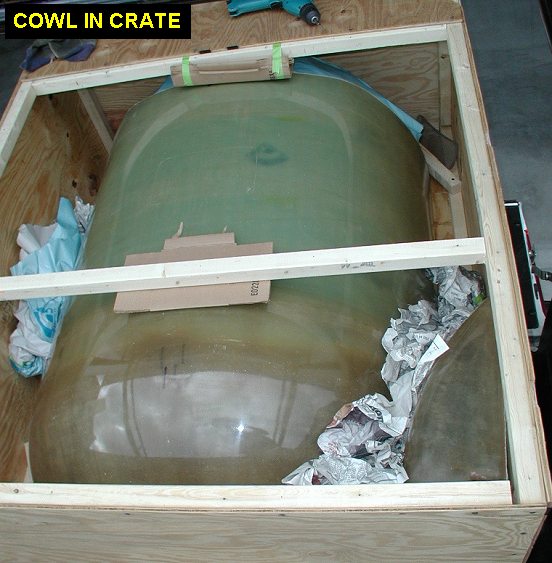
In the afternoon my Dad came by
with my cowl which was on top his GEO Tracker for the ride home behind his
motorhome from Florida. I couldn't figure out how to get it in the cockpit
of my 757, so thanks Mom and Dad for traveling with a small casket on the
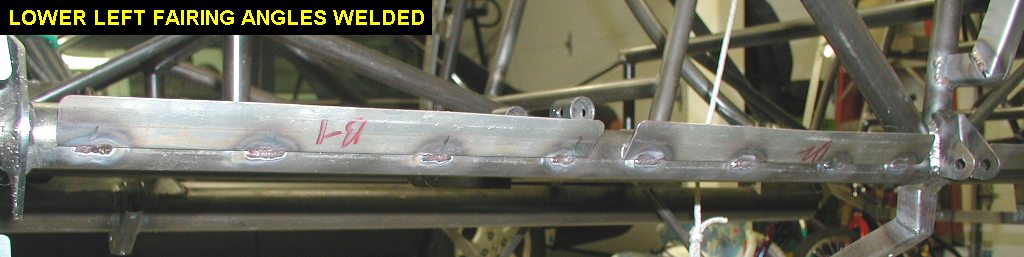
roof again! Last year it was the canopy box. Anyway, that night I tacked
the lower fairing angles on from FS 24.9 aft. After adjusting the angles,
I then finish welded them. One thing I learned is that they increase angle
away from the longeron as you do the welds. SO, make them lay about 3-4
degrees flatter than desired, then they should suck up into the proper
position as you weld them. |
 |
 |
| 04/24/03 |
2.0 |
621.3 |
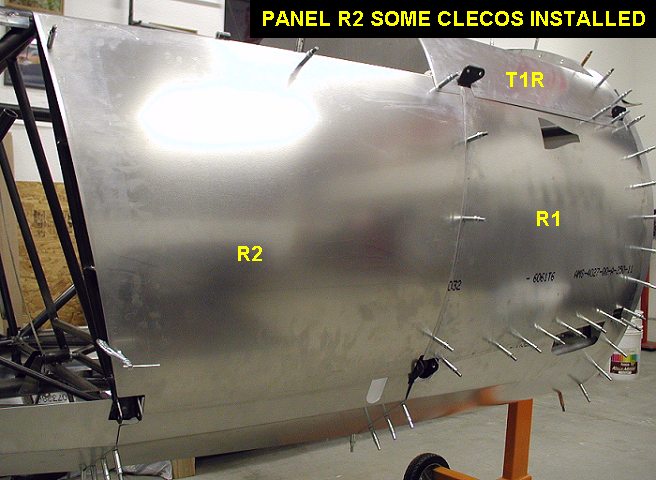
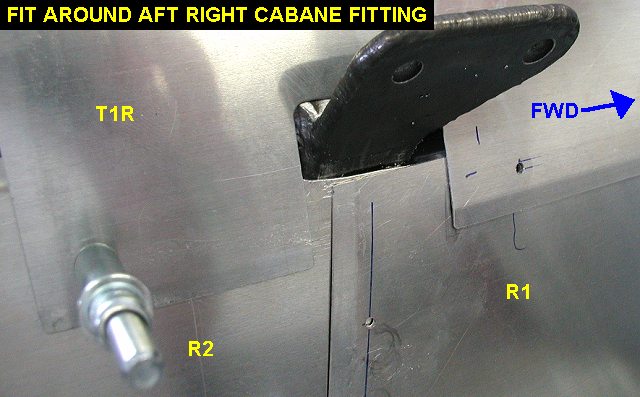
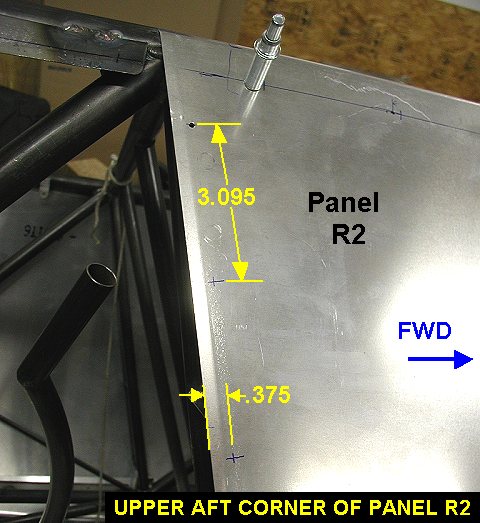
Adjusted the angles on the lower
fairing angles. Did a little more fitting work to panels L2 and R2 near
the upper forward corners where they meet the aft cabane fittings.located
and got some clecos into panel R2. |
 |
 |
| 04/26/03 |
2.2 |
623.5 |
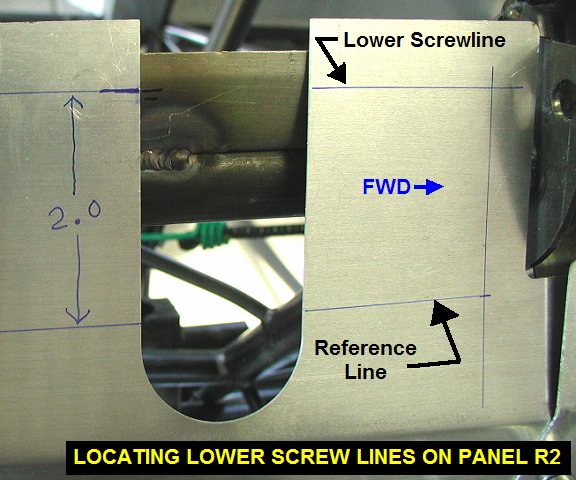
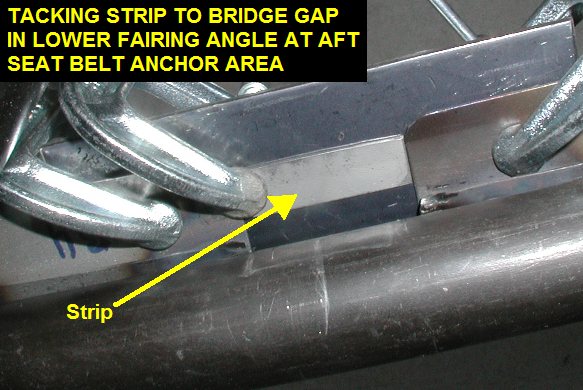
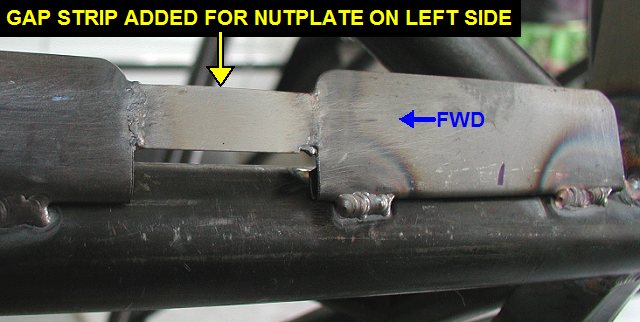
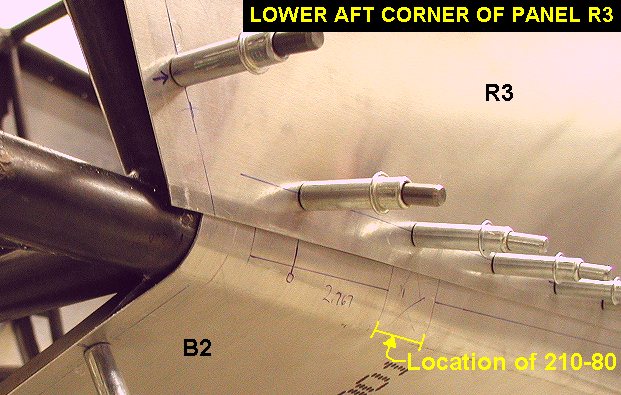
Removed panel R2 and
did some layout work for placing the bottom screwlines for panels R2 and
R3. I first determined where on B2 and B3 the screwlines should be then I
drew reference lines below the screwlines. The idea is to then put R2 and
R3 in place, which covers up the screwline but not the reference line.
Then I'll just measure up from the reference lines to re-establish the
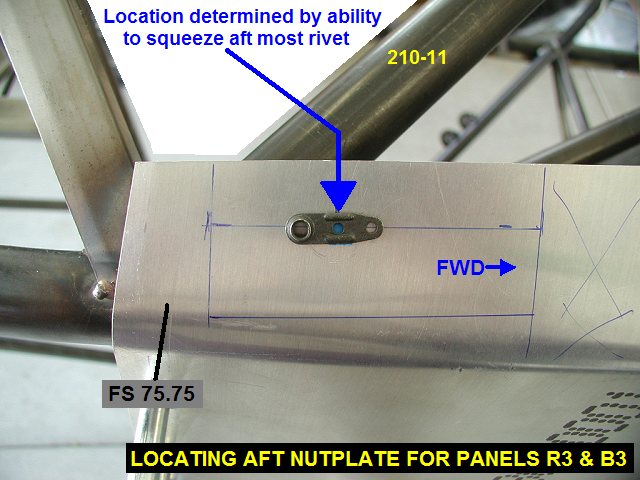
screwline on R2 and R3. I then figured out how close I could squeeze a
rivet for the nutplate I'll install at the aft most bottom position of R3.
Then I discovered that I would like to put a screw right in the gap where
the 210-80 rear seatbelt clamp is. So I cut a small strip of sheet and
welded it across the gap so I can install a nutplate, but still get the
clamp in and welded. Otherwise I'd have an uneven spacing of screws there. |
 |
 |
 |
 |
| 05/05/03 |
4.5 |
626.5 |
Laid out screwlines, drilled and
clecoed most of remaining panels R2, R3, L2 & L3. Ran out of air
in compressor after kids went to bed and didn't want to wake them up
running it. |
 |
 |
 |
| 05/06/03 |
1.8 |
626.5 |
Finished installing clecos in
aft edges of panels L3 and R3. Had to use an uneven spacing of screws to
make it look right with the three angled faces of the panel on the aft
edge. Yea!!! Now all sheet metal is fitted. All I have to do is install
nutplates. I've decided to install nutplates, even with the extra weight
and installation fun, for the following reasons: they look better, I can't
strip the threads as easy, they can be replaced and it reduces the types
of screws needed to two. |
 |
 |
 |
| 05/07/03 |
1.5 |
628.0 |
Drilled out the cowl ring holes
first to 1/8 then 5/32 and installed black clecos. |
| 05/08/03 |
3.5 |
631.5 |
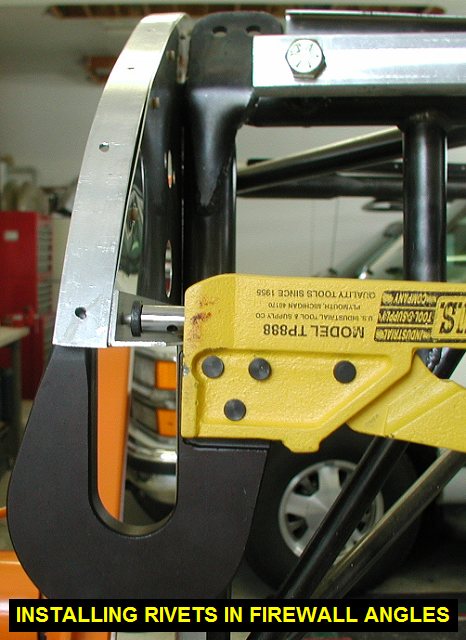
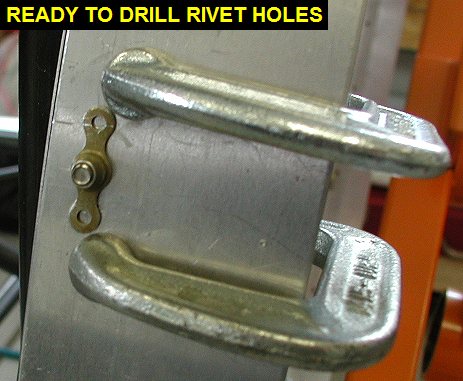
Removed front sheet
metal panels and cowl ring. Installed 1/8 rivets in the short angle strips
on the tunnel area that I had moved outward earlier
on 02/16/03. Deburred holes in cowl ring and firewall angle so they
can mate together tightly. Reinstalled cowl ring on firewall with black
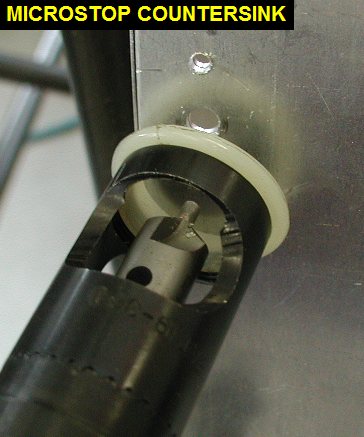
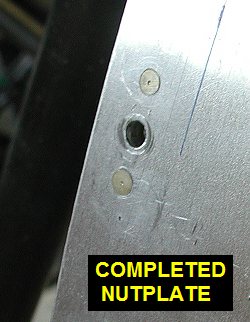
clecos and installed eight MS21047-08 plain nutplates. Basic procedure
used: 1) Put 2 c-clamps either side of cleco to squeeze cowl ring and
firewall angle tight with no gap for drill chips to get in between. 2)
Remove cleco and drill screw hole 11/64. 3) Remove clamps, deburr, then
use an 8-32 screw to install nutplate on OUTSIDE of cowl ring. 4) Put
c-clamps on both sides, next to nutplate legs to eliminate gap between
cowl ring and angle. 5) Drill #40 rivet holes STRAIGHT through nutplate
legs. 6) Remove nutplate and clamps then debur & countersink the rivet
holes. 7) Install nutplate in proper position tight with screw and rivets
keeping holes aligned. 8) Squeeze the AN426AD-3-5 rivets and remove the
screw. |
 |
 |
 |
 |
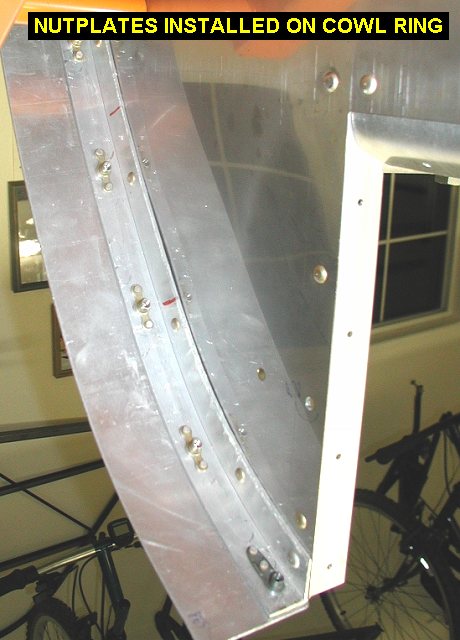
| 05/10/03 |
3.0 |
634.5 |
Installed nutplates on the cowl
ring. Had to take fuselage off the rotating stand to get to the ones in
the corners. Still have 10 left to go. |
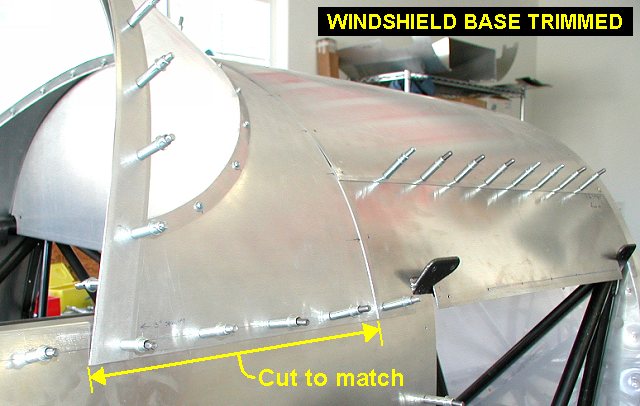
| 05/11/03 |
2.2 |
636.7 |
Installed remaining nutplates on
the cowl ring. Trimmed windshield base and closure strip bottom edges to
match T1L and T1R bottom edges. |
 |
 |
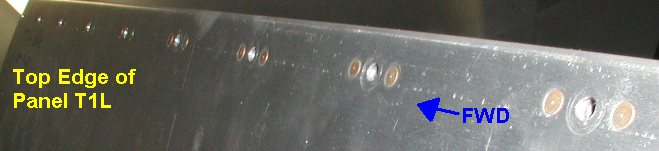
| 05/13/03 |
1.8 |
638.5 |
Installed MS21047-L08K nutplates
with DIMPLED rivet holes on the T1L & T1R panels where they screw to
the T1C panel. Drilled all holes out to 11/64 then 3/16. I used an Avery
tools 3/32 springback dimple die set. I've decided to use these nutplates
wherever possible because dimpling is WAY FASTER than countersinking. |
 |
| 05/15/03 |
3.2 |
641.7 |
Installed nutplates on the
Forward instrument panel top edge where it holds the aft edge of T1C and
the windshield base. |
 |
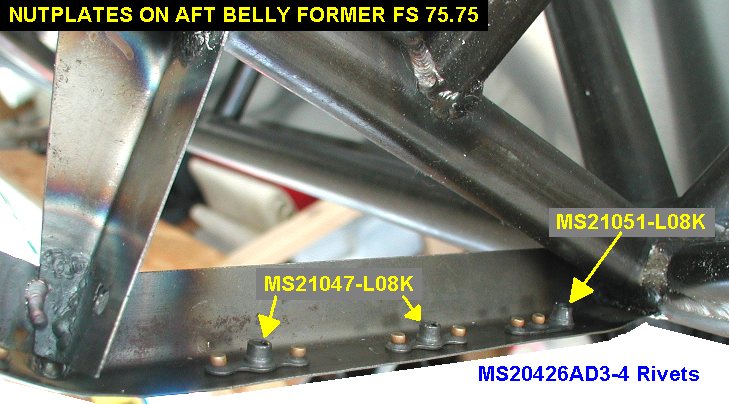
| 05/19/03 |
2.4 |
644.1 |
Installed nutplates on the 2 aft
most belly formers at FS 48 & FS 75.75. The dimple dies worked well on
the 4130 Annealed former material by the way. I had to use some
MS21051-L08K one-sided nutplates in some tight spots. |
 |
 |
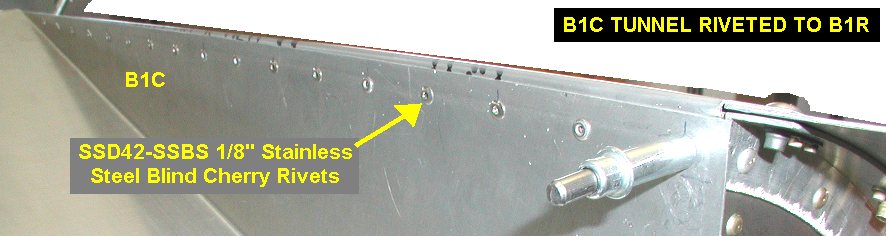
| 05/20/03 |
1.5 |
645.6 |
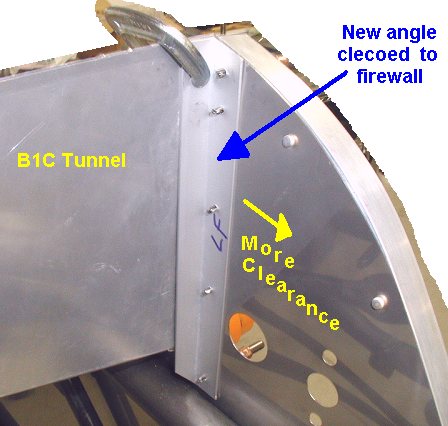
Installed 1/8 blind stainless
steel rivets (SSD42 -SSBS) to hold the B1C tunnel to the two B1L & R
side panels. |
 |
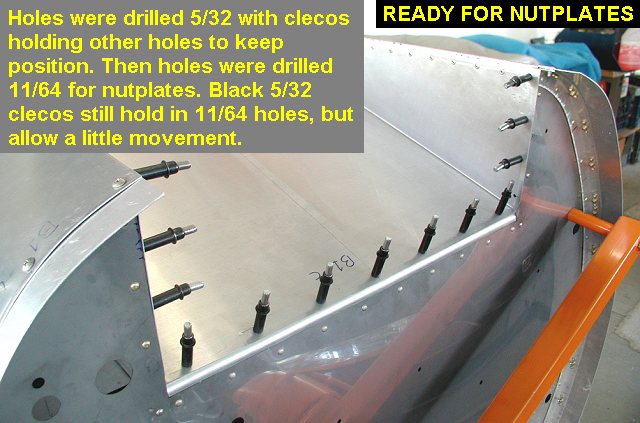
| 05/21/03 |
1.9 |
647.5 |
Step drilled out the forward and
aft edges of the B1L,C,R tunnel assembly to 11/64 for nutplates. Also
marked the B1L and R panels for trimming on both forward aft edges. |
 |
 |
| 05/24/03 |
2.8 |
650.3 |
Trimmed and deburred the marked
B1L & R panels and drilled out the holes in the panels 3/16. Installed
nutplates around the firewall tunnel area and belly former at FS 24.9. |
| 05/28/03 |
3.6 |
653.9 |
Step drilled and clecoed all
remaining holes for panels L1 and R1 to 11/64 for nutplates. Removed the
panels and drilled them out to 3/16 and deburred. Installed some nutplates. |
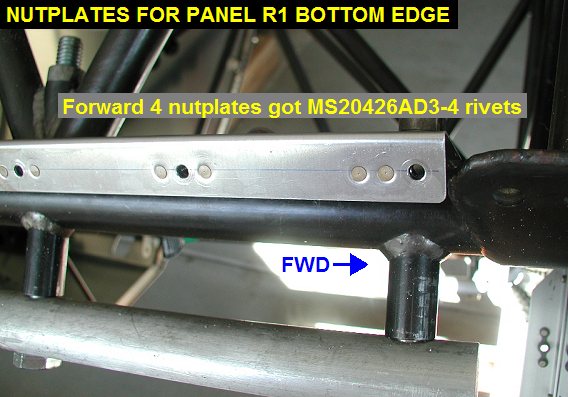
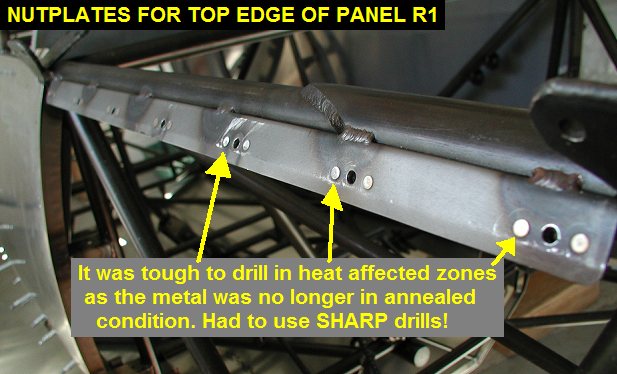
| 05/29/03 |
2.5 |
656.4 |
Step drilled and clecoed holes
for panel R2. Installed nutplates for the top and bottom edges of panel
R1, and and bottom edge of L1. I discovered that it was difficult to drill
a couple of areas of the J-strips where they had been heated up by
welding. Obviously the heating and cooling hardened the metal in those
areas and made drilling difficult compared to the rest of the annealed
strip. |
 |
 |
 |
| 05/31/03 |
2.0 |
658.4 |
More panel work, drilling out
for nutplates. Also marked excess overlap material on the panels and cut
it off with the snips. |
| 06/09/03 |
1.5 |
659.9 |
Drilled out panels and j-strips
for L3 and R3 to 11/64 for nutplates. Removed L3 and R3 and drilled them
3/16 and deburred. |
| QTR TOTAL |
51.0 |
|
|
2ND QTR 2003
|
•
•
•
|


