| 4TH QTR 2014 |
 •
•
 •
•
 •
•

|
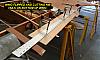
| 10/03/14 - 1.3 hrs Got two sections of aluminum trailing edge material, and cut them to rough length to fit between the ailerons and extend a few inches into the center section. I then marked where to open them up so they can be installed on the rib tails. Took them home and started cutting the marked sections away on the milling machine. I inserted a section of steel rod into the TE sections to keep the vise from crushing them.
| |
| 10/08/14 - 1.8 hrs Finished cutting and deburring the TE stock and went down to Dons. Used a small t-square and scraps of TE to mark where to locate TE so that it lines up with the aft edge of both the ailerons and center sections.
| |
| 10/15/14 - 1.7 hrs Put a 1/2" bit in my plunge router and did some test cuts to set the depth, then figured out where to clamp a straight-edge so that the router would cut the rib tails so the TE will fit flush. The first cuts I did on the left of the wing turned out to be a little too deep so I cut and glued some mahogany ply to build them back up.
| |
| 10/16/14 - 0.5 hrs With the router I re-cut the rib tails that I had built back up after cutting too deep the day before.
| |
| 10/28/14 - 1.9 hrs Flipped the wing over to work on the bottom side. Measured and marked the rib tails, then cut them with the router and straight-edge setup. I then used a sanding board, files and chisels to fit the left side TE. In hindsight, I should have cut a radius on the inner corer of the TE, but did eventually do so.
| |
| 10/29/14 - 1.0 hrs Fit the right side trailing edge.
| |
| 11/04/14 - 1.3 hrs Held up AN426-3-7 rivets in approximate location to determine how far up the trailing edge to drill the holes. I then cut countersinks into both sides of the holes.
| |
| 11/05/14 - 2.4 hrs Glued trailing edge in with rivets in place but not driven. After glue cured rivets were replaced with clean ones and counter sinked holes cleaned up, then rivets were driven, using a large steel block as a bucking to form the shop head of the rivet into the countersink as much as possible.
| |
| 11/07/14 - 1.1 hrs Cut some filler blocks from 5/8 by 1/4 stock. The blocks will reinforce the rib just inboard of the flying wire lugs, where the rib needs to be carved away a little to give the aft wire clearance.
| |
| 11/13/14 - 0.6 hrs Flipped the wing back over so gravity would hold the blocks in position, then glued them in.
| |
| 12/09/14 --> Started construction of a rotisserie type stand to hold the top wing and allow it to rotate, making it easier to work on either side. The construction and completion of the stand can be seen here: Top Wing Rotator
| |
| Quarter Total 13.6 hrs / TTD 1546.0 hrs | |
| 4TH QTR 2014 |
•
•
•
|