|
4TH QTR 2004
|
 •
•
 •
•
 •
•

|
| DATE |
HRS |
TTD |
ACTION |
IMAGES |
| 10/01/04 |
1.8 |
770.5 |
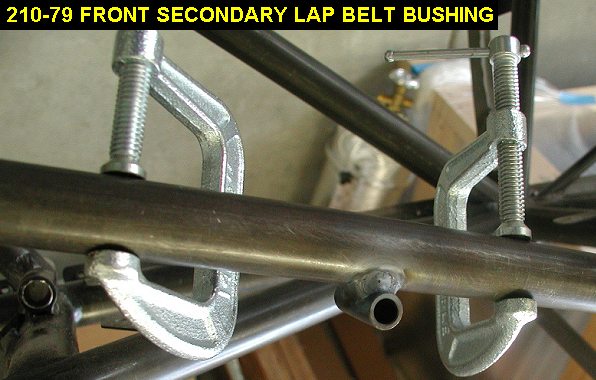
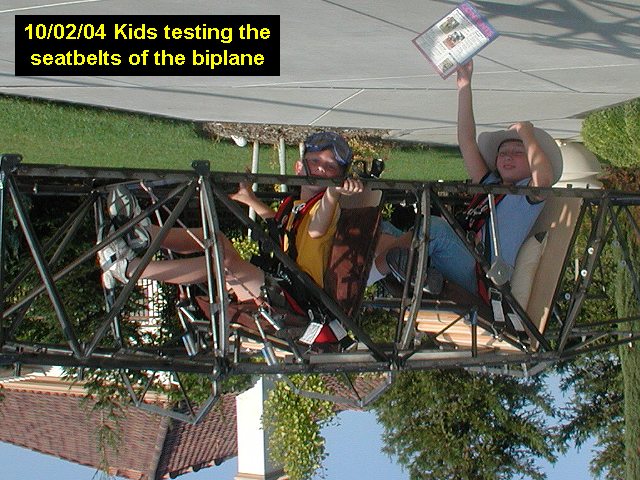
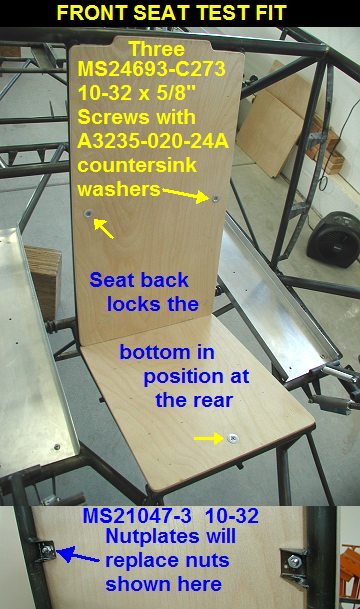
Located the 210-79 secondary lap
belt bushings per the drawing
and welded them in. Test fitted the belts to the front seat. After finding
two "test pilots" I discovered that building an airplane might
cut down on my babysitter expenses....just strap the kids in and leave
them upside down until we come home! |
 |
 |
 |
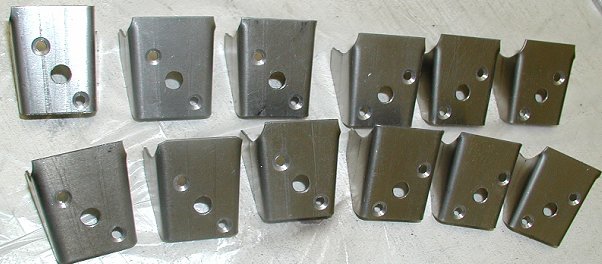
| 10/28/04 |
1.5 |
772.0 |
Drilled brackets made back on
9/3/04 for 10-32 nutplates. |
 |
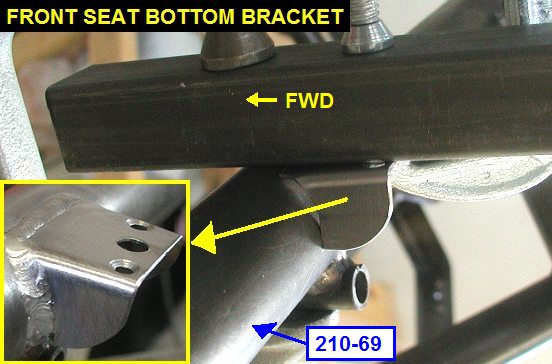
| 10/29/04 |
3.6 |
775.6 |
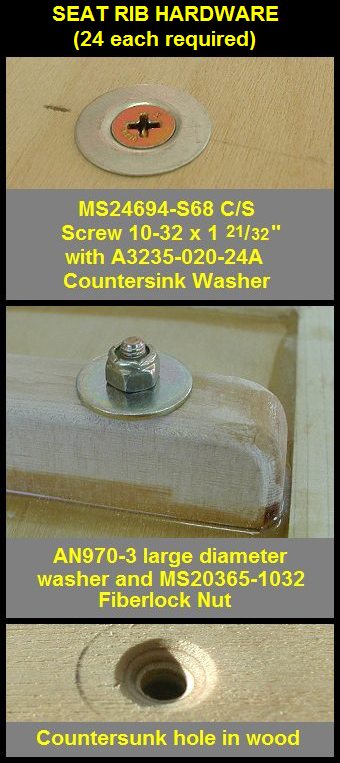
Located and welded
in one bracket for the front seat bottom, and two for the front seat
backrest. Located and drilled the holes for the 10-32 screws through the
seat ribs, then countersunk them. Hardware to use will be MS24694-S68
Countersink Screws, A3235-020-24A Countersink Washer, AN970-3 Large Dia.
Washer and MS20365-1032 Nylock Nut. Also note that I will not be adding
brackets for holding the rear seat boards in. I assume the rear seat
boards will be held in place by the pilot, and also they will need to be
removable to inspect the battery area or fire suppression system under the
rear seat. |
 |
 |
 |
 |
| 11/03/04 |
2.8 |
774.8 |
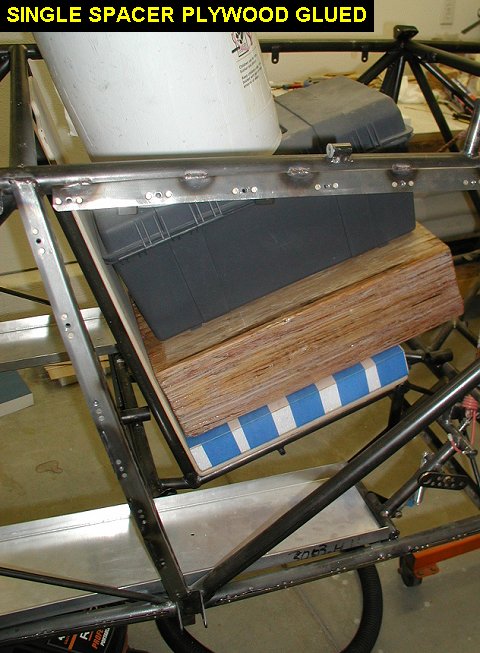
Started building
three front seat spacer pads out of 2" thick styrofoam and 1/8"
plywood. The front seat of my fuselage is lower than standard to accept
tall people, so I decided to make 3 spacers of various thickness, 2",
4" & 6" to accommodate shorter adults and kids even. The
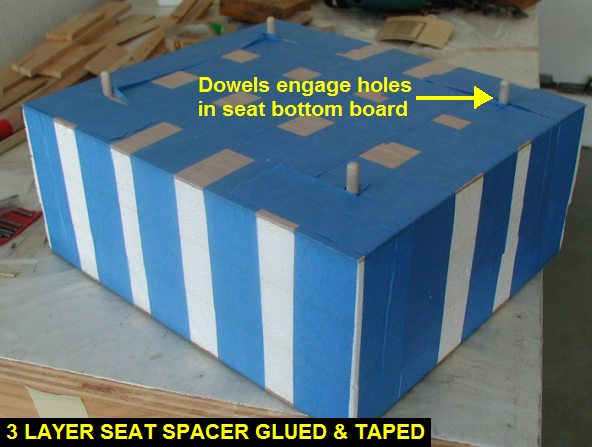
spacers will "lock" in place with four 5/16 dowels that insert
into four holes drilled in the front seat bottom. Today I cut the foam and
plywood, drilled holes and got one pad glued together with tightbond wood
glue, since contact cement eats the styrofoam. The tightbond being water
based makes the ply bow up away from the foam while I'm trying to glue it
down. I'm not sure how well it will all stick together, tomorrow I may end
up using epoxy to put them together, or maybe getting the other side of
the ply wet too to even out the bowing while gluing. |
 |
 |
| 11/04/04 |
2.0 |
776.8 |
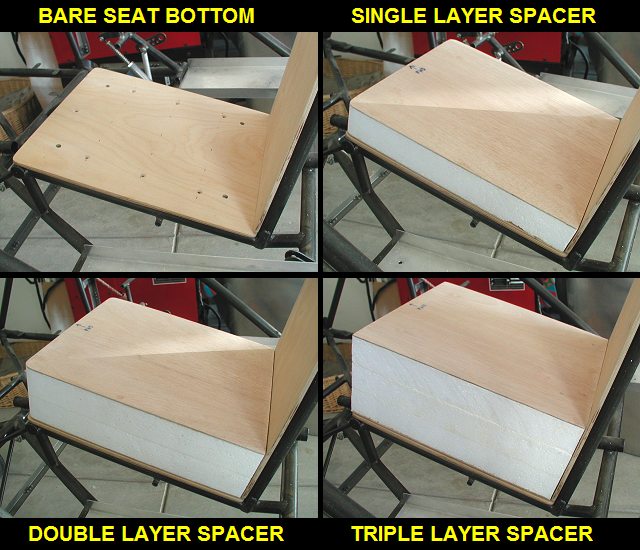
Glued the other two front seat
spacers together, one with two foam layers, the other with three layers. I
ended up wetting the non-glue side just a little with a wet paintbrush,
which really reduced the amount of warpage when I glued and then taped the
wood/foam sandwiches together. |
 |
| 11/05/04 |
0.6 |
777.4 |
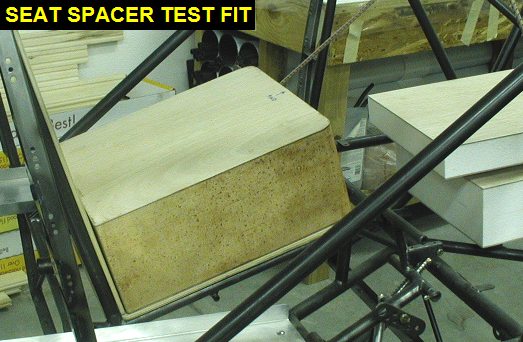
Took the tape off the seat
spacers and did some sanding on them. |
 |
 |
| 11/18/04 |
1.0 |
778.4 |
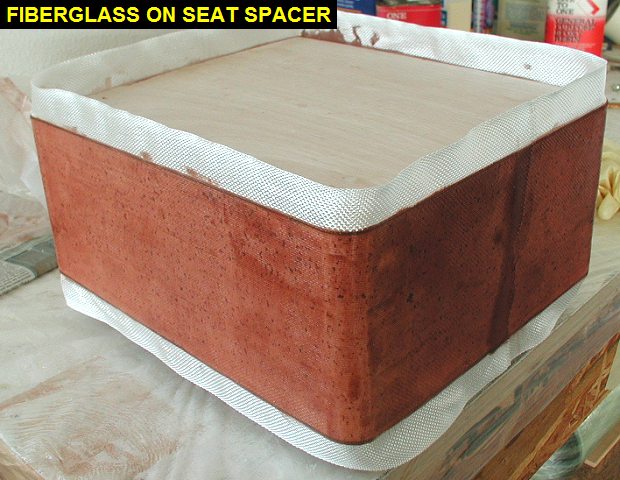
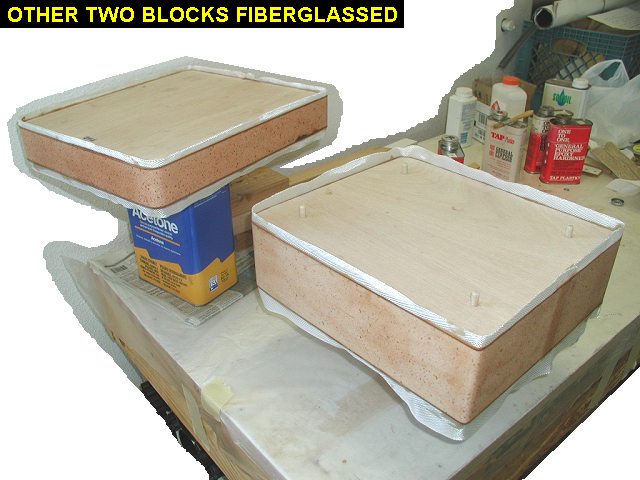
Fiberglassed the 3-layer seat
spacer with epoxy resin and cloth around the foam part. I used some
generic epoxy (don't use polyester resin - it eats foam) from Tap Plastics
that I had laying around. I don't know why the hardener was red, maybe it
gets red when it gets old. That one is now ready for varnish. |
 |
 |
| 11/22/04 |
1.9 |
780.3 |
Fiberglassed the other two seat
spacers. |
 |
| 11/24/04 |
2.6 |
782.9 |
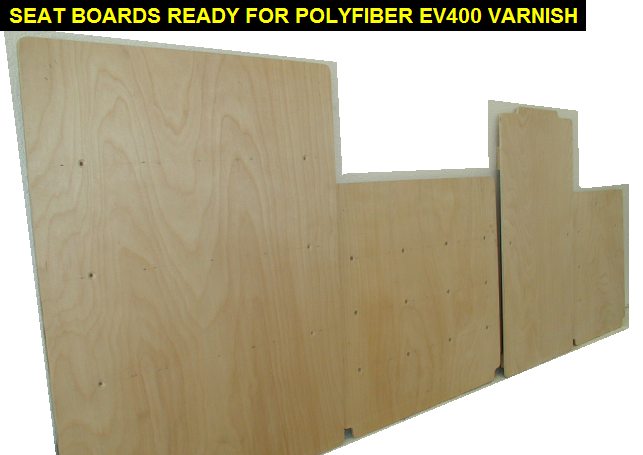
Applied first coat of varnish to
the seat boards, seat spacer blocks, and header tank board. |
 |
| 12/02/04 |
2.5 |
785.4 |
Applied second coat of varnish
to the seat boards, seat spacer blocks. |
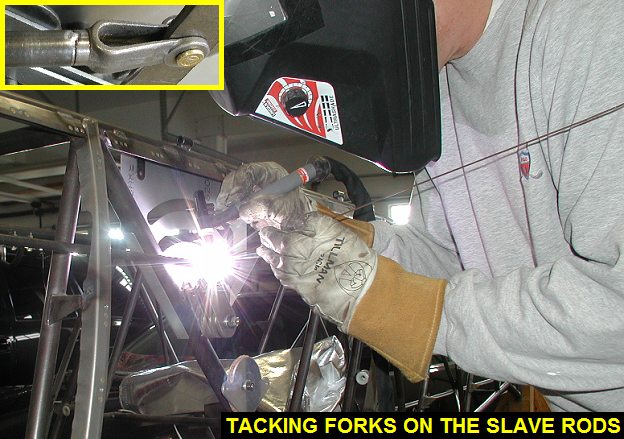
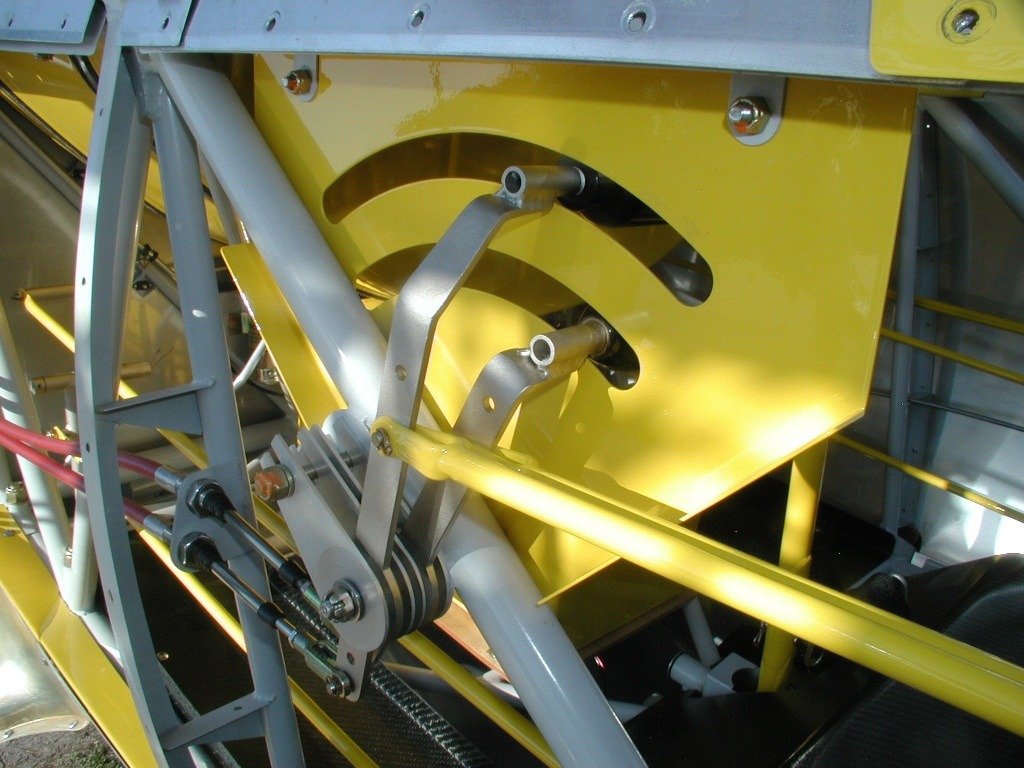
| 12/03/04 |
1.7 |
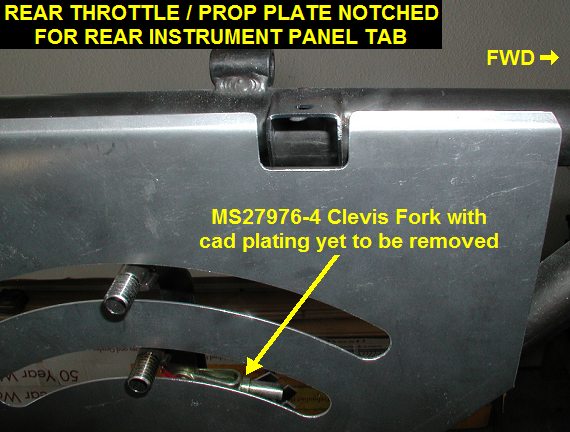
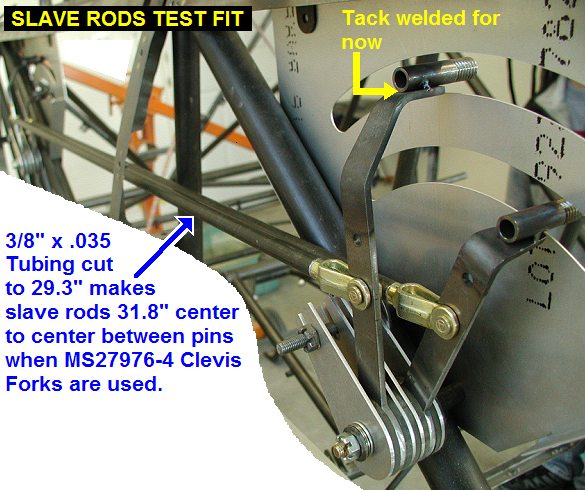
787.1 |
Cut a notch in the aft
throttle/prop control plate to accommodate the rear instrument panel
bracket on the left longeron. Then I deburred both plates and installed
them along with the throttle/prop levers. I then measured the distance
between the two hinge bolts to be 31.8". Using MS27976-4 Clevis Forks
and 3/8" x .035 tubing, I cut the tubing to make slave rods match
that 31.8" dimension. Reference: N393DG
Pic#1 & N393DG pic#2 |
 |
 |
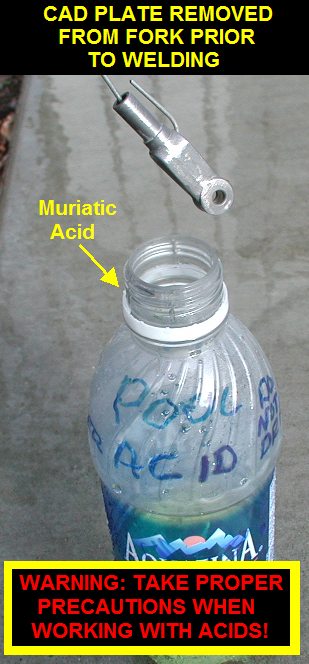
| 12/04/04 |
0.6 |
787.7 |
Since the cad plating would
contaminate the weld, I got some pool acid and removed it from the
forks. |
 |
| 12/07/04 |
1.0 |
788.7 |
Tack welded the forks on the
rods while they were in position on the throttle & prop levers to
ensure correct alignment of the forks. Then I pulled them off and welded
them up. |
 |
| QTR TOTAL |
23.6 |
|
|
4TH QTR 2004
|
•
•
•
|


