

| 2ND QTR 2007 |
 •
•
 •
•
 •
•

|
||||||
| DATE | HRS | TTD | ACTION | IMAGES | |||
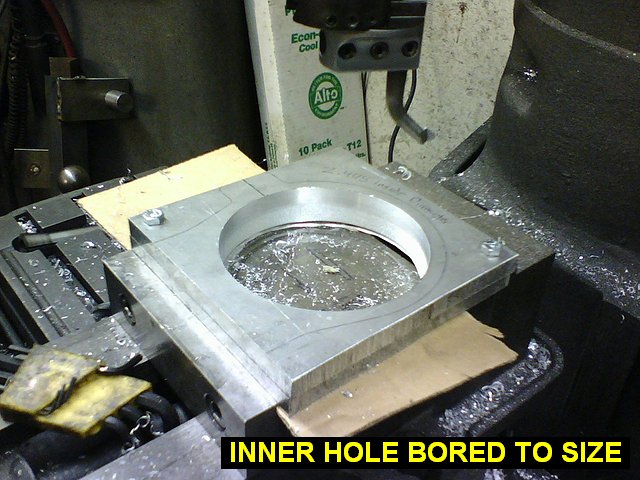
| 04/03/07 | 5.0 | 956.6 | Big night at Kens shop. First I made another knob for the top of the opener, the first one sucked. Then we spent the rest of the night making two air tank mounts out of 1/2" aluminum plate using this drawing. First I bolted the two plates together so we could make two parts at once. It was a lot of work getting the metal out of the middle, we eventually just drove an endmill around close to the lines using the X-Y feed on the bridgeport mill. Then we bored the inner circle to dimension. Then we cut the outer shape on the bandsaw, and used a belt sander to finish it down to the right shape. | 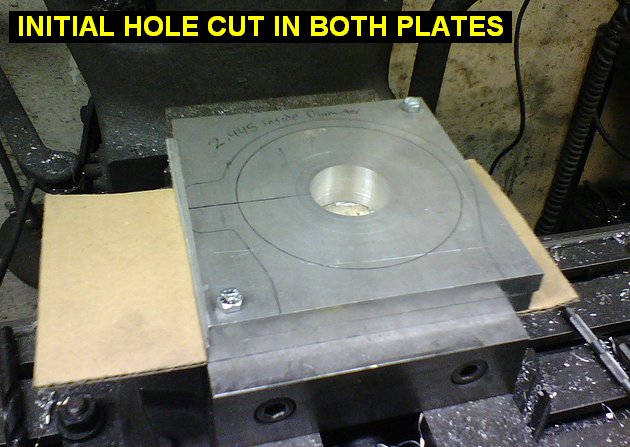 |
 |
||
| 04/04/07 | 2.0 | 958.6 | Did multiple cut with a hacksaw to get the tank mounts to clamp the tank tight enough. Then drilled and tapped the clamp section 10-24 and installed a stud and wingnuts. I may take the mounts over to Ken's and take more material off the mounts to lighten them up. After looking at my whole assembly mocked up on the plate I will need to design a mount to hold the valve/opener. To change air tanks, I will loosen the tank clamps, and then unscrew the tank out of the valve, and then pull it out through the clamps. | 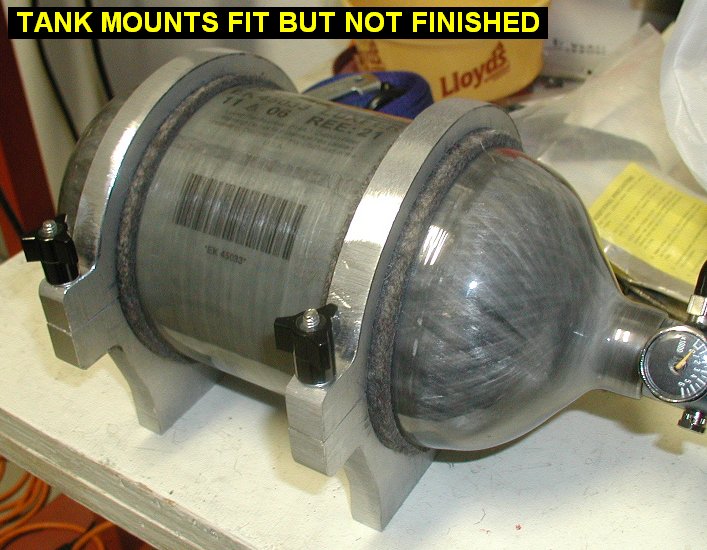 |
 |
||
| April-May 2007 |
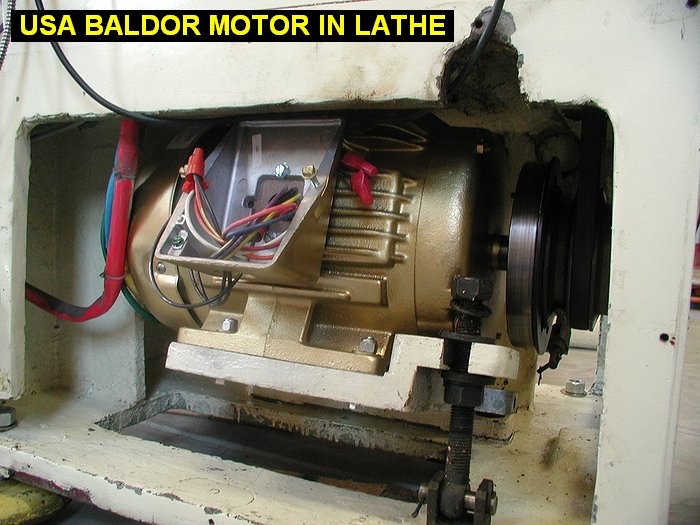
Sorry about the lack of airplane progress, I don't like it either! I've been busy with other stuff, a lot of union work taking my spare time. Also I've acquired a Bridgeport 9x42 milling machine and a Jet 14x40 large spindle bore lathe, both of which I now have in my barn. I discovered that the lathe's Chinese 7hp 3-phase motor will not start and run with a 10hp phase converter running on a 50-amp 220v breaker, it sucks 160 amps until the breaker pops! So I got a more efficient USA Baldor 7hp motor and machined the pulleys to fit the new shaft. The new motor should require less energy to crank up. Also I found a good used Phase-A-Matic R-15 15 horsepower rotary phase converter that I still need to wire up before I can get the machines running. We'll see! The mill should not be a problem, its motor is only 2hp. After I get the machines running, then I have to get them leveled and set up to cut straight & square. It will take some time to get them tooled up to be very useful but it will be worthwhile for future work. | 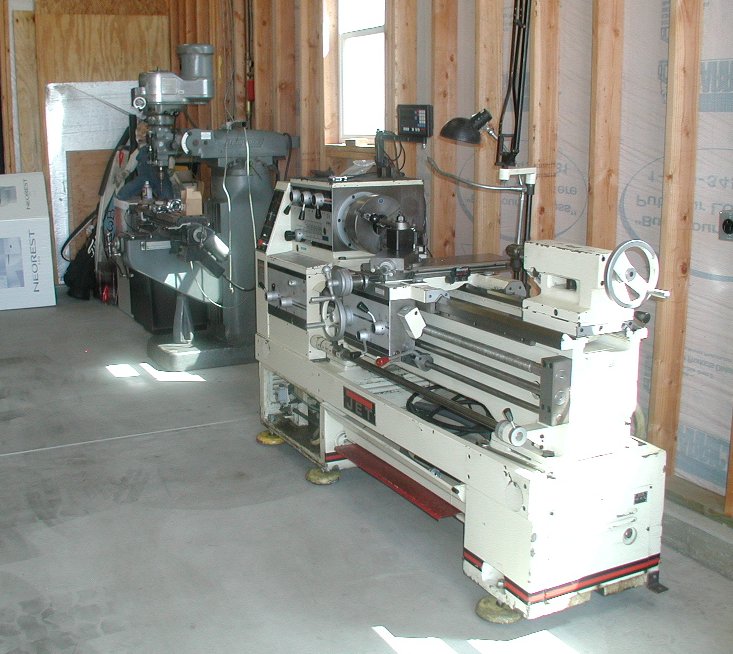 |
|||||
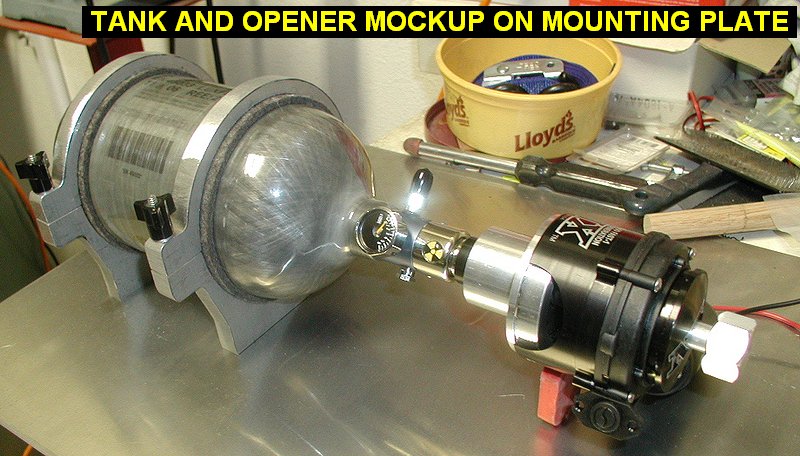
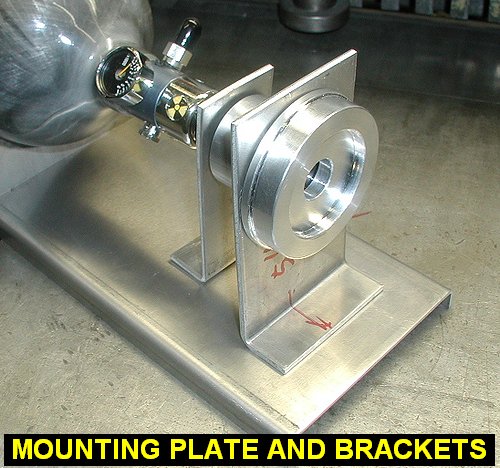
| 05/27/07 | 2.4 | 961.0 | Went over to Ken's and made the paintball bottle mounting plate out of .080 6061-T6 Aluminum. Also cut out and bent up a couple of mounts to hold the valve adapter to the plate. They are made of .125 thick aluminum scrap Ken had laying around. We were careful to punch the holes in the brackets at exactly the same height as the centerline of the tank so everything will stay in alignment when the tank is unscrewed. | 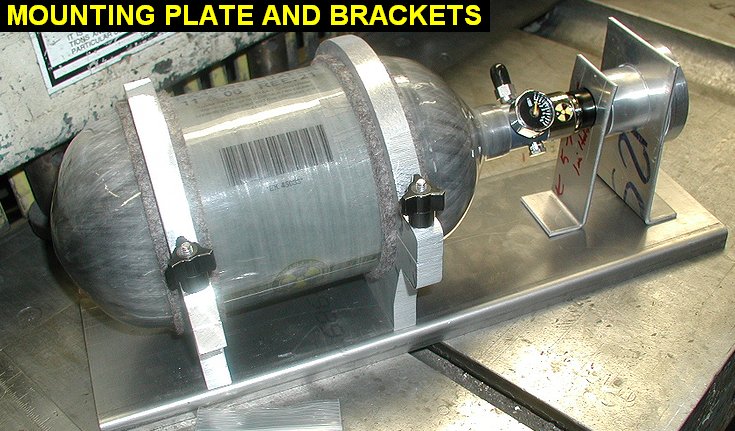 |
 |
||
| 05/30/07 | 2.5 | 963.5 | Went over to Don's and cut a slot in the valve adapter for the air hose to exit. Also drilled and tapped the holes for the brackets to attach to the adapter. |  |
 |
||
| 06/01/07 | 3.0 | 966.5 | Drilled and tapped 1/4-20 holes 3" apart in the bottoms of the air tank mounts, then installed stainless steel studs so I can use nuts with them. I then located and drilled the holes in the plate. Once the air tank was mounted I was able to drill and cleco the holes to attach the valve adapter mounts to the plate also. I haven't decided if I'll rivet or bolt them up. |  |
 |
||
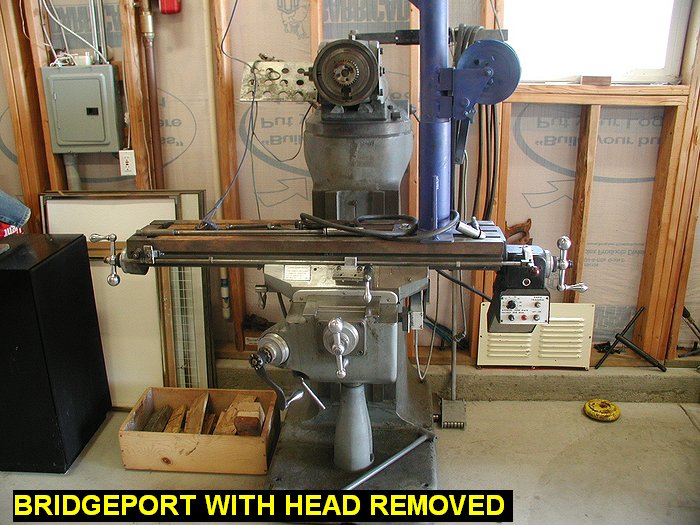
| 06/02/07 | My friend Don came over and we pulled the head off my milling machine. Don is a very skilled machinist and not only knows how to completely rebuild most machinery, he also has acquired a large inventory of parts such as bearings, gears, etc..you name it. He is going to put new bearings in the mill head for me. | 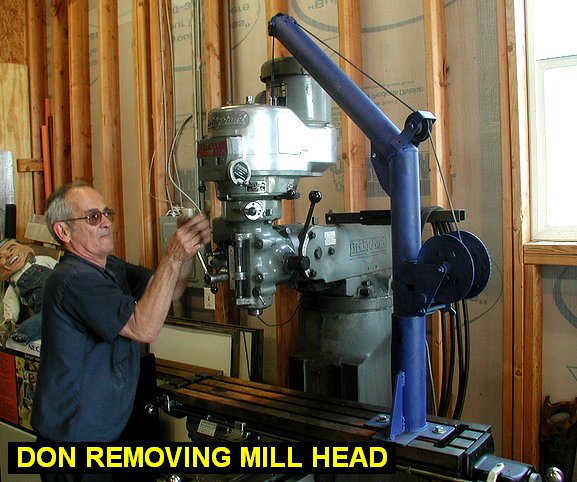 |
 |
||||
| 06/02/07 | 0.5 | 967.0 | I temporarily installed the smoke tank in its straps. Then with the tank and valve opener on the plate I did some trial and error fitting of the assembly on the battery tray rails. Since the tank has to unscrew from the valve then be pulled out through the tank mounts I an limited by the smole tank on where and at what angle to mount the assembly. The battery tray angles are in the way too. | ||||
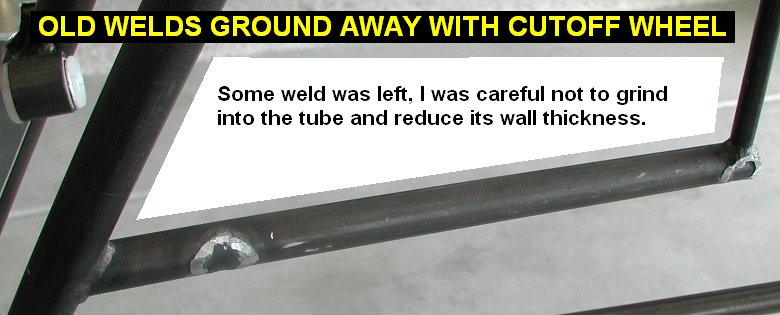
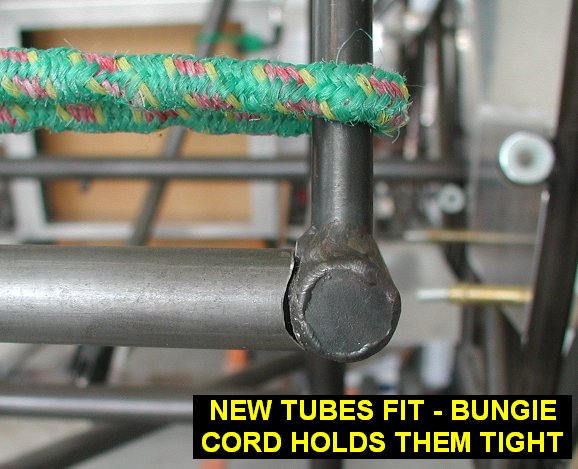
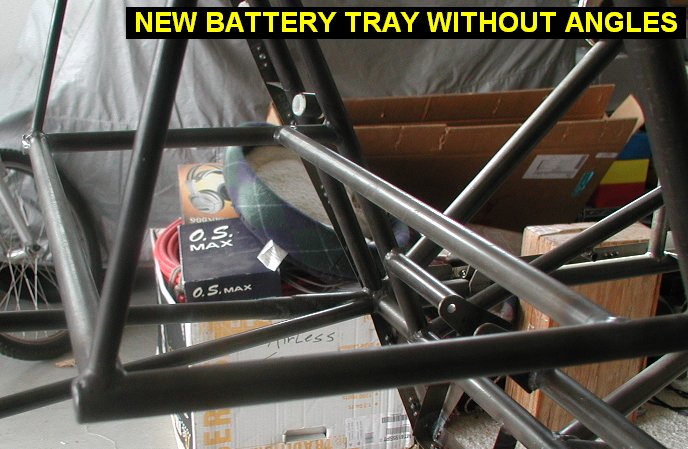
| 06/03/07 | 3.5 | 970.5 | I decided to get rid of the 210-111 battery tray angles, not going to use them, in the way and I can save weight. Used a sawzall to cut out the two crossmembers of the battery tray, then a cutoff wheel to grind the welds down close to the tubes. I then cut and fit two new crossmembers and welded them in. Now I'll be able to locate the airtank assembly more efficiently and with less weight. | 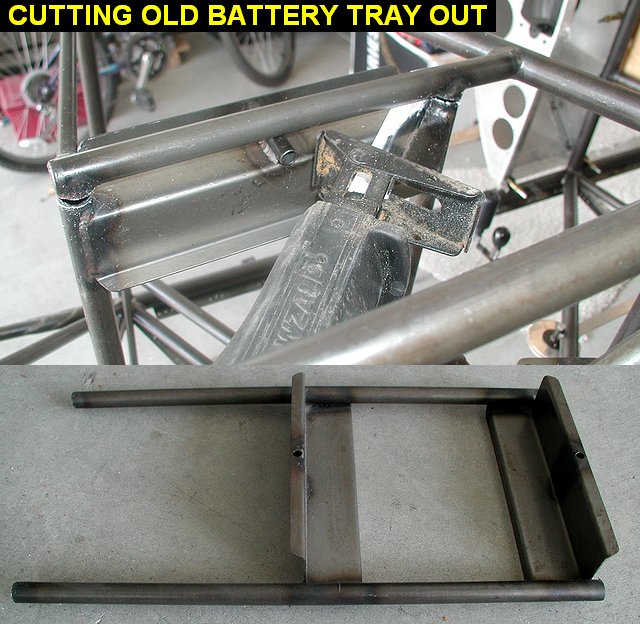 |
 |
||
 |
 |
||||||
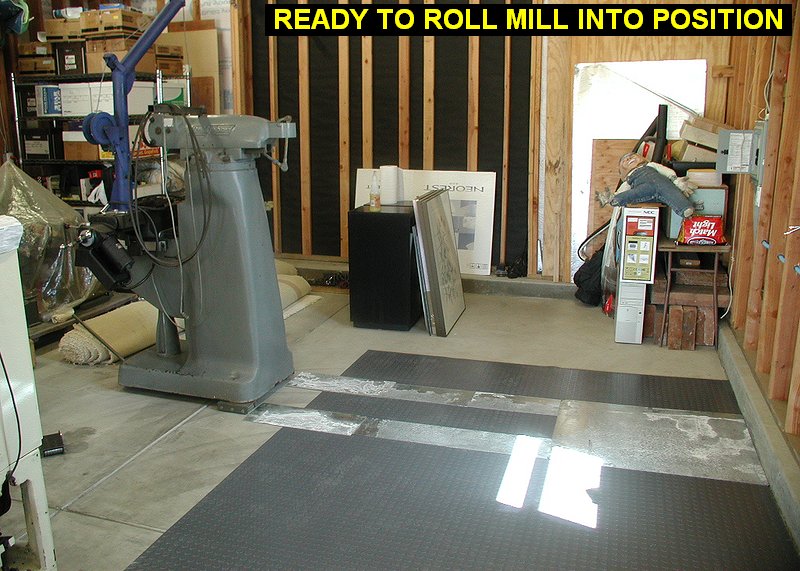
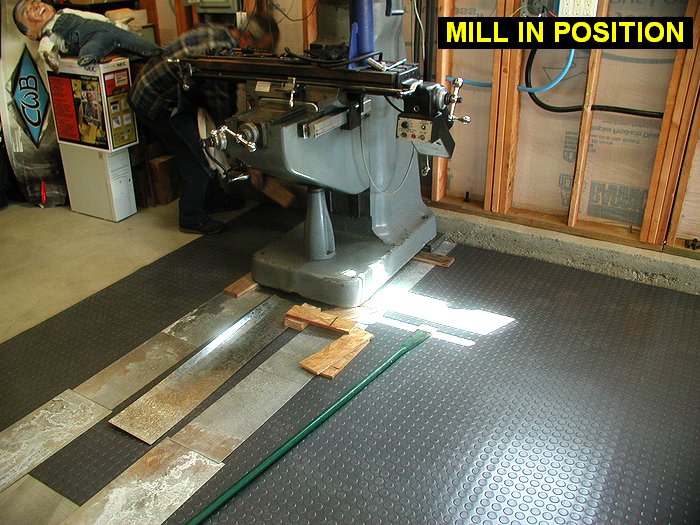
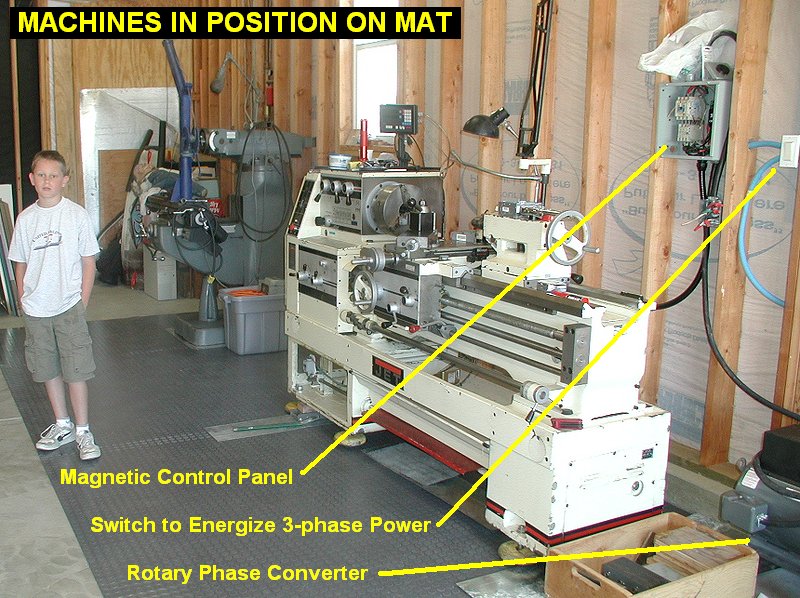
| 06/08/07 | Machinery Update: Finally got
the new motor in the lathe. I took the phase converter all apart and
cleaned out all the sawdust, it had been used in a wood shop. I also
cleaned and re-packed the bearings. My electrician Frank wired up a great
system to power both machines, and any future 3-phase tools I buy. He
happened to have a 3-phase magnetic switch unit left over from a
commercial job many years ago and used that in a new panel that controls
the rotary phase converter. It all works very conveniently from a light
switch on the wall which starts the phase converter, then I can run any of
the machines.
With the new motor, the lathe starts up and runs fine up to 1150 rpm. It won't do the fastest (1600 rpm) speed, with the large chuck on there it almost gets up to speed before tripping the 50 amp breaker to the barn. No problem, the only time I would want to spin anything that fast is if I had a small collect chuck on there to turn really small parts, and without all that weight it would probably spin up fine. I still need to get slightly longer belts so the motor can sit a little lower in the machine. It works fine for now. I didn't like the idea of my new machine dripping oil onto my barn's concrete floor for the next forty or so years, so I bought one of those garage floor mats made of some type of PVC. I borrowed some skates from Don, pried the machines up onto them and rolled them into the middle of the barn. Then I swept the area, and rolled out the mat and let it settle down for awhile until all it laid flat. Then Don came over and we rolled the machines back into position. We used sheetmetal tracks to roll the skates over the mat so it wouldn't bunch up or get get cut by the skate wheels, which are just a large number of alternator bearings on bolt axles. |
|
|
||||
|
 |
||||||
| QTR TOTAL | 18.9 | ||||||
| 2ND QTR 2007 |
•
•
•
|
||||||
